
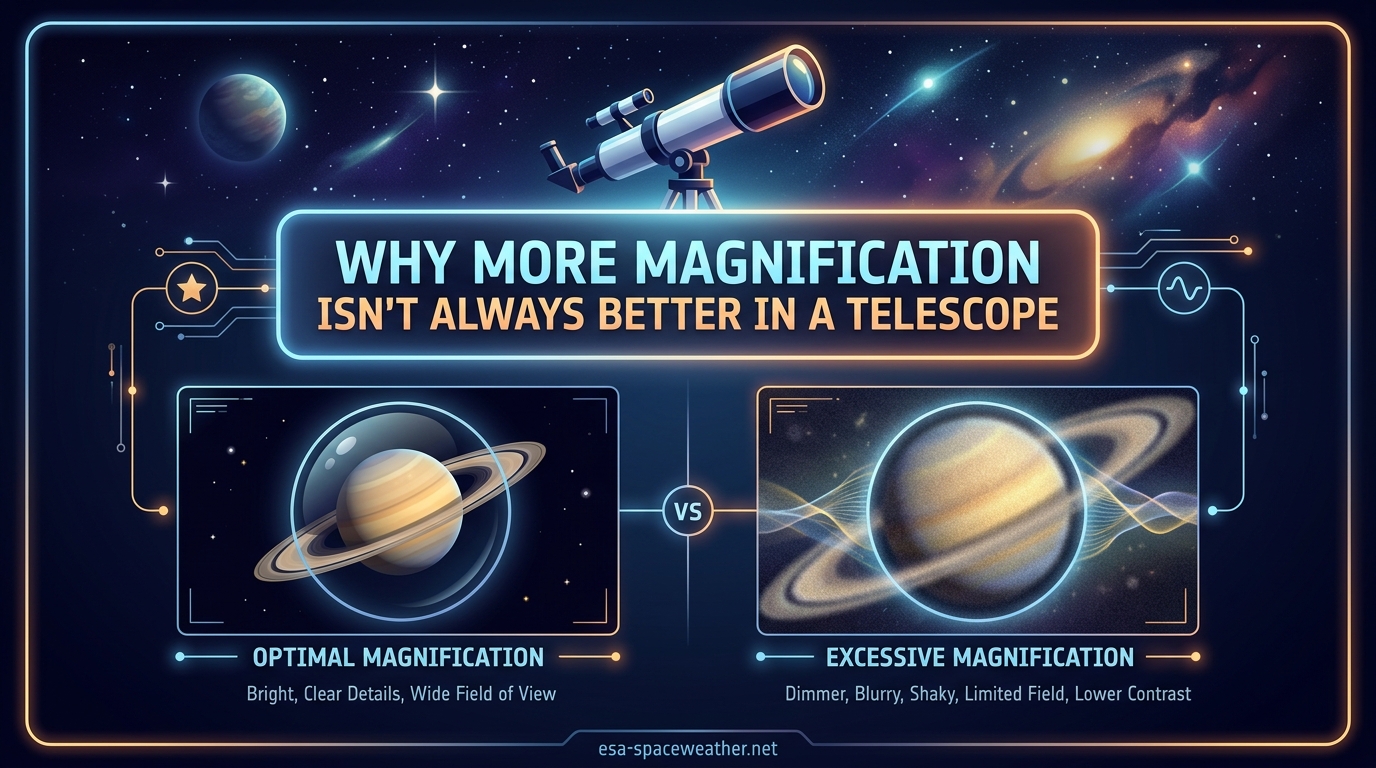
Walk into any department store selling telescopes and you will see boxes plastered with numbers like “600x Power” or “675x Magnification.” Those numbers sell telescopes. They also ruin more first nights under the stars than almost anything else in amateur astronomy. The truth is that more magnification isn’t always better in a telescope, and pushing beyond what your scope and the sky can handle produces dim, blurry, frustrating views that make people give up on stargazing entirely.
Here is the short answer: every time you double the magnification on a telescope, the image becomes four times dimmer. The same amount of collected light gets spread across four times the area. At the same time, atmospheric turbulence gets magnified right along with your target, and the usable field of view shrinks dramatically. A small bright image at moderate power almost always shows more detail than a large dim blurry one at excessive power.
I have spent years helping beginners who bought telescopes based on magnification claims, only to be disappointed when Saturn looked like a dim smudge at 400x. Once they drop down to 100x or 150x, the same scope suddenly delivers a crisp, satisfying view with visible rings and moons. Understanding why this happens changes how you observe and how you spend your equipment budget.
Table of Contents
How Telescope Magnification Actually Works
Telescope magnification is not a fixed property of the telescope itself. It is determined by the combination of your telescope’s focal length and the focal length of whatever eyepiece you insert. The formula is straightforward: divide the telescope focal length by the eyepiece focal length.
Magnification = Telescope Focal Length / Eyepiece Focal Length
For example, if your telescope has a focal length of 1200mm and you use a 25mm eyepiece, your magnification is 48x. Swap in a 10mm eyepiece and you jump to 120x. Drop in a 6mm eyepiece and you reach 200x. The telescope tube did not change. Only the eyepiece did.
This is why experienced observers own multiple eyepieces rather than chasing one high-power option. Each eyepiece gives you a different magnification, and the right choice depends on what you are looking at, how steady the air is that night, and how large your telescope’s aperture is.
A Barlow lens multiplies magnification by inserting an optical element between the telescope and eyepiece. A 2x Barlow placed before a 10mm eyepiece effectively gives you a 5mm eyepiece, doubling your power. This is a cost-effective way to expand your magnification range, but it also means it is very easy to push well past what is useful.
The key takeaway is that magnification is something you control with eyepiece selection. The telescope’s job is to gather light and resolve detail. Magnification simply enlarges whatever image the telescope produces. If that underlying image is dim or blurry, magnifying it just gives you a bigger version of dim and blurry.
The Physics Problem: Higher Magnification Means Dimmer Images
This is the single most important concept to grasp about telescope magnification, and it comes from a basic law of physics. When you increase magnification, the same amount of light your telescope gathered gets spread over a larger area of your eye’s retina. The image grows bigger, but every square degree of that image receives less light.
The relationship follows the inverse square law. Double the magnification and the image area quadruples, which means the surface brightness drops to one quarter. Triple the magnification and the image becomes nine times dimmer. This is not a minor effect or a theoretical concern. It is the reason a galaxy visible at 40x disappears entirely at 200x.
Consider Jupiter as a concrete example. At 50x, the planet appears bright and punchy with visible cloud belts and Galilean moons. At 150x, you can see finer detail in the bands and the Great Red Spot becomes more apparent, though the image is noticeably dimmer. Push to 300x and on many nights Jupiter becomes a washed-out, dim disk with barely any detail. The telescope gathered the same amount of light in all three cases. You just spread it thinner and thinner.
This brightness penalty hits extended objects like nebulae and galaxies the hardest. These targets are already faint and diffuse. Magnifying them spreads their already-weak light across a larger area, pushing them below your eye’s detection threshold. This is why experienced deep-sky observers almost always use the lowest magnification that still frames their target nicely.
Point sources like stars behave differently. Stars are so small that they remain effectively point-like at any magnification your telescope can produce, so they do not get dimmer with magnification the way extended objects do. This is one reason double star observers can productively use very high magnifications. But for anything with apparent size, whether a planet, the Moon, or a galaxy, the inverse square law is always working against you.
Maximum Useful Magnification: The 50x Per Inch Rule
Astronomers have long used a rule of thumb for the highest magnification a telescope can use productively. The guideline is approximately 50x per inch of aperture, or equivalently about 2x per millimeter of aperture. This is not an arbitrary marketing number. It comes from the physics of diffraction and how much detail a given aperture can actually resolve.
Beyond this limit, you enter what opticians call empty magnification. The image gets larger, but no new detail appears. You are magnifying blur, not resolving power. The telescope simply cannot extract additional information from the light it gathered, so cranking up the power just gives you a bigger version of the same fuzzy image.
For popular beginner telescope sizes, here is what the 50x per inch guideline produces. A 60mm refractor tops out around 120x. An 80mm refractor reaches about 160x. A 114mm reflector can handle roughly 225x. A 130mm Newtonian pushes to about 260x. An 8-inch Dobsonian can use up to 400x in theory. A 10-inch reaches 500x and a 12-inch can theoretically hit 600x.
Notice the word theoretically. Those numbers assume perfect optics, perfect collimation, and perfect skies. In practice, the real-world ceiling is almost always lower than the theoretical maximum, and the atmosphere usually cuts you off well before your telescope’s diffraction limit does.
This is also why those department store telescopes advertising 600x on a 60mm scope are so misleading. A 60mm aperture has a theoretical maximum useful magnification of about 120x. Advertising 600x is promising something the telescope physically cannot deliver. The image at 600x would be unusably dim and blurry, assuming you could even find your target in the tiny, narrow field of view.
The 50x per inch rule is a ceiling, not a target. Most observing happens well below it. A more practical guideline for everyday conditions is 25x to 35x per inch, which gives you enough magnification for planets and doubles while keeping images reasonably bright.
The Real Bottleneck: Earth’s Atmosphere
Even if you own a massive 20-inch Dobsonian with perfect optics, there is a hard limit that no telescope can overcome. The atmosphere above your head is constantly churning with turbulent air currents of different temperatures and densities. This turbulence bends and distorts light passing through it, and astronomers call this effect seeing.
Seeing conditions are the single biggest factor limiting how much magnification is useful on any given night. On a typical night from most locations, the atmosphere limits useful magnification to about 200x to 250x regardless of telescope size. On poor nights, you might be limited to 100x or even less. On truly exceptional nights at a high-altitude site, you might briefly get useful views at 400x or higher, but those nights are rare treasures.
This means that spending money on a bigger telescope primarily buys you light gathering and resolution, not higher usable magnification. An 8-inch scope and a 16-inch scope will both be capped at roughly 250x on an average night. The 16-inch will show a brighter, more detailed image at that same 250x, but it will not let you productively zoom in further.
You can assess your local seeing conditions by observing a bright star at high power. If the diffraction pattern is steady and the star looks like a tiny sharp point surrounded by faint rings, seeing is excellent. If the star is a dancing, boiling blob, seeing is poor and you should drop to lower magnification for the night.
Transparency is different from seeing and is worth understanding. Transparency refers to how clear the air is, meaning how much light gets absorbed or scattered before reaching your telescope. Good transparency means dark skies with faint stars visible. Good seeing means steady air with sharp planetary views. Sometimes you get both. Often you get one or the other. Adapting your observing plan to the night’s conditions is one of the most important skills an amateur astronomer develops.
A practical approach is to always start observing at low power and gradually increase magnification until the image stops improving. The point where adding more power no longer reveals additional detail is your effective limit for that night. Some nights that might be 300x. Other nights it might be 120x. Let the atmosphere tell you when to stop.
Why Aperture Matters More Than Magnification
If magnification is not the most important telescope spec, what is? The answer is aperture, which is the diameter of the main lens or mirror that gathers light. Aperture determines three critical things: how much light your telescope collects, how fine a detail it can resolve, and the maximum useful magnification it supports.
Light gathering scales with the area of the aperture, which means it scales with the square of the diameter. An 8-inch telescope gathers four times as much light as a 4-inch telescope, not twice as much. This is why doubling aperture is so dramatic. Faint galaxies invisible in a 4-inch scope become clearly visible in an 8-inch, and breathtaking in a 16-inch.
Resolution is governed by the diffraction limit, which is a fundamental property of light related to its wave nature. Larger apertures produce smaller diffraction patterns, which means they can resolve finer detail on planets and split closer double stars. The Dawes limit gives the theoretical minimum separable angular distance for a given aperture, and it improves linearly as aperture increases.
This is why a large telescope at moderate magnification consistently outperforms a small telescope at high magnification. The large scope resolves finer detail and gathers more light, so even at 150x it shows more than a small scope pushed to 300x. The small scope is magnifying blur beyond what its aperture can resolve, while the large scope is showing genuine detail within its resolution capability.
When choosing a telescope, prioritize aperture over magnification claims. A 6-inch or 8-inch Dobsonian reflector costs less than many advertised 600x department store telescopes, yet delivers genuinely stunning views. The Dobsonian mount is simple and stable, and the large mirror provides enough light gathering and resolution to show planets, lunar craters, globular clusters, nebulae, and bright galaxies with real detail.
When High Magnification Helps and When It Hurts
Different celestial targets demand different magnifications. Using the wrong power for the object you are observing is one of the most common beginner mistakes, and understanding the right range for each target type transforms your observing experience.
For planets like Jupiter, Saturn, and Mars, higher magnification is generally beneficial. These objects are small but bright, so you can afford the brightness penalty of magnification. Typical planetary magnification ranges from 150x to 300x depending on conditions. Jupiter shows cloud belt detail and moon transits. Saturn reveals the Cassini Division in its rings. Mars shows dark surface markings and polar caps during close approaches.
The Moon is extremely bright, so brightness loss from magnification is not a concern. Lunar observing commonly uses 100x to 300x, and the Moon is one of the few targets where pushing to very high magnification on good nights can reveal extremely fine crater detail. The Moon is also the best target for practicing your high-power observing technique.
Double stars benefit from high magnification because you are trying to separate two point sources. Since stars do not dim with magnification the way extended objects do, you can push to 300x or higher on doubles. This is where the theoretical maximum magnification of a large scope occasionally gets put to real use.
Deep-sky objects like nebulae, galaxies, and star clusters generally want lower magnification. These targets are faint and extended, so the brightness penalty from magnification is devastating. The Andromeda Galaxy spans over 3 degrees across the sky, meaning it is six times wider than the full Moon. At high magnification, you would see only a tiny dim corner of it. At 40x or 50x with a wide-field eyepiece, you can fit the entire galaxy in view and actually detect its bright core and dust lanes.
Large star clusters like the Pleiades are similar. They span more than a degree of sky and look spectacular at 25x to 50x. At 200x, you would see only a handful of stars because the cluster no longer fits in the field of view. Globular clusters are the exception among clusters, as they are compact and benefit from 150x to 250x to resolve individual stars at their cores.
Nebulae like the Orion Nebula are a middle ground. They have bright cores that tolerate moderate magnification but faint outer wisps that need low power. Many observers use a range of 50x to 200x on the Orion Nebula, spending time at each magnification to see different aspects of the structure.
As a practical guide, here are recommended ranges. Planets and the Moon: 150x to 300x. Double stars: 200x to 400x. Globular clusters: 100x to 250x. Bright nebulae: 50x to 150x. Galaxies: 30x to 100x. Large open clusters: 25x to 60x. Wide-field Milky Way sweeping: 20x to 40x. These are starting points, not rules. Experiment with different powers every session.
Minimum Magnification and the Exit Pupil
There is also a lower limit to useful magnification, and it is governed by the exit pupil. The exit pupil is the beam of light that exits the eyepiece and enters your eye. You can calculate it by dividing the telescope aperture by the magnification, or equivalently dividing the eyepiece focal length by the telescope’s focal ratio.
Your fully dark-adapted pupil opens to about 7mm in diameter. If the exit pupil from your telescope is larger than 7mm, your eye cannot accept all the light and the excess is wasted. This sets a floor on useful magnification for a given aperture.
For example, an 8-inch telescope has a 203mm aperture. Its lowest useful magnification with a 7mm exit pupil is about 29x. Below that, light is being wasted. A 4-inch scope reaches its minimum at about 14.5x, and a 12-inch scope at about 43x.
The commonly cited 7mm figure is a maximum for a young observer under truly dark conditions. As we age, our maximum pupil dilation shrinks. By your 50s or 60s, your dark-adapted pupil may only reach 5mm or 6mm. This means the practical minimum magnification is slightly higher for older observers, and exit pupils in the 5mm to 6mm range may capture all the light your eye can actually use.
Most experienced observers find that an exit pupil around 2mm to 3mm produces the best balance of brightness, contrast, and image scale for deep-sky observing. This typically corresponds to magnifications that are about one third to one half of the theoretical maximum for a given scope.
The exit pupil also affects perceived contrast on faint objects. A very large exit pupil can wash out the view by admitting too much sky glow. A smaller exit pupil darkens the sky background, which can actually make faint targets easier to detect even though the target itself is also somewhat dimmer. This is a subtle effect but one that experienced observers exploit regularly.
Barlow Lenses and Eyepiece Selection
A Barlow lens is an optical accessory that increases the effective magnification of any eyepiece. A 2x Barlow placed between the telescope and a 15mm eyepiece gives you the equivalent of a 7.5mm eyepiece. This effectively doubles the number of magnifications available from your eyepiece collection without buying additional eyepieces.
Modern Barlow lenses are well-corrected optical elements that introduce minimal degradation when used with quality eyepieces. The old myth that Barlows always degrade image quality stems from cheap, poorly made Barlows from decades past. A quality Barlow from a reputable manufacturer introduces essentially no visible image loss.
The real danger of a Barlow is that it makes it trivially easy to push past useful magnification limits. A 3x Barlow on a 6mm eyepiece in a 1200mm telescope gives you 600x, which is almost certainly beyond what any beginner telescope and typical atmosphere can support. Use Barlows thoughtfully, and treat the resulting magnification with the same scrutiny you would any eyepiece choice.
For building a practical eyepiece collection, the standard recommendation from experienced observers is to start with three magnifications. A low-power wide-field eyepiece for large objects and finding targets, typically giving a 5mm to 6mm exit pupil. A medium-power eyepiece for general observing and most deep-sky targets, around a 2mm to 3mm exit pupil. And a high-power eyepiece for planets and doubles, around a 0.8mm to 1.2mm exit pupil.
For a typical 8-inch Dobsonian with a 1200mm focal length, this might mean a 32mm eyepiece at 38x for wide field, a 12mm or 15mm at 80x to 100x for general use, and a 6mm at 200x for planets. Adding a 2x Barlow extends this to cover 160x and 400x without buying two more eyepieces.
Investing in quality eyepieces pays off more than chasing aperture upgrades in many cases. A premium wide-field eyepiece retains its value across multiple telescopes and dramatically improves the observing experience by providing sharp views across a wider field with comfortable eye relief.
Buyer Beware: Telescopes Marketed by Maximum Magnification
The single biggest red flag when shopping for a telescope is a box that leads with magnification. Telescopes advertised as delivering 400x, 525x, 675x, or similar numbers are almost universally low-quality instruments with small apertures and poor optics. The manufacturers know that beginners equate magnification with quality, and they exploit that misconception to sell inferior products.
These hobby-killer telescopes typically have small 50mm to 60mm objectives that can only usefully support about 100x to 120x. They come with shaky mounts that vibrate badly at high power, making the already-poor image even worse. The included eyepieces are usually low-quality Huygens or Ramsden designs that degrade whatever image the telescope manages to produce.
Instead of magnification, evaluate telescopes by aperture, optical quality, and mount stability. A reputable telescope will advertise its aperture prominently and will either not mention maximum magnification or will cite the realistic 50x per inch figure. Brands and product lines with established reputations in the amateur astronomy community are almost always safer choices than unknown brands making extreme claims.
If you see a telescope advertising magnification that exceeds 2x per millimeter of aperture, walk away. That manufacturer is either misinformed or dishonest about what the instrument can actually do. Your observing experience depends on optical quality, aperture, and a stable mount far more than on any magnification number printed on a box.
Quick Reference: Magnification Guide by Telescope Size
Here is a practical magnification reference for common beginner and intermediate telescope apertures. These ranges assume decent optical quality and typical suburban seeing conditions.
For a 70mm refractor, the useful range is about 20x to 140x. Best for the Moon, bright planets at moderate power, and brighter deep-sky objects at low power. Push beyond 140x and the image becomes too dim and soft.
For an 80mm refractor, expect 25x to 160x. The extra 10mm of aperture gathers roughly 30 percent more light than a 70mm, giving slightly brighter images and a modestly higher useful magnification ceiling.
For a 114mm reflector, the range is 30x to 225x. This is a popular beginner size with enough aperture for satisfying planetary views and respectable deep-sky performance.
For a 130mm Newtonian, you get 35x to 260x. A solid step up from 114mm with noticeably brighter images and better resolution on planets.
For a 150mm Newtonian, the useful range is 40x to 300x. This aperture starts to show real detail on planets and brings many galaxies and nebulae within reach from reasonably dark skies.
For an 8-inch Dobsonian at 203mm, expect 40x to 400x theoretical, with 200x to 250x being the practical most-useful upper limit on typical nights. This is widely considered the sweet spot for amateur astronomy, balancing aperture, cost, and portability.
For a 10-inch Dobsonian at 254mm, the range extends to 500x theoretical and 250x to 300x practical. The extra aperture delivers brighter images and better resolution than the 8-inch at every magnification.
For a 12-inch Dobsonian at 305mm, you can theoretically reach 600x, but 250x to 350x is more typical under real skies. The light gathering is stunning, bringing many faint fuzzies within easy reach.
FAQs
Is 200x magnification good on a telescope?
Yes, 200x is an excellent magnification for many telescopes and targets. For a 4-inch telescope, 200x is approximately the maximum useful magnification. It is ideal for planetary viewing and splitting double stars on nights with good atmospheric seeing. However, on nights with poor seeing, even 200x may produce a blurry image, and you may need to drop to 150x or lower for a sharper view.
Why does increasing magnification not necessarily improve resolution?
Increasing magnification beyond a telescope’s diffraction limit does not improve resolution because the telescope cannot resolve detail finer than what its aperture allows. The diffraction limit is set by the wave nature of light and the diameter of the main lens or mirror. Magnifying a diffraction-limited image just makes the blur larger without revealing new detail. Only increasing aperture improves true resolving power.
Is 70mm or 80mm better for a telescope?
An 80mm telescope is generally better than a 70mm because it gathers about 30 percent more light, allowing slightly higher useful magnification and brighter images at every power. However, optical quality and mount stability matter more than this aperture difference alone. A well-made 70mm refractor on a solid mount will outperform a poorly made 80mm on a shaky tripod. Both sizes are excellent beginner choices for lunar and planetary observing.
Is 40x magnification good for a telescope?
Yes, 40x is a very useful magnification, especially for wide-field deep-sky observing. On an 8-inch telescope, 40x produces an exit pupil of about 5mm, which is excellent for viewing large objects like the Andromeda Galaxy, the Pleiades, and the Orion Nebula. At 40x you get a wide field of view and bright images. This magnification is too low for detailed planetary viewing, where 150x to 250x is typically preferred.
Conclusion
Understanding why more magnification isn’t always better in a telescope is the most important lesson for any new astronomer. The temptation to chase higher power is universal, but the physics of light, the limits of aperture, and the turbulence of our atmosphere all conspire to reward moderate magnification over excessive zoom.
Prioritize aperture, invest in quality eyepieces, and let the conditions of each night guide your magnification choices. Start low, increase gradually, and stop when the image stops improving. That simple habit will give you better views than any high-power eyepiece or advertised magnification number ever could.