
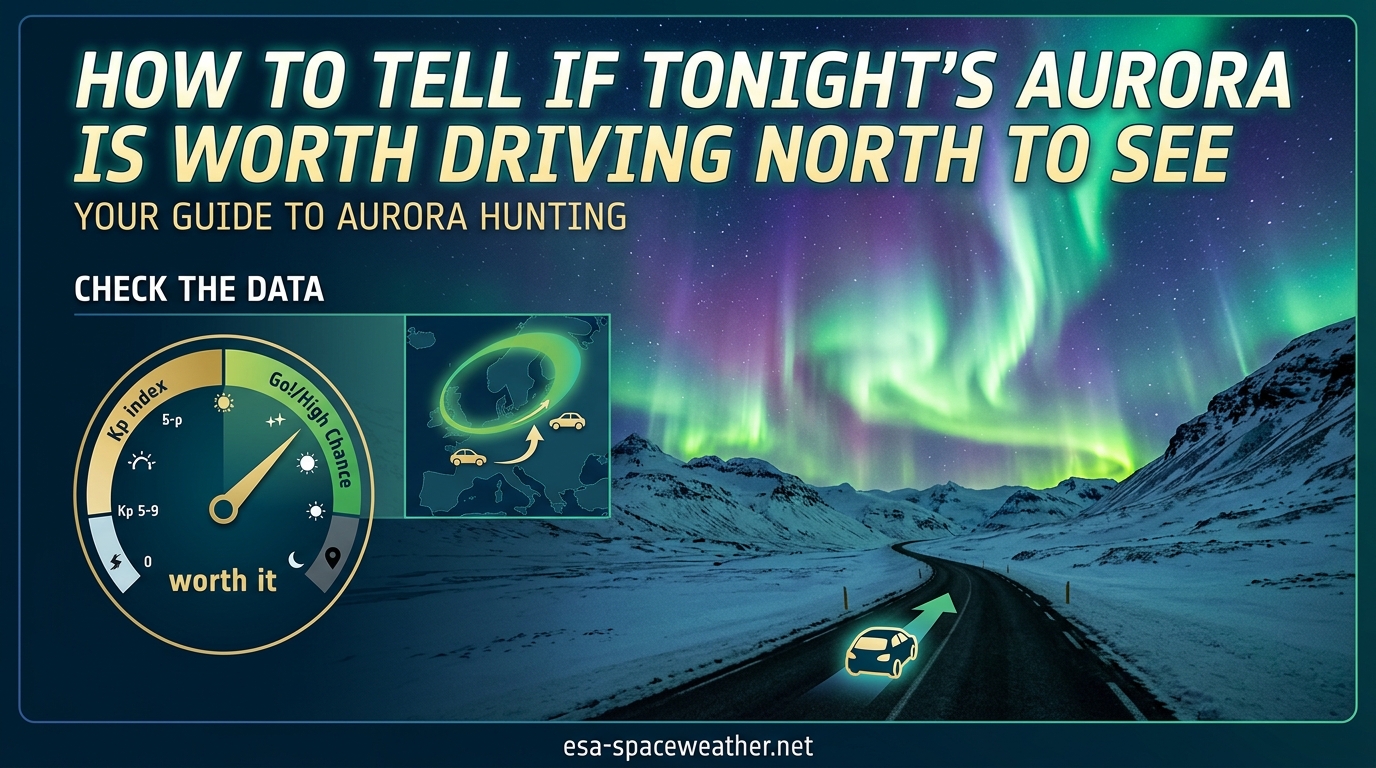
You saw the alert pop up on your phone. “Geomagnetic storm watch tonight.” Your heart rate ticks up a notch. The aurora might be visible, and you are already mentally mapping out a route north to darker skies. But then the doubt creeps in. Is it actually worth a two-hour drive? Will you arrive and see nothing but stars and disappointment?
That frustration is incredibly common. Every aurora season, thousands of people drive an hour or more north, stand in a cold field, and see absolutely nothing. The apps said it was a good night. The Facebook post promised a show. Yet the sky stayed dark and quiet. Learning how to tell if tonight’s aurora is worth driving north to see can save you hours of wasted time, a tank of gas, and a lot of cold frustration.
I have chased the northern lights across multiple states and seasons, watched apps fail and succeed, and learned that the gap between “there might be aurora” and “you should drive tonight” is where most people get tripped up. The decision comes down to five measurable factors that you can check in under ten minutes. This guide breaks down each one so you can make that call with confidence.
You will learn what KP, Bz, and solar wind speed actually mean for your viewing odds. You will discover which forecasting tools are reliable and which ones will send you on a wild goose chase. And you will get a clear framework for weighing drive time against realistic visibility so you know exactly when to grab your keys and when to stay on the couch.
Table of Contents
Quick 5-Point Decision Checklist: Should You Drive North Tonight?
Before you do anything else, run through this checklist. If you cannot answer yes to at least four of these five questions, tonight is probably not your night to drive. This is the exact framework I use every single time I consider heading out, and it has saved me from more wasted trips than I can count.
1. Is the KP index at or above 3 for your magnetic latitude?
Check the current KP index on NOAA’s Space Weather Prediction Center or SpaceWeatherLive.com. If you live around 55 degrees magnetic latitude, you need KP 3 or higher for a reasonable chance. At 50 degrees, aim for KP 5. Below 45 degrees, you typically need KP 7 or above. If the current reading is below your threshold and forecasts show no upward trend, save the trip for another night.
2. Is the Bz component pointing south (negative)?
The Bz value tells you whether Earth’s magnetic field and the solar wind are aligned in a way that lets aurora-causing particles penetrate the atmosphere. A negative Bz (southward) means the door is open. A positive Bz means it is largely shut. Look for Bz values of negative 5 or lower for a solid chance. If Bz is positive or only slightly negative, the aurora will likely stay weak even if other numbers look good. This single metric is what most casual aurora hunters overlook entirely.
3. Is the solar wind speed above 400 km/s?
Solar wind speed drives the intensity of any aurora display. Speeds below 350 km/s usually mean quiet conditions. Anything between 400 and 500 km/s is decent. Above 500 km/s means business, and speeds over 700 km/s can produce spectacular shows visible far south of normal. Check the current speed alongside your KP and Bz readings for the full picture.
4. Are your local skies clear between 10 PM and 2 AM?
This sounds obvious, but people skip it constantly. Pull up a satellite cloud cover map for your target viewing area, not just your home. Clear skies at your house mean nothing if the area 90 miles north is under a cloud bank. Use a service like Clear Outside, Astrospheric, or the National Weather Service satellite loop to check cloud conditions at your destination. Partial clouds can work, but overcast skies will completely ruin your night.
5. Are you within a reasonable drive of dark skies?
Check a light pollution map like Dark Site Finder or Lightpollutionmap.info. You want to reach at least a green or blue zone, ideally a gray zone. If your nearest dark sky area is more than two hours away and conditions are marginal, the odds of a satisfying experience drop sharply. For a drive longer than two hours, you want KP 5 or higher, negative Bz, and wind speeds above 450 km/s to justify the trip.
The verdict: If you answered yes to four or five questions, grab your coat and go. Three yes answers mean it is a gamble. Two or fewer means stay home, check tomorrow’s forecast, and try again.
Understanding Aurora Conditions: KP, Bz, and Solar Wind Explained
Three primary metrics determine whether aurora will be visible tonight: the KP index, the Bz component, and solar wind speed. Understanding how these work together transforms you from someone hoping for a show into someone who can predict one.
The KP Index: Your Aurora Intensity Gauge
The KP index is a scale from 0 to 9 that measures geomagnetic activity worldwide. It is the single most referenced number in aurora forecasting, and for good reason. Each KP level corresponds to how far south the auroral oval extends, meaning higher KP equals visibility at lower latitudes.
Here is what each level means in practical terms for viewing:
KP 0-1: Aurora is confined to the far north, visible only from places like northern Alaska, northern Canada, and Scandinavia above the Arctic Circle. If you are already at high latitude, the show could be excellent. If you are further south, forget it.
KP 2-3: Aurora extends to around 60-65 degrees magnetic latitude. Visible from places like Fairbanks, Reykjavik, and Tromso with good clarity. Cities like Edmonton and Helsinki might see a low glow on the northern horizon.
KP 4-5: The auroral oval reaches 55-60 degrees magnetic latitude. This is where things get exciting for people in the northern tier of the United States, southern Canada, Scotland, and similar latitudes. Minneapolis, Seattle, Glasgow, and Oslo have a real shot at visible aurora.
KP 6-7: Aurora pushes down to 50-55 degrees magnetic latitude. States like Wisconsin, Michigan, Montana, and the Dakotas get good displays. Northern Europe sees strong aurora well south of normal. This is a G2 to G3 geomagnetic storm.
KP 8-9: The big one. Aurora can be visible as far south as 40 degrees or lower, reaching into states like Oklahoma, Alabama, and occasionally even further. The May 2024 storm hit KP 9, producing aurora visible from Hawaii and parts of Mexico. These events are rare but unforgettable.
One important detail: KP is reported in near-real-time, meaning it tells you what is happening now, not what will happen in three hours. A KP reading of 3 at 8 PM could jump to 6 by midnight if a coronal mass ejection arrives. Always check the trend, not just the current number.
The Bz Component: The Gate Keeper
If KP is the intensity gauge, Bz is the on-off switch. The Bz component measures the north-south orientation of the interplanetary magnetic field carried by the solar wind. This one value can make or break your night more than any other metric.
When Bz is positive (northward), the solar wind’s magnetic field aligns with Earth’s protective magnetic shield. Particles slide past, and very few penetrate the atmosphere. Aurora stays weak and far north regardless of what the KP index says.
When Bz is negative (southward), the opposite happens. The magnetic fields connect, creating openings that funnel charged particles directly into the upper atmosphere. This is when aurora explodes into life, forming bright arcs, dancing curtains, and vivid colors. A strong negative Bz of minus 10 or lower can trigger a substorm even when other conditions seem marginal.
I have seen nights where KP was technically at 4, but Bz was stuck positive, and the sky stayed dead. I have also seen nights where KP was only at 3, but Bz crashed to minus 15, and the aurora lit up the entire northern horizon. Always check Bz alongside KP. Many casual forecasters never look at Bz, which is exactly why they get caught off guard.
Solar Wind Speed: The Engine
Solar wind speed determines how much energy gets delivered to the magnetosphere. Think of it as the fuel flow rate. Higher speed means more energetic particle impacts and brighter, faster-moving aurora.
Typical solar wind speed ranges from 300 to 800 km/s. Here is how to interpret what you see:
Below 350 km/s: Quiet conditions. Even with decent KP and negative Bz, displays will be faint and slow. Not worth a long drive.
350-450 km/s: Moderate. Reasonable aurora activity is possible, especially if Bz is strongly negative. Good enough for a short drive to dark skies if you are already at a favorable latitude.
450-600 km/s: Active conditions. This is the sweet spot for aurora hunting at mid-latitudes. Combined with KP 5 and negative Bz, you have a solid chance of a memorable display.
Above 600 km/s: Storm-level conditions. Often associated with coronal mass ejections or coronal hole high-speed streams. Aurora can be intense, fast-moving, and visible far south of normal. These are the nights worth driving for.
The best approach is to look at all three metrics together. KP tells you how far south the aurora reaches. Bz tells you whether the magnetic connection is open. Solar wind speed tells you how much energy is flowing. When all three align in your favor, that is when you grab the car keys.
The Auroral Oval: Why Latitude Matters So Much
The auroral oval is a ring-shaped band around each magnetic pole where aurora is most likely to occur. It is not a fixed ring. It expands and contracts based on geomagnetic activity. During quiet conditions, the oval sits tight around 70-75 degrees magnetic latitude. During storms, it can balloon outward to 50 degrees or lower.
This is why the same KP reading means different things depending on where you live. Someone in Fairbanks, Alaska (65 degrees magnetic latitude) is essentially inside the auroral oval during almost any active period. Someone in Chicago (53 degrees magnetic latitude) needs the oval to expand significantly before they see anything.
Understanding your magnetic latitude is essential. It differs slightly from your geographic latitude because Earth’s magnetic poles are offset from its geographic poles. You can find your magnetic latitude using the NOAA magnetic latitude calculator. Once you know your number, you can map it directly to the KP level you need.
Forecasting Tools: Where to Check Before You Drive
Having the right tools makes the difference between an informed decision and a guess. Not all aurora forecasting resources are created equal, and relying on a single source is the fastest way to miss a good night or waste a trip on a bad one.
NOAA Space Weather Prediction Center
The NOAA SWPC (swpc.noaa.gov) is the gold standard for space weather data in the United States. It provides the OVATION model forecast, which predicts auroral intensity and location for the next 30 minutes. This is the tool professional aurora guides check first.
The site offers several key products. The 30-minute forecast shows a map of predicted aurora intensity, which is incredibly useful for real-time decisions. The 3-day KP forecast gives you a heads-up on incoming activity. The watches and warnings page alerts you to geomagnetic storm conditions. I check the 30-minute forecast obsessively when conditions look promising, refreshing every few minutes as the predicted aurora oval shifts and pulses.
One thing to keep in mind: NOAA’s models are excellent for short-term prediction but less reliable beyond a few hours. Solar wind conditions can change rapidly, especially when a coronal mass ejection’s exact arrival time is uncertain. Use NOAA for the immediate decision, not for planning a trip next weekend.
SpaceWeatherLive.com
SpaceWeatherLive is my go-to for a quick snapshot of all three critical metrics in one place. The homepage shows current KP, Bz, solar wind speed, and density in a clean, easy-to-read format. It also provides historical data and 3-hour KP estimates, which help you see trends.
The site pulls data from the DSCOVR and ACE satellites, which sit about a million miles upstream of Earth and measure solar wind conditions before they arrive. This gives you a 15 to 60-minute preview of what is coming. When Bz turns sharply negative on SpaceWeatherLive, you know the next substorm could fire within the hour.
SpaceWeatherLive also has a community reporting feature where users submit aurora sightings from around the world. This is invaluable for real-time confirmation. If people 200 miles north of you are reporting visible aurora, that is a strong signal to head out.
GI Alaska All-Sky Cameras
The University of Alaska Fairbanks Geophysical Institute operates all-sky cameras across Alaska that show real-time aurora images. If you are in or near Alaska, this is an essential resource. The cameras update continuously, so you can literally see the aurora moving before you commit to going outside.
Even if you are not in Alaska, the GI camera network is useful for gauging overall auroral activity levels. When the Poker Flat camera shows a bright, active sky, you can be confident that the auroral oval is energized, which bodes well for locations further south.
Mobile Apps: Useful but Unreliable
Several mobile apps are popular among aurora hunters, including My Aurora Forecast, Aurora Pro, and Space Weather Live. These apps pull from the same satellite data as the websites above and package it in a convenient format with push notifications.
The convenience is real. Getting an alert when KP crosses your threshold is genuinely helpful. However, forum users and experienced chasers consistently warn about over-relying on apps. The probability percentages many apps display are generated by algorithms that do not account for local conditions, cloud cover, or the rapid fluctuations that characterize substorm behavior.
Multiple experienced aurora hunters on Reddit have reported their best sightings happened on nights when apps showed low probability, and their most disappointing trips happened when apps promised a great show. Use apps as a starting point, then confirm with NOAA and SpaceWeatherLive before committing to a drive.
The ideal workflow is to set up app alerts for your KP threshold, check NOAA’s 30-minute forecast when you get an alert, verify Bz is negative on SpaceWeatherLive, confirm clear skies with a satellite map, and then make your drive decision. This takes about five minutes and dramatically improves your success rate.
Local Aurora Alert Services
Many regions with active aurora tourism have local alert services. The University of Alaska Fairbanks offers email alerts. Several Facebook groups and Discord servers provide real-time community updates for specific areas. Local astronomy clubs often have text alert chains.
These community resources are particularly valuable because they cut through the noise. When someone in your area posts “aurora visible now, bright green arc on the northern horizon,” that is worth more than any model prediction. Finding and joining these local networks is one of the highest-impact things you can do to improve your aurora success.
When to Drive North vs When to Stay Home
Even when conditions look good, the question remains: is it worth getting in the car? That depends on your starting latitude, the strength of the storm, how far you need to drive, and what kind of experience you are hoping for. Let me break this down into practical guidance.
Matching Drive Distance to KP Level
The further south you live, the stronger the storm needs to be to justify a drive. Here is a practical framework I have developed from years of chasing:
If you are already at high latitude (above 60 degrees magnetic), you barely need to drive at all. Step outside and look north. KP 2-3 with clear skies will give you a decent show most nights during aurora season.
If you are in the 55-60 degree range (northern US, southern Canada, Scotland, southern Scandinavia), a 30 to 60-minute drive to escape city light pollution is worthwhile at KP 4 or higher with negative Bz. You are close enough to the oval that even moderate activity produces visible aurora.
At 50-55 degrees (US-Canada border region, central UK, central Europe), you need KP 5 or higher to make a drive worthwhile. Plan for 60 to 90 minutes of driving to reach a dark sky location. At this latitude, the aurora will appear low on the northern horizon, so finding a location with a clear northern view matters as much as dark skies.
Below 50 degrees (most of the central and southern United States, central and southern Europe), you need KP 7 or higher for a realistic chance. These are major geomagnetic storms that happen perhaps a few times per year, more frequently during solar maximum. When one hits, it can absolutely be worth a 2-hour drive. But do not waste your time chasing KP 4 events from these latitudes. You will almost certainly see nothing.
Naked Eye vs Camera: Managing Expectations
One of the biggest sources of disappointment is the gap between what cameras capture and what the human eye perceives. This is something that catches almost every first-time aurora hunter off guard.
Your eyes are terrible at seeing color in low light. The photoreceptor cells responsible for night vision (rods) are essentially colorblind. They detect brightness and motion but not color. This means that a moderate aurora display will look like a faint white or grayish-green glow to your naked eye, not the vivid greens and purples you see in photographs.
Cameras, on the other hand, can gather light over time through long exposures. A 5 to 10-second phone exposure will pick up far more color and detail than your eyes ever will. This is why phones and cameras frequently detect aurora before you can see it with your naked eye.
Here is the practical implication: if you are at a marginal latitude for the current KP level, you may need to rely on your camera to confirm aurora is present. Point your phone camera north, use a long exposure (most modern phones have a night mode), and check the screen. If you see green on the screen but not in the sky, the aurora is there but too faint for direct visual observation.
During strong storms (KP 6 or higher from a mid-latitude location), aurora becomes bright enough that colors are clearly visible to the naked eye. Greens, pinks, and even reds become apparent. The curtains dance and pulse. This is the experience everyone hopes for, and it is worth driving for. But it is not what every night looks like, even on active nights.
Set your expectations accordingly. A grayish-white glow on the northern horizon is a successful sighting, even if it does not look like an Instagram post. The vivid, colorful displays are the reward for persistence and patience across many nights.
The Latitude Sweet Spot and Why Going Too Far North Can Backfire
Counterintuitively, driving as far north as possible is not always the best strategy. The auroral oval is a ring, not a cap. If you travel too far north, you can end up inside the oval where aurora is actually overhead or behind you rather than in front. This is why places like Tromso, Norway (70 degrees north) can sometimes have worse viewing than locations slightly further south. The aurora arcs are directly overhead, making them harder to photograph and appreciate than when they stretch across the northern horizon.
The sweet spot for aurora viewing is generally along the southern edge of the auroral oval. From this position, the aurora stretches across the northern sky in wide, dramatic arcs. This is where the combination of latitude and KP matters. For a KP 5 night, the southern edge of the oval sits around 55-58 degrees magnetic latitude. That is your target zone.
If you are planning a multi-night aurora trip rather than a single night chase, the generally recommended latitude band is 64 to 70 degrees north. This puts you under or near the oval for almost any active night, giving you multiple chances over several evenings. Destinations like Fairbanks, Tromso, Yellowknife, and Abisko sit in this band.
How Long to Commit: The Patience Factor
If there is one lesson that stands out from every experienced aurora hunter, it is this: do not give up after 15 minutes. Aurora is not a continuous display. It comes in waves called substorms, and the timing is unpredictable.
A substorm cycle typically lasts 2 to 4 hours. During that period, the aurora will intensify, expand, and then subside. The peak of a substorm, when the aurora is brightest and most active, might last only 10 to 20 minutes. If you arrive, see nothing for 30 minutes, and leave, you might have missed the entire show by ten minutes.
Plan to stay at your viewing location for a minimum of 2 to 3 hours. Bring warm clothes, hot drinks, a comfortable chair, and something to keep you occupied. Some of the best displays happen between 11 PM and 1 AM, but activity can spike at any point between 9 PM and 4 AM. The peak viewing window that most guides reference is 10 PM to 2 AM local time, which corresponds to the period when the auroral oval is typically most active on the night side of Earth.
For a dedicated aurora trip rather than a single-night drive, plan for 3 to 5 nights. This is the standard recommendation from tour operators and experienced chasers. Even in ideal locations, cloud cover and quiet geomagnetic conditions will kill some nights. Having multiple nights gives you the statistical advantage that single-night chasers simply do not have.
Maximizing Your Chances Once You Commit to Driving
You have decided tonight is the night. Conditions are right, you are packed, and you are heading north. Here is how to stack the odds in your favor once you are out there.
Find Genuine Dark Skies
Light pollution is the enemy of aurora viewing. Even a modest town 10 miles away can wash out a faint aurora display. Use a light pollution map to identify areas classified as green, blue, or gray zones. Gray zones are the darkest, with virtually no artificial light interference.
Lakes and open fields facing north are ideal because they give you an unobstructed view of the horizon. Aurora at mid-latitudes typically appears low on the northern horizon. Trees, hills, and buildings in that direction will block your view. Scope out potential locations during daylight hours if possible, so you are not fumbling around in the dark trying to find a clear sight line.
Check Cloud Cover at Your Destination, Not Just at Home
Cloud cover is the single most common reason aurora chases fail. Clear skies at your starting location tell you nothing about conditions 60 miles north. Weather systems move, and cloud patterns shift dramatically across even modest distances.
Before you leave, pull up a satellite image or a specialized astronomy weather tool. Astrospheric (for North America) and Clear Outside are popular among amateur astronomers for exactly this purpose. They provide hour-by-hour cloud cover forecasts for specific locations.
If your target area shows overcast conditions for the entire viewing window, pick a different location or reschedule. Partial cloud cover can actually add visual interest to aurora photography, but a solid overcast layer will completely block your view.
One pro tip from experienced chasers: if cloud cover is scattered, the gaps between clouds can create dramatic framing for aurora photos. Do not automatically cancel for partial clouds. But if the forecast shows a solid wall, find a different area or save the trip for another night.
Dress for 20 Degrees Colder Than Expected
This sounds like obvious advice, but forum after forum lists “not dressing warmly enough” as a top mistake. When you are standing still in a field at midnight in November, the cold hits differently than when you are active during the day.
Aurora viewing involves long periods of standing or sitting. You are not hiking, not moving, just waiting. Layer up with thermal base layers, insulated mid-layers, a windproof outer shell, warm boots, gloves, and a hat. Hand warmers and a thermos of hot coffee or tea make a enormous difference in your comfort and therefore your willingness to stay.
If you are cold and miserable after 45 minutes, you will leave. And you might leave 10 minutes before the substorm hits. Staying warm is not just about comfort. It is about giving yourself the time needed for aurora to appear.
Set Up Your Camera Before You Need It
When a strong aurora display erupts, you will have maybe 5 to 10 minutes of peak activity. That is not the time to be fumbling with camera settings. Get your phone or camera set up and tested before anything happens.
For phone photography, use night mode or download a long exposure app. Set your phone on a tripod or rest it against something stable. Take test shots facing north to see what the camera picks up. This also helps you detect faint aurora that your eyes cannot yet see.
For a DSLR or mirrorless camera, set your aperture as wide as possible (f/2.8 or lower), ISO at 1600 to 3200, and shutter speed at 5 to 15 seconds depending on aurora brightness. Faster-moving aurora needs shorter exposures to avoid blurring.
Having your equipment ready means you can enjoy the visual experience when aurora appears rather than frantically adjusting settings while the display peaks and fades.
Monitor Conditions While You Wait
Keep SpaceWeatherLive open on your phone while you wait. Watch the Bz value. If Bz is hovering near zero but suddenly dips to minus 8 or minus 10, an aurora substorm is likely imminent. That is your 5-minute warning to get ready.
Similarly, if KP starts climbing from 3 to 5 while you are already at your viewing location, stay put. You are in position for exactly the kind of rapid intensification that creates the most memorable displays.
The community reporting features on SpaceWeatherLive and local aurora alert networks are also worth monitoring. If someone 100 miles north of you reports “aurora going crazy right now,” that activity is likely heading your direction within the hour.
FAQs
What is the best time to view the aurora tonight?
The best viewing window is typically between 10 PM and 2 AM local time, with peak activity often occurring between 11 PM and midnight. This corresponds to when your location is on the night side of Earth and the auroral oval is most active. However, strong geomagnetic storms can produce visible aurora outside this window, so stay alert throughout the night if conditions are favorable.
Do I have to look north to see aurora?
In most cases yes, you should face north to see the aurora, especially from mid-latitudes where the auroral oval appears low on the northern horizon. During strong geomagnetic storms (KP 7 or higher), aurora can extend overhead or even appear in the southern sky, but for typical viewing conditions the northern horizon is where you will find it.
What direction should I look to see the aurora borealis?
Face north for the best chance of seeing the aurora borealis from mid-latitudes. If you are at high latitude (above 65 degrees north), the aurora may appear directly overhead or in any direction since you are beneath the auroral oval. For most viewers in the northern United States and Europe, a clear view of the northern horizon is essential.
What setting should I put my phone on to see the Northern Lights?
Use night mode or a long exposure app, set your phone on a stable surface or tripod, and aim north. On most modern smartphones, night mode automatically extends exposure time to capture more light. For more control, use a manual camera app with exposure times of 3 to 10 seconds, ISO set high, and focus set to infinity. Take test shots first to detect aurora your eyes cannot yet see.
Can I see the aurora tonight?
Check three things: KP index at or above your magnetic latitude threshold, Bz component at negative 5 or lower, and clear skies in your viewing area. If all three conditions are met, you have a good chance. For most of the contiguous United States, you need KP 5 or higher. Use NOAA’s 30-minute forecast and SpaceWeatherLive for real-time data before heading out.
What states will be able to view the aurora borealis tonight?
During KP 5-6 storms, the northern tier states including Washington, Idaho, Montana, North Dakota, Minnesota, Wisconsin, Michigan, and Maine have the best chances. At KP 7-8, visibility extends to Oregon, Wyoming, Nebraska, Iowa, Illinois, Indiana, Ohio, Pennsylvania, and New York. At KP 9, aurora can be visible from nearly anywhere in the lower 48 states. Check current KP forecasts for tonight’s specific prediction.
Making the Call: Final Thoughts
Figuring out how to tell if tonight’s aurora is worth driving north to see does not require a degree in space physics. It requires checking five things: KP index, Bz component, solar wind speed, cloud cover, and your distance to dark skies. When four or more of those line up in your favor, go. When they do not, save your energy for a better night.
The most important quality in aurora hunting is not expertise or equipment. It is patience. The best displays come to those who check the data, commit when conditions are right, and stay long enough for the show to begin. Use the tools, trust the metrics, and keep looking up. Your night will come.