
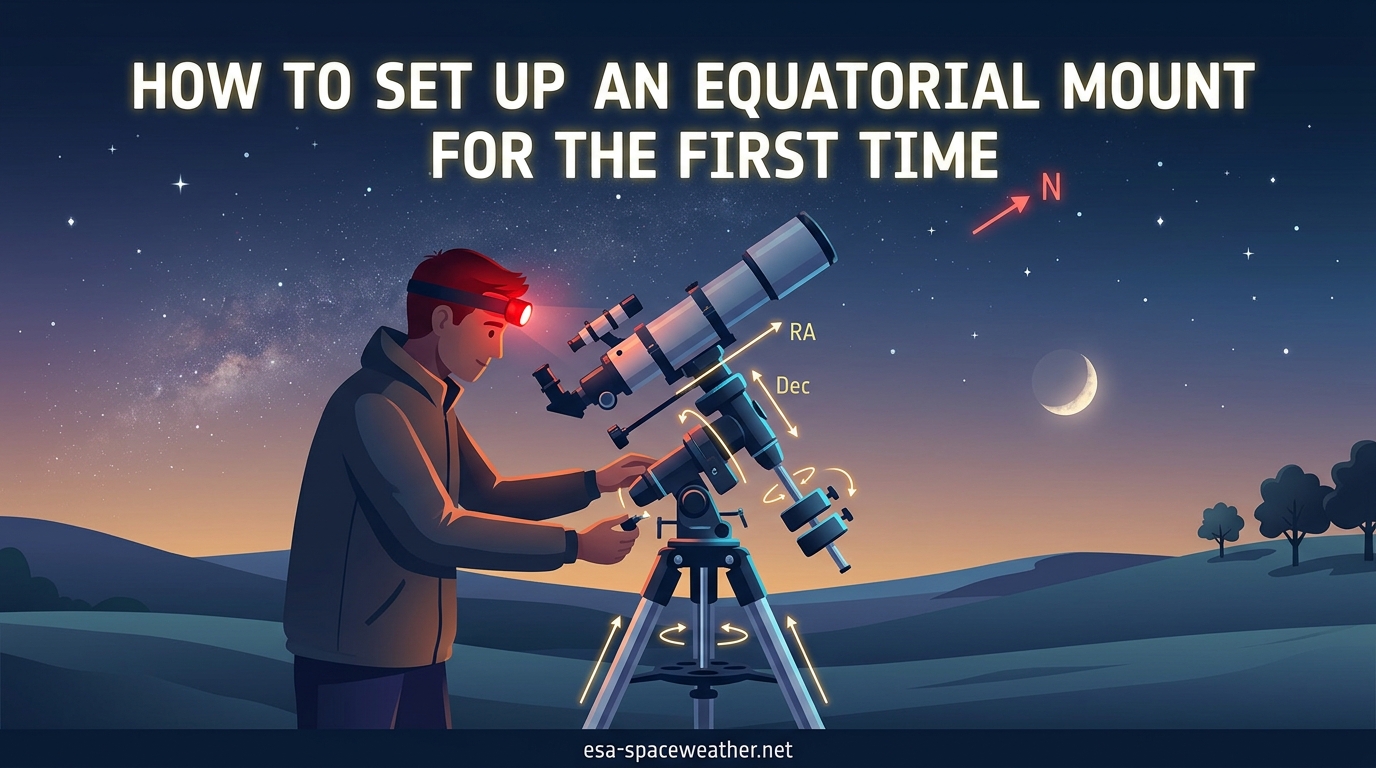
Setting up an equatorial mount for the first time can feel like assembling furniture without the instructions. You have a pile of parts, a counterweight that looks suspiciously heavy, and a sky full of stars waiting to be observed. If you are wondering whether you will ever get this thing working, the answer is yes, and faster than you think.
In this guide, I will walk you through exactly how to set up an equatorial mount for the first time, from unboxing the tripod to your first successful tracking session. I have broken down every step into plain language with no assumptions about your prior experience. By the end, you will understand what every knob does, why polar alignment matters, and how to avoid the mistakes that trip up nearly every beginner.
Here is the most important thing I can tell you before we start: practice this setup during the daytime first. Nearly every experienced astronomer on forums like Cloudy Nights and Reddit repeats this advice because it works. You will save yourself an hour of fumbling in the dark on your first night if you assemble the mount once or twice in your living room or backyard while you can actually see what you are doing.
This guide covers German equatorial mounts (the most common type for beginners), including popular models like the SkyWatcher EQ-3, EQ-5, HEQ-5, Celestron CG-4, and similar designs. Even if you have a different brand, the principles are identical. Let us get started.
Table of Contents
What Is an Equatorial Mount and Why Do You Need One?
An equatorial mount is a telescope mounting system designed to counteract Earth’s rotation. Instead of fighting the sky by constantly adjusting two directions like you would with an altazimuth mount, an equatorial mount lets you track any celestial object by turning a single slow-motion knob or motor along one axis. That axis is called the right ascension axis, and it is aligned parallel to Earth’s own rotational axis.
Think of it this way. Earth spins, and from our perspective, the stars appear to rotate around the celestial poles. An equatorial mount mirrors that rotation. When you align the mount’s polar axis with the north or south celestial pole, the mount can spin in the exact opposite direction of Earth at the exact same speed. The result is that your target stays centered in the eyepiece or camera frame for as long as you want.
This is why equatorial mounts are the standard for astrophotography. If you want to take a 60-second exposure of the Orion Nebula, your mount needs to track the sky precisely enough that stars remain pinpoints rather than streaks. An altazimuth mount cannot do this for long exposures because it introduces field rotation, a gradual twisting of the image that turns stars into curved trails. An equatorial mount eliminates that problem entirely.
For visual observing, the benefits are more practical than dramatic. With a properly aligned equatorial mount, you only nudge one slow-motion control to keep an object in view. Compare that to an altazimuth mount, where you constantly adjust both up-down and left-right. Over a long observing session, the equatorial mount is simply less tiring to use.
Equatorial Mount vs Altazimuth Mount: Quick Comparison
Many beginners ask whether they actually need an equatorial mount or if a simpler altazimuth mount would work fine. The honest answer depends on what you want to do.
Altazimuth mounts move up-down (altitude) and left-right (azimuth). They are simpler, lighter, faster to set up, and perfect for casual visual observing of the Moon, planets, and bright deep-sky objects. Dobsonian telescopes use a specialized altazimuth design that is incredibly stable and affordable for large apertures. If your only goal is to look through an eyepiece, an altazimuth or Dobsonian mount is genuinely easier.
Equatorial mounts shine when you want to track objects for long periods, use setting circles to find targets by their celestial coordinates, or do any form of astrophotography beyond short lunar shots. They require more setup time and a steeper learning curve, but they unlock capabilities that altazimuth mounts simply cannot offer.
Types of Equatorial Mounts
The German equatorial mount (GEM) is the design most beginners encounter. It uses a T-shaped structure where the telescope sits on one side of the polar axis and a counterweight balances it on the other. GEMs are made by SkyWatcher, Celestron, iOptron, Vixen, and others under model names like EQ-1, EQ-2, EQ-3, EQ-5, HEQ-5, CG-4, CG-5, and so on.
Fork mounts are another type of equatorial mount, typically supplied with Schmidt-Cassegrain telescopes from Celestron and Meade. When placed on a wedge, a fork mount functions as an equatorial mount. These are less common for first-time buyers but worth knowing about.
For this guide, I focus on German equatorial mounts because they are what most beginners purchase. The setup process is similar enough across designs that the principles transfer.
Parts of an Equatorial Mount: A Visual Tour
Before you start assembling anything, let us identify the major components. One of the biggest sources of beginner confusion is simply not knowing what each part is called or what it does. I frequently see posts on astronomy forums from people who cannot figure out their manual because they do not know which knob is the RA lock versus the Dec lock.
The Tripod
The tripod is the three-legged base that holds everything up. On equatorial mounts, the tripod is usually heavier and sturdier than what you find on altazimuth mounts because it needs to support the counterweight system without tipping. Most tripods have adjustable leg extensions and a center bolt or fitting that connects to the mount head.
Some tripods include a spreader, an accessory tray that locks the legs into position. The spreader does double duty: it holds your eyepieces and prevents the tripod legs from collapsing or shifting. Always install the spreader before adding weight to the mount.
The Mount Head and RA/Dec Axes
The mount head is the mechanical heart of the system. It contains two rotational axes. The right ascension (RA) axis is the one you align with the celestial pole. When tracking, only this axis needs to rotate. The declination (Dec) axis allows you to move the telescope north-south on the celestial sphere.
Each axis has a lock bolt or clamp that freezes it in place and a slow-motion control that lets you make fine adjustments. The RA lock must be engaged for tracking to work. The Dec lock should be engaged when you are observing so the telescope does not drift in declination.
Most mount heads also have setting circles, which are graduated dials on each axis that show the RA and Dec coordinates. You can use these to locate objects by their celestial coordinates, though most beginners rely on star-hopping or GoTo systems instead.
Counterweights and the Counterweight Bar
The counterweight bar screws into the bottom of the RA axis and extends downward. You slide counterweights onto this bar to balance the weight of your telescope. Most mounts come with one or two counterweights, and you can add more if you use a heavier optical tube or accessories.
A critical safety note that many manuals mention only in passing: always thread the safety stop onto the bottom of the counterweight bar before letting go of anything. This small metal cap prevents counterweights from sliding off the bar and crashing onto your foot or your equipment. I have read too many forum posts about bruised toes and dented telescopes to skip mentioning this.
The Saddle and Dovetail Bar
The saddle is the clamp on top of the mount head that holds the telescope. The dovetail bar is a metal rail that attaches to your telescope tube rings or its built-in mounting plate. You slide the dovetail bar into the saddle and tighten a knob or lever to lock it in place.
Dovetail bars come in two common widths: Vixen-style (about 43mm) and Losmandy-style (about 75mm). Beginner mounts almost always use Vixen-style dovetails. Make sure the dovetail bar is securely attached to the telescope before you try to mount it. A loose dovetail is the fastest way to drop a telescope.
Slow Motion Controls and Hand Controller
Slow motion controls are flexible cables that attach to gears on the RA and Dec axes. They let you make smooth, small movements when centering objects. On non-motorized mounts, you use these cables to manually track objects as they drift across the field of view.
If your mount is motorized or GoTo, you will have a hand controller instead of (or in addition to) manual slow-motion cables. The hand controller connects to the mount via a cable and allows electronic slewing at various speeds. GoTo mounts can automatically point to objects from an internal database after you complete an alignment procedure.
The Polarscope
The polarscope (or polar alignment scope) is a small finder telescope that sits inside the hollow center of the RA axis on many mounts. You look through it to precisely align the mount with the celestial pole. Not all mounts include one, and beginner-level mounts like the EQ-1 and EQ-2 often omit it.
If your mount has a polarscope, it will have a reticle inside, which is a glass disk with an engraved pattern showing the position of Polaris relative to the north celestial pole. You rotate the RA axis and adjust the mount’s altitude and azimuth to place Polaris in the correct position on the reticle.
Pre-Setup Checklist: What to Do Before You Head Outside
One thing I noticed when researching this guide is that no major competitor provides a pre-setup checklist. That is a shame, because being prepared is half the battle. Here is everything you should gather and do before you even carry the mount outside.
Tools and Accessories to Bring
Gather these items before you start. You do not want to be running back inside with a flashlight in your teeth while your eyes are trying to dark-adapt.
First, the essentials: your mount, tripod, telescope optical tube, counterweights, and all mounting hardware. Then a red flashlight or headlamp for preserving night vision. White light destroys dark adaptation in seconds and takes 20-30 minutes to recover, so red light only.
Bring eyepieces (start with a low-power one, 25mm or 32mm, for the widest field of view). If you have a GoTo mount, bring fresh batteries or a power pack. A compass or smartphone with a compass app helps you find north. If your mount has a polarscope, make sure it is installed and focused.
Optional but helpful items include a small bubble level, a star chart or planetarium app on your phone, a notebook for recording observations, warm clothing (it gets colder than you think when you are standing still), and a chair. Many beginners forget the chair, but being comfortable dramatically improves the experience.
Know Your Latitude
You need to know your observing latitude to set the mount’s altitude adjustment correctly. Look this up before you go outside using any GPS app or a quick web search. For example, if you are in London, your latitude is about 51.5 degrees north. In New York, it is about 40.7 degrees north. Write this number down.
The latitude setting tells the mount how high to tilt the RA axis. If your latitude is 40 degrees north, you set the mount altitude to 40 degrees. This aims the polar axis at the correct elevation above the horizon to point at the north celestial pole.
Check the Weather and Find Polaris
Obvious but overlooked: check that the sky will be clear enough to see stars. More importantly, make sure you can see the northern sky (or southern sky if you are in the southern hemisphere) from your observing spot. If trees, buildings, or hills block your view of Polaris, you need to find a different location or use an alternative polar alignment method.
If light pollution is heavy in your area, finding Polaris can be tricky. Use a planetarium app like Stellarium, SkySafari, or Star Walk to pinpoint its position before you go out. Polaris is the end star in the handle of the Little Dipper, but in light-polluted skies, you may need to star-hop from the Big Dipper pointer stars to find it.
Practice in Daylight First
I cannot emphasize this enough. Take 30 minutes during the afternoon to assemble the entire mount in your backyard or living room. Go through every step in this guide while you can see clearly. Identify every knob. Figure out which way the axis locks turn. Practice attaching the telescope to the dovetail saddle.
Multiple experienced astronomers on Reddit and Cloudy Nights cite this as the single most valuable tip for beginners. The first time you set up in the dark, you will be grateful you already know where everything goes and how it fits together.
How to Set Up an Equatorial Mount: Step-by-Step
Now we get to the heart of it. Learning how to set up an equatorial mount for the first time is a process that takes about 30 to 60 minutes when you are new. After 5 to 10 sessions, it drops to 10 to 15 minutes. Follow these steps in order, and you will have a properly assembled and aligned mount ready for observing.
Step 1: Position and Level the Tripod
Start with just the tripod. Extend the legs to a comfortable working height, usually about chest height when standing. Do not extend the legs fully unless you are very tall; a lower mount is more stable and easier to reach with an eyepiece.
Point one tripod leg roughly toward north. This is a simple trick that helps with balance and gives you a physical reference for where the polar axis needs to point. Use a compass or smartphone to find north, or locate Polaris if you are setting up at dusk.
Place the tripod on solid, level ground. Grass is fine; deep mud or loose gravel is not. Use the bubble level on the tripod or mount head (if equipped) to get it roughly level. You do not need surgical precision here, just close enough that the mount head sits reasonably flat. The polar alignment process corrects for small leveling errors.
Install the accessory tray or spreader now. This locks the tripod legs open and prevents them from shifting when you add the weight of the mount and counterweights. Skipping this step risks a tipping tripod.
Step 2: Attach the Mount Head
Place the mount head on top of the tripod. There is usually a central bolt that passes through the tripod head into the bottom of the mount. Tighten it firmly but do not overtighten to the point of stripping threads.
Some mounts use a hand knob; others use a nut that you tighten with a wrench or coin. Either way, make sure the mount head is secure and cannot rotate on the tripod. A loose mount head will ruin your polar alignment the moment you touch the telescope.
At this point, the RA axis should be pointing roughly upward and toward the pole. Do not worry about precision yet. We fine-tune the direction in later steps.
Step 3: Set Your Latitude
This is where your pre-setup research pays off. On the side of the mount head, there is an altitude adjustment mechanism, usually a pair of bolts or knobs that tilt the RA axis up and down. There will be a latitude scale marked in degrees.
Loosen the altitude lock and adjust the tilt until the scale reads your local latitude. If you are at 40 degrees north, set it to 40. This aims the polar axis at the correct angle above the horizon. Tighten the altitude lock once you have the correct reading.
This does not have to be exact to the decimal. Getting within a degree or two is fine for visual observing. For astrophotography, you will refine this during polar alignment, but the initial setting gets you in the ballpark.
Step 4: Install the Counterweight Bar and Weights
Screw the counterweight bar into the threaded hole at the bottom of the RA axis. It should be fully seated and tight. This bar points downward when the mount is correctly oriented.
Before sliding on any counterweights, thread the small safety stop cap onto the bottom of the bar. This prevents the weights from sliding off if the lock knob loosens. Now slide one counterweight onto the bar and tighten its locking knob.
How much counterweight do you need? Start with one weight positioned about halfway down the bar. You will fine-tune the position during balancing in Steps 6 and 7. If your telescope is heavy, you may need both counterweights. The general rule is that the counterweight side should be slightly heavier than the telescope side so the mount naturally stops rather than swinging freely if you loosen a lock.
Step 5: Attach the Telescope via the Dovetail
Make sure the dovetail bar is securely attached to your telescope tube rings. Most beginner telescopes come with a dovetail bar pre-installed, but double-check the screws are tight.
Loosen the saddle clamp on the mount head. Slide the dovetail bar into the saddle from the end, not from the top. Push it in until it is centered left-to-right, then tighten the saddle clamp firmly. Give the telescope a gentle tug to confirm it is locked in and cannot slide.
This is the moment where mistakes happen. If the dovetail is not fully seated in the saddle, the telescope can slip or fall when you release it. Always test with a gentle pull before letting go completely. I once watched a beginner set an eyepiece diagonal slightly off-center, which prevented the dovetail from seating properly. The telescope held for about 30 seconds before sliding. Check twice, let go once.
Step 6: Balance in Right Ascension
Balancing is the step beginners skip most often, and it causes more problems than any other. An unbalanced mount puts strain on the motor (if equipped), makes tracking jerky, and can cause the telescope to swing suddenly when you loosen a lock bolt.
To balance in RA, first loosen the DEC lock and rotate the telescope so it is perpendicular to the counterweight bar. In other words, the telescope should be horizontal, and the counterweight bar should also be horizontal. Tighten the DEC lock in this position.
Now loosen the RA lock. The mount will probably rotate, with either the telescope or the counterweight dropping. Let it settle and see which side is heavier. If the telescope drops, slide the counterweight farther down the bar or add another weight. If the counterweight drops, slide the counterweight up or remove weight.
Adjust until the mount stays roughly balanced in any RA position. It does not need to be perfectly motionless, but it should not swing strongly in either direction. When balanced, tighten the counterweight lock knob and the RA lock.
Step 7: Balance in Declination
Now balance the other axis. Loosen the RA lock and rotate the mount so the telescope is on top, pointing straight up. Tighten the RA lock. The counterweight bar should now be pointing straight down.
Loosen the DEC lock. The telescope may rotate around the DEC axis, tipping nose-up or nose-down. This tells you the center of gravity is not at the DEC axis pivot point.
To fix this, loosen the tube rings slightly and slide the telescope forward or backward in the rings until it balances. Retighten the rings. Check again by loosening the DEC lock. The telescope should stay roughly level without strong rotation in either direction.
This step is especially important for astrophotography. An unbalanced DEC axis causes tracking errors and puts uneven load on the DEC motor. For visual observing, a rough balance is acceptable, but getting it close saves frustration.
Step 8: Align the Finderscope
Your finderscope or red dot finder needs to point at exactly the same thing as your main telescope. The best time to do this is during daylight setup or at dusk when you can easily identify a distant target.
Aim the main telescope at a distant, stationary object. A chimney, a distant treetop, or a power pole works well. Use a low-power eyepiece (25mm or 32mm) and center the object in the field of view.
Now look through the finderscope. Use its adjustment screws to move the crosshair or red dot until it is centered on the same object. This takes a few minutes, but it saves enormous frustration at night when you are trying to locate faint objects. A misaligned finderscope is the number one reason beginners cannot find anything in the telescope.
Step 9: Connect Power and Hand Controller (If GoTo)
If you have a motorized or GoTo mount, connect the power supply now. Use a fresh set of batteries or a 12V power pack. Cold temperatures drain batteries quickly, so a power tank or portable battery pack is more reliable than internal batteries for winter observing.
Plug in the hand controller. Most GoTo systems have a specific port for the hand controller and separate ports for the DEC and RA motor cables. Check your manual for the correct connections. Power on the mount and follow the initial setup prompts, which typically ask for your date, time, location, and time zone.
If you have a non-motorized mount, install the slow-motion cables on the RA and DEC axis gears. Make sure they are seated and turn smoothly without binding.
Step 10: Point the RA Axis Toward the Celestial Pole
This is the beginning of polar alignment, which we cover in detail in the next section. For now, here is the quick version.
Loosen the azimuth adjustment bolts (the pair of knobs that let you rotate the mount left-right around the vertical axis). Rotate the mount so the RA axis points roughly toward Polaris (in the northern hemisphere) or the south celestial pole (in the southern hemisphere).
If you set your latitude correctly in Step 3 and pointed a tripod leg north in Step 1, you should already be close. Confirm by looking along the RA axis from the front or by sighting through the polarscope if your mount has one. You can refine the alignment now or move to the detailed polar alignment process in the next section.
Polar Alignment: The Step That Makes Everything Work
Polar alignment is the process of making the RA axis point exactly at the celestial pole. It is the single most important step in learning how to set up an equatorial mount for the first time, and it is also the step that causes the most frustration. I will break it down into three methods, from simplest to most precise.
Here is the key concept: the north celestial pole is not exactly at Polaris. Polaris is about 0.7 degrees away from the true pole, which is close enough for visual observing but not for long-exposure astrophotography. The goal of polar alignment is to get the RA axis pointing at the true pole, not just at Polaris itself.
Method 1: Polar Alignment Without a Polarscope
If your mount does not have a polarscope (common on EQ-1 and EQ-2 mounts), you can do a rough polar alignment by simply sighting along the RA axis toward Polaris. This is adequate for visual observing at low to medium magnifications.
Loosen the azimuth adjustment knobs and rotate the mount until the RA axis points at Polaris. You can sight along the axis tube or use the silhouette of the mount head as a reference. Tighten the azimuth knobs.
Check the altitude setting. If your latitude scale is set correctly and the tripod is roughly level, the altitude should already be close. Make small adjustments to the altitude bolts if Polaris appears too high or too low when you sight along the axis.
This method gets you within a degree or two of the pole. For visual observing, that is usually good enough. Objects will stay in the field of view for several minutes at a time with only occasional nudging of the RA slow-motion control.
Method 2: Using the Polarscope
If your mount has a polarscope, you can achieve much more precise alignment. The polarscope has a reticle inside with markings for the position of Polaris relative to the true north celestial pole. The exact reticle pattern varies by manufacturer, but the principle is the same.
First, make sure the polarscope is focused. Point it at a distant object during the day and adjust the eyepiece until the reticle and the object are both sharp. This only needs to be done once.
At night, rotate the RA axis (with the RA lock loosened) until the reticle orientation matches the current position of Polaris. You can determine the correct orientation using a smartphone app like PolarScope Align, which shows you exactly where Polaris should appear on the reticle for your date, time, and location.
Adjust the mount’s azimuth knobs to move Polaris left-right until it sits in the correct position on the reticle. Then adjust the altitude bolts to move it up-down. Repeat until Polaris is precisely on the designated reticle mark.
This method typically gets you within 5 to 10 arcminutes of the true pole, which is excellent for visual observing and good enough for short to medium astrophotography exposures (up to about 2-3 minutes with a short focal length).
Method 3: Smartphone App-Assisted Alignment
The PolarScope Align app is frequently recommended on astronomy forums as a game-changer for beginners. It shows you a real-time view of where Polaris should be on your specific polarscope reticle based on your exact time and location. You simply match what the app shows to what you see in the polarscope.
Other useful apps include PS Align (for iOS), Polar Finder, and SynScan Pro (for SkyWatcher GoTo mounts). Some GoTo mounts have built-in polar alignment routines that use the main telescope camera or an illuminated reticle eyepiece to refine alignment after an initial star alignment.
For example, the Celestron All-Star Polar Alignment routine lets you slew to any bright star, center it in the eyepiece, then rotate the mount 180 degrees in RA and adjust the azimuth and altitude to re-center the star. This achieves excellent polar alignment without needing to see Polaris at all.
What If You Cannot See Polaris?
This is a real problem for many urban observers. Trees, buildings, or light pollution can make Polaris invisible from your observing location. Forum posts on Cloudy Nights and Reddit confirm this is one of the most common frustrations for beginners.
You have several options. First, the drift alignment method works without seeing Polaris at all. You center a star near the celestial equator and meridian, then watch how it drifts in declination over a few minutes. The direction and rate of drift tell you how to adjust the azimuth. You then repeat with a star near the eastern or western horizon to adjust altitude.
Drift alignment takes practice but is very accurate. It does require a reticle eyepiece or a camera to measure drift precisely.
Second, GoTo mounts with computerized polar alignment routines (like Celestron All-Star or SkyWatcher routine in the hand controller) can polar-align without seeing Polaris. These routines use the main optics and a bright star instead.
Third, you can do a rough alignment by compass. Find magnetic north, correct for magnetic declination in your area (the difference between magnetic north and true north), and point the RA axis in that direction at your latitude angle. This gets you within a few degrees, enough for wide-field visual observing.
Southern Hemisphere: Aligning to Sigma Octantis
If you are in the southern hemisphere, you align to the south celestial pole instead of the north. The situation is harder because there is no bright star marking the south celestial pole. The closest naked-eye star is Sigma Octantis, which is magnitude 5.5 and barely visible in dark skies.
Most southern hemisphere observers use a geometric approach. Draw an imaginary line through the Southern Cross (Crux) extending about 4.5 times its length, then bisect the line between the bright stars Hadar and Rigil Kentaurus in Centaurus. Where these two reference lines meet is approximately the south celestial pole.
If your polarscope has a southern hemisphere reticle (many do), position Sigma Octantis on the designated mark. The process is otherwise identical to northern hemisphere alignment. Smartphone apps work for both hemispheres and are especially helpful in the south where there is no bright pole star.
Balancing and Testing: Don’t Skip This
I mentioned balancing in Steps 6 and 7, but let me emphasize why this matters so much. On astronomy forums, experienced observers repeatedly say that skipping the balance step is the most common cause of tracking problems, motor strain, and sudden telescope swings.
A properly balanced mount moves smoothly when you loosen a lock bolt. The telescope stays where you put it. The slow-motion controls feel responsive without being stiff. An unbalanced mount fights you at every turn.
For visual observing, a rough balance is acceptable. Get the RA and DEC axes to the point where neither side strongly dominates, and you are fine. Objects will stay in view long enough for comfortable observing with occasional manual corrections.
For astrophotography, balance is critical. Many astrophotographers intentionally add a slight east-heavy imbalance on the RA axis so the mount’s gears stay engaged in one direction, eliminating backlash. This is an advanced technique you can explore once you are comfortable with the basics.
Testing With a Bright Star
After polar alignment and balancing, test the mount on a bright star before committing to a faint target. This confirms everything is working correctly and lets you practice tracking.
Slew to a bright star like Vega, Sirius, or Arcturus using the slow-motion controls or hand controller. Center it in a low-power eyepiece. Now watch it for a minute or two.
If the star drifts slowly out of view in RA (east-west), you need to adjust the slow-motion control to track it, or engage the motor if you have one. If the star drifts in declination (north-south), your polar alignment needs refinement. Some RA drift is normal with manual mounts. Dec drift indicates a polar alignment error.
This test takes two minutes and tells you immediately whether your setup is working. If the star stays centered for several minutes with only minor RA correction needed, you are ready for real observing.
Common Beginner Mistakes and Troubleshooting
No competitor article I found includes a dedicated troubleshooting section, which is a real gap. Based on forum discussions and common questions, here are the problems beginners encounter most often and how to fix them.
The Mount Wobbles or Vibrates
Vibration is the enemy of good observing. If the image dances in the eyepiece every time you touch the focuser, something is wrong with your setup stability.
The most common cause is an incompletely extended or improperly seated tripod. Make sure all three legs are firmly planted and the spreader tray is installed. If the ground is soft, stand on each leg foot to press it into the soil.
A second cause is too much weight on the mount. Every mount has a payload capacity. If your telescope plus accessories exceed about 75% of the rated capacity, the mount will struggle. Cheap mounts like the EQ-1 and EQ-2 are notorious for wobbling under even modest loads. If you consistently have vibration problems, upgrading to at least an EQ-3 or HEQ-5 class mount makes a significant difference.
Wind also causes vibration. Even a light breeze will shake a tall, lightly built mount. Observe from a sheltered location if possible, or wait for calmer conditions.
Stars Drift Out of View Quickly
If objects zoom through the field of view in seconds, check three things. First, are both RA and DEC lock bolts tightened? If the DEC lock is loose, the telescope tips slowly under gravity. Second, is the motor running (if equipped)? Check that tracking is engaged at sidereal rate. Third, is polar alignment accurate? Significant drift in declination means the RA axis is not pointed at the pole.
At high magnification, even a well-aligned manual mount will need frequent RA corrections. This is normal. The drift you should worry about is fast drift at low power, or any consistent drift in declination.
Stuck Screws and Tight Axis Locks
This is a surprisingly common complaint on forums. Axis lock bolts can be stiff, especially on new mounts where threads are tight or lubrication is sparse. Do not force a stuck bolt with pliers or a wrench. You will strip the head or damage the threads.
Try loosening the opposite bolt slightly first. Many adjustment mechanisms work by tightening one bolt against another, so loosening the opposing bolt creates space. If a bolt is truly stuck, apply a tiny amount of silicone lubricant and let it sit for a few minutes.
For brand-new mounts, the threads often loosen up after a few uses. Work the bolts back and forth gently to break them in.
Counterweight Slipping or Falling
If the counterweight slowly slides down the bar during use, the lock knob is either not tight enough or the bore is slightly oversized. Tighten firmly, and if the problem persists, add a thin shim of tape or paper inside the counterweight bore to increase friction.
Never remove the safety stop from the bottom of the counterweight bar. This small piece of metal is the only thing preventing a heavy counterweight from sliding off and crashing to the ground. If your mount did not come with one, improvise with a hose clamp or a nut threaded onto the end of the bar.
GoTo Alignment Fails Repeatedly
If your GoTo mount cannot complete its star alignment routine, the most common causes are incorrect time or location entered during setup, a level that is far off, or the mount not being in the correct home position before starting alignment.
Check that the date, time, time zone, and location (latitude and longitude) are all correct in the hand controller. Even being off by one time zone will cause the GoTo system to look in the wrong part of the sky. Verify the mount is in the home position (telescope pointed at the meridian, RA axis at zero hour angle, DEC at zero) as specified in your manual.
If alignment still fails, try a different alignment star. Sometimes a star near the horizon or behind a tree causes the issue. Choose stars high in the sky and as far apart as possible for the best alignment.
Setting Circles Do Not Point Accurately
Setting circles on beginner mounts are notoriously imprecise. The graduated dials are small, the graduations are coarse, and mechanical slop means readings are approximate at best.
To use setting circles effectively, first calibrate them. Center a known object (like a bright star with known RA and Dec coordinates) in the eyepiece, then rotate the RA setting circle to match the star’s RA coordinate. Now you can slew to other objects using their coordinates, but expect to be within a degree or so at best.
Most beginners find star-hopping with a finderscope and a star chart far more practical than setting circles on entry-level mounts. GoTo systems have largely replaced setting circles for locating faint targets.
Your First Observing Session: What to Expect
You have set up the mount, balanced the telescope, aligned the polarscope, and tested on a bright star. Now what? Here is what a realistic first session looks like.
Expect to spend more time on logistics than observing. Your first night is about getting comfortable with the equipment, not bagging 20 deep-sky objects. Pick two or three easy targets. The Moon is always rewarding and forgiving of alignment errors. Jupiter and Saturn (when visible) are spectacular at even low power. For deep-sky, try the Orion Nebula (winter), the Andromeda Galaxy (fall), or the Pleiades cluster (any season).
Use your lowest power eyepiece first. A 25mm or 32mm eyepiece gives the widest field of view, making it easiest to find objects and center them. Once you have found something, you can switch to higher power for more detail. But always start low.
When you track manually, nudge the RA slow-motion control periodically to keep the object centered. How often depends on magnification. At low power, every minute or two is fine. At high power, you may need to adjust every 15 to 20 seconds. This is normal and becomes second nature quickly.
Take notes. Write down what you observed, what eyepiece you used, and any problems you encountered. These notes are invaluable for improving your technique and tracking your progress as an observer.
Most importantly, be patient with yourself. Everyone struggles the first time. The setup process that took an hour tonight will take 15 minutes after a few sessions. The mount that seemed impossibly complicated will become a familiar tool. By your fifth or sixth night out, you will be setting up in the dark without thinking about it.
Frequently Asked Questions
How do you set up an equatorial mount?
To set up an equatorial mount, first position and level the tripod with one leg pointing north. Attach the mount head, set the latitude adjustment to your local latitude, install the counterweight bar and weights, then attach the telescope via the dovetail saddle. Balance the telescope in both right ascension and declination, align the finderscope, and finally point the RA axis at the celestial pole for polar alignment.
What is the best equatorial mount for beginners?
The best equatorial mount for beginners depends on budget and intended use. For visual observing, the SkyWatcher EQ-3 or Celestron CG-4 offer good stability without being overwhelming. For astrophotography, the SkyWatcher HEQ-5 Pro or iOptron SmartEQ Pro provide better tracking precision. Avoid the cheapest EQ-1 and EQ-2 mounts if possible, as they tend to wobble under typical beginner telescope loads.
How to align a telescope for beginners?
Beginners should start by aligning the finderscope during daylight by centering a distant object in the main telescope and adjusting the finder to match. For polar alignment of an equatorial mount, point the RA axis at Polaris (northern hemisphere) using the mount’s azimuth and altitude adjustments. For GoTo mounts, follow the hand controller’s star alignment procedure, centering two or more alignment stars as prompted.
What are the disadvantages of an equatorial mount?
Equatorial mounts are heavier, more complex, and take longer to set up than altazimuth mounts. They require polar alignment for proper tracking, which can be frustrating for beginners. They are also typically more expensive for the same payload capacity. The counterweight system adds bulk and requires careful balancing. For casual visual observing, a simpler altazimuth or Dobsonian mount is often easier to use.
How long does it take to set up an equatorial mount?
A beginner should expect 30 to 60 minutes for the first few setups, including polar alignment. With practice, the setup time drops to 10 to 15 minutes after 5 to 10 sessions. Experienced observers can set up and polar-align a familiar mount in under 10 minutes. Practicing the setup process during daylight significantly reduces the time needed on the first night.
Do you need to polar align for visual observing?
For visual observing, a rough polar alignment is sufficient. Pointing the RA axis approximately at Polaris gets you close enough that objects stay in view for several minutes with occasional manual tracking corrections. Precise polar alignment is necessary for long-exposure astrophotography but is overkill for casual visual use at low to medium magnifications.
Is an equatorial mount hard to set up?
An equatorial mount has a learning curve, but it is not inherently difficult. The first setup takes about an hour as you learn the parts and process. Most beginners become comfortable after 3 to 4 sessions. Practicing assembly during the daytime, understanding each component before heading out, and following a step-by-step guide make the process much easier than trying to figure it out in the dark on the first night.
Can I use an equatorial mount without a GoTo controller?
Yes, you can absolutely use an equatorial mount without GoTo. Non-motorized equatorial mounts use manual slow-motion controls for tracking and slewing. You find objects by star-hopping with a finderscope and track them by turning the RA slow-motion knob. GoTo is a convenience feature, not a requirement, and many experienced observers prefer manual mounts for their simplicity and reliability.
Conclusion
Learning how to set up an equatorial mount for the first time is a rite of passage for every amateur astronomer. It feels overwhelming at first, but the process is logical and repeatable once you understand the parts and the sequence. Position the tripod, mount the head, set your latitude, add counterweights, attach the telescope, balance both axes, align the finderscope, and polar-align the RA axis. That is the entire process in one sentence.
The three things that make the biggest difference for beginners are practicing in daylight, balancing the telescope properly, and being patient with polar alignment. Skip any of these and you will struggle. Embrace them and the mount becomes a tool that opens up the night sky rather than an obstacle to getting there.
Every experienced astronomer was once a beginner fumbling with counterweights and confused by RA and Dec. The setup that took you an hour today will be muscle memory in a few weeks. Once it clicks, you will have a mounting system that tracks the stars, supports astrophotography, and lets you explore deep-sky objects for as long as you want. That payoff is worth the initial learning curve. Clear skies, and happy observing.