
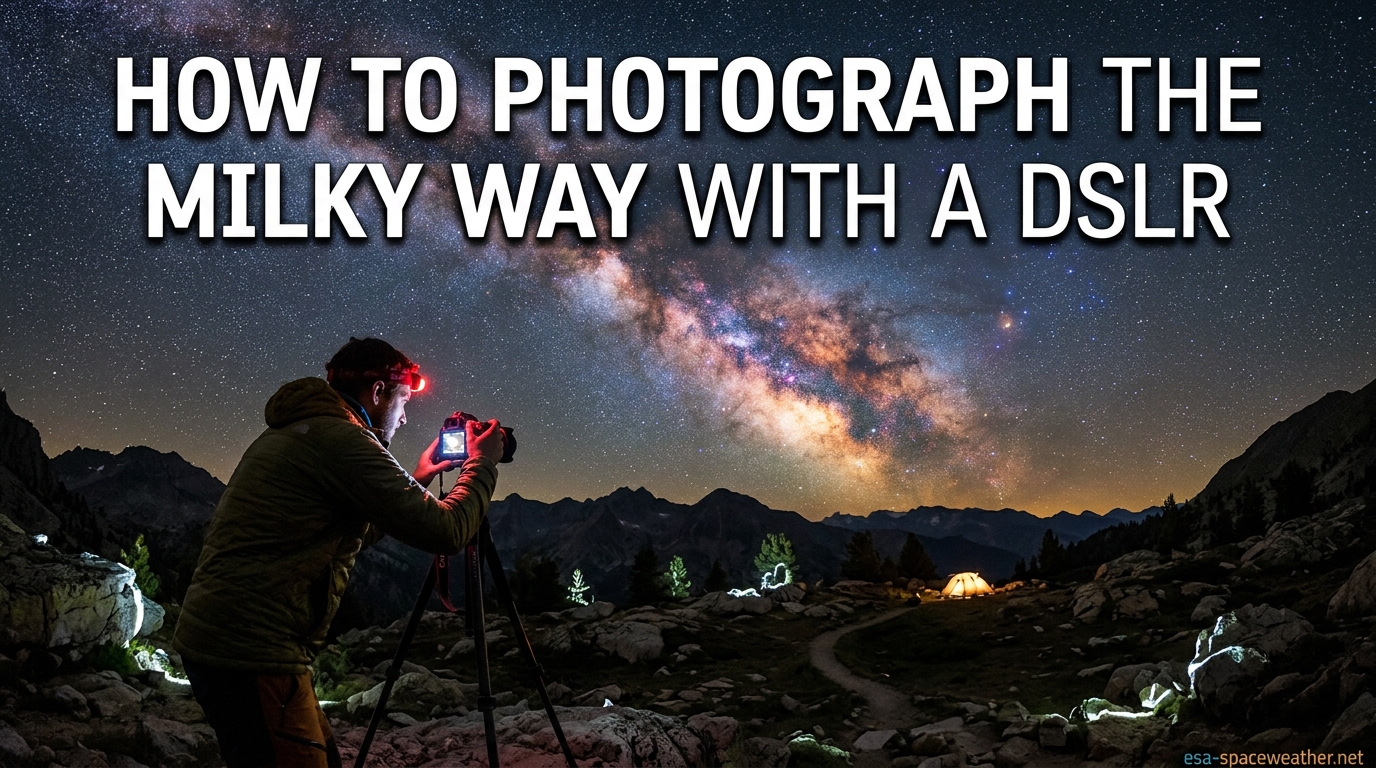
Learning how to photograph the Milky Way with a DSLR for the first time feels intimidating, but I promise you it is one of the most rewarding things you can do with a camera. I still remember my first successful Milky Way shot — a grainy, slightly trailed, but unmistakable band of stars stretching across a dark desert sky. That single photo changed how I saw night photography forever.
The truth is you do not need a telescope, a star tracker, or a $2,000 lens to capture our galaxy. A basic DSLR, a sturdy tripod, and a willingness to stand in the dark for an hour are enough to get started. What you really need is the right settings, a dark location, and a clear understanding of what to expect when you point your camera at the sky.
This guide walks you through every step of Milky Way photography from scratch. I will cover the gear you actually need, the camera settings that work on the very first try, how to focus in total darkness, and the common mistakes that ruin beginner shots. By the end, you will have everything required to head out tonight and come home with a photo you are proud of.
One thing that sets this guide apart from most others: we also cover how space weather conditions affect your night sky photography. As a site dedicated to space weather, we want you to understand that solar activity, airglow, and geomagnetic conditions all play a role in what your camera captures. That knowledge gives you an edge most beginners never think about.
Table of Contents
Quick-Start Camera Settings for Milky Way Photography
If you want to skip straight to the settings and start shooting, here is what I recommend for your very first attempt at Milky Way DSLR photography. These are the baseline values that work for most situations.
Full-frame DSLR settings:
- Mode: Manual (M)
- Aperture: f/2.8 or the widest your lens allows (f/1.4 to f/4.0)
- ISO: 3200 to 6400
- Shutter speed: 15 to 25 seconds (use the 500 rule, explained below)
- White balance: 3400K to 4400K (Kelvin)
- Image format: RAW
- Long exposure noise reduction: Off for now
- Image stabilization / vibration reduction: Off
Crop sensor (APS-C) DSLR settings:
- Mode: Manual (M)
- Aperture: f/2.8 or widest available
- ISO: 3200 to 6400 (some crop sensors handle 6400 better than others)
- Shutter speed: 10 to 15 seconds (shorter due to the 300 rule)
- White balance: 3400K to 4400K
- Image format: RAW
- Long exposure noise reduction: Off
- Image stabilization: Off
These settings are starting points, not absolutes. Every location, lens, and camera combination is slightly different. The goal is to capture as much light as possible while keeping stars as sharp points rather than streaks. Once you understand why each setting matters, you can adjust with confidence.
The single most important concept here is the 500 rule. It tells you the longest shutter speed you can use before stars start to trail due to Earth’s rotation. The formula is simple: divide 500 by your lens focal length. For a 24mm lens on a full-frame camera, that gives you about 20 seconds. On a crop sensor, use 300 instead of 500 — so a 24mm lens gives you roughly 12 seconds. We will break this down in detail later, but keep it in mind as you dial in your exposure.
What You Will Need: Equipment Checklist
One of the biggest misconceptions about Milky Way photography is that you need expensive, specialized gear. That is simply not true. Let me break down what you actually need, starting with the absolute essentials and moving to optional upgrades.
Your Camera Body: Full-Frame vs Crop Sensor
Any DSLR made in the last 10 years can photograph the Milky Way. Full-frame cameras (like the Nikon D750, Canon 5D series, or Sony a7 series) have larger sensors that gather more light and produce less noise at high ISO settings. They are ideal but not mandatory.
Crop sensor DSLRs (APS-C format) like the Canon Rebel series, Nikon D3x00 or D5x00 series, and similar models work well too. You will deal with more noise at high ISO, and you need shorter shutter speeds due to the crop factor, but the results can still be stunning. Many Reddit users post incredible Milky Way shots taken with basic crop-sensor cameras.
The key advantage of full-frame is signal-to-noise ratio (SNR) — the larger sensor pixels gather more photons per unit of noise, giving you cleaner images at ISO 6400. But do not let that stop you from starting with whatever camera you already own.
Your Lens: The Most Important Piece of Gear
If there is one place to invest money for Milky Way photography, it is the lens. You want a wide-angle lens with a fast aperture. Here is what I recommend at different budget levels.
Budget tier (kit lens): Your 18-55mm kit lens at 18mm and f/3.5 will work. It is not ideal, but beginners on Reddit regularly produce good results by stacking multiple exposures. Set it to 18mm, widest aperture, and accept that you will need shorter exposures and more noise reduction.
Mid tier (best value): A Rokinon or Samyang 14mm f/2.8 manual lens is the community favorite for budget Milky Way photography. These cost a fraction of name-brand equivalents and deliver excellent results. Manual focus is not a problem since you will be focusing manually anyway.
Premium tier: A 24mm f/1.4 lens (like the Sigma 24mm f/1.4 Art) is a Reddit favorite for wide-field astrophotography. The extra light gathering at f/1.4 lets you drop ISO or shutter speed significantly. Other excellent options include the Rokinon 24mm f/1.4 and the Sigma 14mm f/1.8 Art.
Any wide-angle lens with an aperture of f/2.8 or faster will work for photographing stars as points of light. Something 24mm or wider is ideal because it lets you use longer shutter speeds before trailing becomes visible.
Tripod: Non-Negotiable
You absolutely need a sturdy tripod. Any vibration during a 20-second exposure will blur your stars. Your tripod does not need to be expensive, but it needs to be stable enough to hold your camera completely still for at least 30 seconds.
If your tripod is lightweight, hang your camera bag from the center column to add stability. Avoid extending the center column if possible — keeping the camera low and using just the legs is more stable.
Remote Shutter Release or Intervalometer
Pressing the shutter button by hand introduces vibration. A remote shutter release or intervalometer solves this problem for just a few dollars. An intervalometer also allows exposures longer than 30 seconds using Bulb mode, which you may want later for star trail photography or tracked exposures.
If you do not have a remote release, use your camera’s 2-second self-timer. It is not as reliable, but it works in a pinch.
Red Headlamp
A red light headlamp preserves your night vision while letting you see your camera controls. White light ruins your dark-adapted eyes for up to 30 minutes. Every experienced Milky Way photographer carries a red headlamp.
Spare Batteries
Cold weather and long exposures drain batteries fast. Bring at least one spare battery, ideally two. Keep spares in an inside pocket close to your body to keep them warm. A battery that reads 80 percent in a warm car can die quickly in 30-degree night air.
When to Photograph the Milky Way
Timing is everything in Milky Way photography. You can have perfect gear and settings, but if the timing is wrong, the galactic core will be below the horizon or washed out by moonlight. Here is what you need to know about when to shoot.
Milky Way Season
The Milky Way core — the brightest, most photogenic part of our galaxy — is only visible from about February through October in the Northern Hemisphere. The peak season runs from April through July, when the core is high in the sky during nighttime hours.
Here is a rough month-by-month breakdown for the Northern Hemisphere:
- February to March: The core appears low on the southeastern horizon just before dawn. Great for horizon-hugging compositions.
- April to May: The core rises earlier, visible from midnight through early morning. Excellent shooting window.
- June to July: Peak season. The core is visible from sunset through the middle of the night and stands high in the sky.
- August to September: The core shifts to the southwestern sky, visible right after sunset. Still strong but the window shortens.
- October: The core sets shortly after twilight. Last chance before the off-season.
- November to January: The core is below the horizon at night. Only the fainter winter Milky Way band is visible.
For the Southern Hemisphere, the season is similar but the galactic core appears higher and more overhead, making for dramatic compositions. Southern Hemisphere shooters also get a better view of the galactic center.
Moon Phase: Shoot During New Moon
This is critical: the moon is your enemy when photographing the Milky Way. Even a crescent moon produces enough light to wash out the faint galactic detail. Check the lunar calendar and plan your shoot within 3 to 4 days of a new moon.
Reddit users consistently emphasize this point. Shooting when the moon is still up is one of the most common reasons beginners come home with flat, dull images. The moon does not have to be completely gone — a moon that sets an hour after twilight still leaves most of the night dark — but you want dark skies.
Time of Night: Astronomical Twilight
The best time to shoot is during astronomical darkness, which occurs when the sun is more than 18 degrees below the horizon. This is deeper than civil or nautical twilight. You can check astronomical twilight times for your location using apps like PhotoPills or websites like timeanddate.com.
Typically, full astronomical darkness begins about 90 minutes to 2 hours after sunset and ends about 90 minutes before sunrise. This is your shooting window.
How Space Weather Affects Your Milky Way Photos
This is where our guide differs from every other Milky Way tutorial on the internet. As a space weather resource, we want you to understand that the atmosphere above you is not static. Solar activity and geomagnetic conditions directly affect what your camera sees when pointed at the night sky.
Solar Activity and Airglow
The sun constantly emits charged particles, and when those particles interact with Earth’s upper atmosphere, they create a faint glow called airglow. Airglow is always present to some degree, but during periods of high solar activity it becomes much stronger.
A strong airglow can add a green, red, or yellow tint to your Milky Way photos that looks like light pollution but is actually natural. Sometimes this creates beautiful color in your image. Other times it reduces contrast and makes the Milky Way look washed out.
During solar maximum — the peak of the sun’s approximately 11-year cycle — airglow is noticeably stronger. We are currently in a period of elevated solar activity, which means you may see more airglow in your images than guides from a few years ago would suggest.
Aurora: Friend or Foe?
If you shoot from high latitudes (above about 50 degrees north or south), aurora activity can dramatically affect your night sky photos. A strong geomagnetic storm can paint the sky with green, pink, or red auroral light that either complements or completely overwhelms your Milky Way composition.
Check space weather forecasts before your shoot. A minor geomagnetic storm (G1) might add a subtle green glow to your horizon that looks beautiful in a Milky Way panorama. A severe storm (G4 or G5) could turn the entire sky green and obscure the Milky Way entirely.
Checking Space Weather Conditions
Before any Milky Way shoot, check the Kp index — a scale from 0 to 9 that measures geomagnetic activity. A Kp of 0 to 2 means quiet conditions and clean night skies. A Kp of 5 or above means a geomagnetic storm is in progress and aurora may be visible, even at lower latitudes than usual.
You can monitor space weather conditions right here on our site. Understanding these patterns helps you plan better shoots and avoid nights when atmospheric conditions will work against you. It also gives you the chance to capture something unexpected — like a Milky Way photo with a surprise aurora on the horizon.
Finding and Planning Your Location
Your location matters as much as your timing. Light pollution from cities, towns, and even distant highways can completely erase the Milky Way from your camera sensor. Finding a truly dark sky location is essential.
Use Dark Sky Maps
The Bortle scale rates sky darkness from Class 1 (pristine, darkest possible) to Class 9 (inner-city sky). You want to shoot from Bortle Class 1 to 3 for the best results. Class 4 can work if your composition is strong, but anything above Class 5 will significantly degrade your Milky Way detail.
Use the light pollution map at lightpollutionmap.info to find dark areas near you. Look for areas colored blue, gray, or black. Even driving 30 to 60 minutes outside a city can make a dramatic difference.
A dark sky finder tool shows you exactly where light pollution ends and true darkness begins. I always check this map before planning any Milky Way road trip.
Planning Apps: PhotoPills and Stellarium
PhotoPills is the gold standard for Milky Way planning. It shows you exactly where and when the galactic core will appear from any location on Earth. You can visualize the Milky Way arc, plan compositions with foreground elements, and even calculate the 500 rule for your specific lens.
Stellarium is a free, open-source alternative. It is a planetarium program that shows the night sky from any time and location. It does not have the photography-specific features of PhotoPills, but it is excellent for understanding where the Milky Way will be.
Both tools let you plan ahead so you are not guessing in the dark. I recommend scouting your location during daylight hours if possible, identifying interesting foreground elements like rock formations, trees, or buildings that will anchor your composition.
Scout Before You Shoot
If you can, visit your chosen location during the day. Walk around, identify foreground subjects, and figure out where the Milky Way will be relative to those subjects. Shooting blind in the dark is much harder than shooting a location you already know.
Pay attention to the horizon line to the south (in the Northern Hemisphere). The Milky Way core rises in the southeast and sets in the southwest, so you want a clear southern view without obstructing trees or hills.
How to Photograph the Milky Way With a DSLR
Now let us get into why each setting matters. Understanding the reasoning behind your camera settings is what separates someone who follows a checklist from someone who can troubleshoot in the field.
Aperture: Gather Maximum Light
Set your lens to its widest aperture — the lowest f-number. This is f/2.8 on most quality wide-angle lenses, f/1.4 on premium options, or f/3.5 on a kit lens. Wide aperture means the lens opening is as large as possible, letting in the maximum amount of light.
In Milky Way photography, light is everything. The difference between f/2.8 and f/4.0 is one full stop — that is half the light reaching your sensor. At night, every photon counts.
One trade-off to know: lenses shot wide open sometimes show coma aberration, where stars near the edges of the frame appear as small comets or blobs instead of points. Premium lenses control this better. If you see coma, try stopping down one-third or half a stop (like f/2.8 to f/3.2) and see if it improves.
ISO: Amplify the Signal
ISO amplifies the signal your sensor captures. For Milky Way photography, you need high ISO — typically 3200 to 6400 — because there is so little light available. The trade-off is noise: higher ISO introduces more digital grain.
Modern DSLRs handle high ISO remarkably well. A full-frame camera at ISO 6400 will show noise, but it is manageable in post-processing. Crop sensors at ISO 6400 show more noise, but noise reduction software like Sequator (free) or DxO DeepPRIME can clean it up effectively.
Start at ISO 3200. If your image is too dark, increase to 6400. If it is too bright (rare in dark locations), drop to 1600. The histogram — which we will cover next — tells you whether your exposure is correct.
Shutter Speed: The 500 Rule and 300 Rule
Shutter speed controls how long your sensor collects light. Longer exposures gather more light, but Earth’s rotation causes stars to appear as streaks if the exposure is too long. This is the most common beginner mistake: using too long a shutter speed and getting star trails instead of sharp points.
The 500 rule helps you calculate the maximum shutter speed for sharp stars. The formula: 500 divided by your focal length = maximum shutter speed in seconds.
Examples for full-frame cameras:
- 14mm lens: 500 / 14 = 35 seconds (round down to 30)
- 24mm lens: 500 / 24 = 20 seconds
- 35mm lens: 500 / 35 = 14 seconds
For crop sensor (APS-C) cameras, the crop factor (1.5x for Nikon, 1.6x for Canon) means stars trail faster. Use the 300 rule instead: 500 divided by (focal length x crop factor). Or more simply, divide 300 by your focal length.
Examples for crop sensor cameras (1.5x factor):
- 14mm lens: 300 / 14 = 21 seconds
- 18mm lens: 300 / 18 = 16 seconds
- 24mm lens: 300 / 24 = 12 seconds
These are maximums. For guaranteed sharp stars, especially on crop sensors, subtract a second or two from the calculated value. I would rather have a slightly darker image I can brighten in editing than a brighter image with trailed stars that cannot be fixed.
White Balance: Set It Once
For Milky Way photography, a Kelvin white balance between 3400K and 4400K gives natural-looking night skies. Lower values make the sky bluer; higher values make it warmer. If you shoot RAW — and you absolutely should — white balance can be adjusted later, but setting a good starting value helps you evaluate your photos on the camera LCD.
A common approach is to set white balance to 3800K or 4000K in-camera and fine-tune during editing. The Milky Way core has a natural warm reddish-brown tint from interstellar dust, while the surrounding sky tends toward blue-green. A neutral white balance lets both colors show naturally.
Shoot in RAW Format
Always shoot RAW, never JPEG. RAW files contain dramatically more data — typically 12 to 14 bits per channel versus 8 bits for JPEG. This gives you enormous latitude to adjust exposure, white balance, noise reduction, and color in post-processing.
A JPEG that looks too dark may have lost detail in the shadows that cannot be recovered. A RAW file from the same shot can often be brightened by 2 or 3 stops without losing quality. For night photography, this flexibility is essential.
Reading the Histogram for Night Sky Exposure
The histogram is a graph showing the distribution of light in your image, from pure black on the left to pure white on the right. For Milky Way photography, you want the histogram peak roughly in the left third to middle of the graph — not jammed against the left edge (underexposed) and not touching the right edge (overexposed).
The biggest mistake beginners make is trusting the camera LCD. At night, your LCD makes images look much brighter than they actually are. A photo that looks perfect on the LCD at 2 AM is often severely underexposed when you view it on a computer. The histogram does not lie.
Aim for the right side of your histogram to reach about one-quarter to one-third from the right edge. This is called exposing to the right (ETTR). It captures maximum data while avoiding overexposure, and the resulting image can be darkened in editing for cleaner results.
How to Focus on Stars at Night: Step by Step
Focusing is the number one challenge beginners face in Milky Way photography. Autofocus does not work on stars — there is not enough light or contrast for your camera’s autofocus system to lock on. You must focus manually, and it takes practice.
Here is the step-by-step method I use every single time, based on the Live View technique recommended overwhelmingly on Reddit and by professional astrophotographers.
Step 1: Switch to Manual Focus
Set your lens to manual focus. There is usually a switch on the side of the lens marked AF/MF. If your lens has focus-by-wire (common on mirrorless lenses), make sure the camera is powered on when you turn the focus ring.
Step 2: Find a Bright Star
Turn on your camera’s Live View (the rear LCD display) and point the camera at the brightest star you can see. Sirius, Vega, or Jupiter work well. Use your lens at its widest focal length first to find the star more easily.
Step 3: Zoom In on Live View
Use the magnification button on your camera to zoom into Live View by 5x or 10x. You should see the bright star as a small dot or blob on the screen. If the star is a large fuzzy circle, your focus is way off.
Step 4: Focus Manually
Slowly turn the focus ring back and forth while watching the star on the LCD. The goal is to make the star as small and sharp as possible. When the star is a tiny, tight point, you are in focus. Take your time — a few millimeters of focus ring movement makes a big difference.
Step 5: Lock Your Focus
Once focused, carefully tape the focus ring in place using a small piece of gaffer tape or painter’s tape. This prevents accidental movement when you recompose or adjust other settings. Many photographers mark the focus position with a paint pen for future shoots.
Alternative: Use the Infinity Mark
Most lenses have an infinity focus mark on the barrel. However, the marked infinity position is often not perfectly accurate for stars. It gets you close, but Live View focusing is always more precise. Use the infinity mark to get close, then fine-tune with Live View.
Common Focusing Mistakes
The most common mistake is thinking you are in focus when you are not. Stars that look sharp on the unmagnified LCD can be soft blobs when you zoom in. Always check focus at 10x magnification.
Another mistake is bumping the focus ring while adjusting your composition. If your stars look soft and you recently recomposed, recheck focus. It takes 30 seconds and saves an entire night of blurry photos.
Common Beginner Mistakes and How to Fix Them
Every experienced Milky Way photographer has made these mistakes. Learning to recognize and fix them is how you go from frustrating first attempts to consistently good results.
Mistake 1: Stars Are Trailing Instead of Sharp Points
This is the single most common complaint from beginners on Reddit. Your stars look like short lines or streaks instead of crisp dots. The cause is almost always shutter speed that exceeds the 500 or 300 rule.
Fix: Shorten your shutter speed. If you are shooting at 25 seconds with a 24mm lens on a crop sensor, drop to 12 seconds. Increase ISO or open aperture to compensate for the reduced light. Also double-check that your tripod is stable — vibration can mimic trailing.
Mistake 2: Photos Are Grainy and Dull
Your image looks noisy, flat, and lacks the vibrant Milky Way detail you see in other people’s photos. This usually means underexposure. When the histogram data is jammed against the left side, there is not enough signal to separate the Milky Way from sensor noise.
Fix: Increase your ISO or shutter speed (within the 500 rule). Expose to the right on your histogram. In post-processing, use noise reduction software like Sequator for stacking multiple frames, or DxO PhotoLab for single-frame noise reduction. Proper editing also dramatically improves perceived sharpness and detail.
Mistake 3: Stars Are Not Sharp (Focus Issues)
Your exposure and settings are correct, but stars look like soft blobs. This is a focus problem, plain and simple.
Fix: Redo the Live View focusing procedure described above. Be meticulous about making the star as small as possible at 10x magnification. Tape the focus ring afterward. If stars in the center are sharp but edges are soft, your lens may have coma aberration — try stopping down one-third of a stop.
Mistake 4: Light Pollution Washing Out the Milky Way
You can see the Milky Way faintly with your eyes, but your photos show an orange or gray haze instead of galactic detail.
Fix: Move to a darker location. Check the Bortle scale map and aim for Class 3 or darker. If you cannot move, try shooting when the light pollution source (usually a city) is behind the Milky Way rather than in front of it. Post-processing can remove some light pollution gradient, but nothing replaces a truly dark sky.
Mistake 5: Shooting When the Moon Is Up
The moon acts like a giant light pollution source. Even a quarter moon significantly reduces Milky Way visibility.
Fix: Check the moon phase and rise/set times before you go. Plan shoots within a few days of a new moon. If the moon rises during your shoot, finish your sky exposures before it appears and switch to foreground exposures afterward.
Mistake 6: Cold Weather Killing Your Battery
Your battery reads 80 percent when you leave the car, but dies after 30 minutes of shooting in the cold.
Fix: Keep spare batteries in an inside pocket against your body. Rotate batteries — when one gets cold, swap it for a warm one and put the cold one in your pocket to recover. Turn off image review to save power. If temperatures are below freezing, consider a battery grip with multiple batteries.
Mistake 7: Purple or Green Noise (Amp Glow)
Your image has a purple, green, or magenta cast in the corners or along one edge. This is amp glow — electronic noise from your camera’s sensor amplifier during long exposures.
Fix: This varies by camera model. Some cameras (certain Sony models, for example) are known for amp glow issues, sometimes called the “star eater” effect. The best fix is to take dark frames — cover your lens and take an exposure with the same settings — and subtract the dark frame during stacking. Many stacking programs do this automatically.
Do You Need a Star Tracker? (And Alternatives)
A star tracker is a motorized mount that rotates your camera to match Earth’s rotation, allowing longer exposures without star trailing. With a tracker, you can shoot at 60, 120, or even 300 seconds instead of being limited to 15-25 seconds.
The short answer for first-timers: no, you do not need a star tracker. Learn the basics first with untracked wide-field astrophotography. Once you are comfortable and want to push image quality further, a tracker becomes a worthwhile investment.
Image Stacking: The Free Alternative
Image stacking is the technique of taking multiple identical exposures and combining them in software to reduce noise. Instead of one 20-second exposure at ISO 6400, you take 15 to 20 exposures and let software average them together. The result is dramatically lower noise and more detail.
The signal-to-noise ratio improves with every frame you add. Four stacked frames have half the noise of a single frame. Sixteen frames have one-quarter the noise. This is why Reddit users report impressive results with basic DSLRs — they are stacking.
Free software options include:
- Sequator (Windows): Beginner-friendly, excellent for Milky Way foreground blending
- DeepSkyStacker (Windows): More advanced, better for deep-sky objects
- SiriL (Mac/Windows/Linux): Powerful cross-platform option
- Photoshop / Affinity Photo: Manual stacking using median blending layers
Stacking takes practice but costs nothing and dramatically improves image quality. I recommend learning it before investing in a tracker.
When to Buy a Star Tracker
If you find yourself limited by noise even after stacking 20 frames, or if you want to use longer focal length lenses for more detailed galactic core shots, a tracker makes sense. The Sky-Watcher Star Adventurer is the most popular entry-level option, frequently recommended on Reddit as worth the investment.
Post-Processing: Editing Your First Milky Way Photo
Editing is where your Milky Way photo comes to life. A RAW file straight from the camera often looks flat, dark, and unimpressive. Post-processing reveals the detail, color, and drama that are hiding in the data.
Basic RAW Workflow
Start in Lightroom, Adobe Camera Raw, Capture One, or your preferred RAW editor. Here is a beginner-friendly workflow:
Step 1: White Balance. Adjust temperature to 3800K to 4200K and tint slightly toward magenta to neutralize any green airglow cast. The exact values depend on your location and atmospheric conditions.
Step 2: Exposure. If you exposed to the right, you may need to bring exposure down slightly. If you underexposed, increase exposure carefully — pushing more than 1 to 2 stops introduces noise.
Step 3: Contrast and Tone. Increase contrast to make the Milky Way pop against the sky. Drop highlights slightly to control bright stars. Lift shadows carefully to reveal foreground detail without introducing noise.
Step 4: Clarity and Dehaze. Lightroom’s Dehaze slider is a secret weapon for Milky Way photos — it increases mid-tone contrast and makes the galactic dust lanes more visible. Use clarity sparingly (10 to 20) to avoid halos around stars.
Step 5: Noise Reduction. Apply luminance noise reduction of 15 to 30 for single-frame images. For stacked images, you need much less. Avoid color noise reduction above 25, as it can blur star colors.
Foreground Blending Basics
One challenge in Milky Way photography is that the settings for a well-exposed sky produce a pitch-black foreground. To capture both, take a separate exposure for the foreground — often a longer exposure or one taken during twilight — and blend the two images in Photoshop.
Sequator handles this automatically when you provide foreground images alongside sky images. For manual blending in Photoshop, use luminosity masks or a simple sky replacement: paste the foreground exposure as a new layer, then mask out the sky portion.
Stacking Workflow Summary
If you are stacking multiple frames, the workflow is: import all light frames (your actual Milky Way exposures) and any dark frames (lens-cap-on exposures for noise mapping) into Sequator or DeepSkyStacker. The software aligns the stars, averages the frames, and outputs a low-noise TIFF you can then edit normally.
The improvement is dramatic. A stacked image from 15 frames at ISO 6400 looks cleaner than a single frame at ISO 1600, with far more Milky Way detail visible.
Pre-Shoot Checklist: What to Do Before You Head Out
Use this checklist every time. It prevents the frustrating mistakes that ruin shoots.
- Check the moon phase — confirm you are within 4 days of a new moon
- Check astronomical twilight times for your location
- Check space weather and Kp index for airglow or aurora conditions
- Verify the Milky Way core position using PhotoPills or Stellarium
- Confirm your location on a dark sky map (Bortle Class 3 or better)
- Charge all batteries and pack at least one spare
- Format your memory card and confirm you are shooting RAW
- Disable long exposure noise reduction and image stabilization in camera
- Pack your tripod, remote shutter, red headlamp, and warm clothing
- Scout the location in daylight if possible
- Check weather forecast for clear skies and low humidity
- Tell someone where you are going and when you expect to return
Print this list or save it to your phone. Every item has saved at least one of my shoots from disaster.
FAQs
What settings do I need for Milky Way photography?
For your first attempt, use Manual mode at f/2.8 (or widest aperture), ISO 3200-6400, and a shutter speed of 15-25 seconds on a full-frame camera or 10-15 seconds on a crop sensor. Shoot in RAW format with white balance set to 3800-4000K. These baseline settings capture maximum light while keeping stars sharp.
What lens is best for photographing the Milky Way?
A wide-angle lens between 14mm and 24mm with an aperture of f/2.8 or faster is ideal. Budget favorites include the Rokinon or Samyang 14mm f/2.8 and 24mm f/1.4 manual lenses. Premium options include the Sigma 14mm f/1.8 Art and Sigma 24mm f/1.4 Art. Your kit lens at 18mm and f/3.5 will work for beginners using image stacking.
When is the best time to photograph the Milky Way?
The Milky Way core is visible from February through October in the Northern Hemisphere, with peak season from April through July. Shoot during astronomical darkness within 3-4 days of a new moon. The core rises in the southeast and sets in the southwest, so a clear southern view is ideal.
Can I photograph the Milky Way with a kit lens?
Yes, you can photograph the Milky Way with a standard 18-55mm kit lens. Set it to 18mm and f/3.5, use ISO 6400, and keep exposures to about 16 seconds on a crop sensor using the 300 rule. Your results will be noisier and less detailed than with a fast prime lens, but stacking multiple exposures in free software like Sequator significantly improves image quality.
How do I focus on stars at night?
Switch your lens to manual focus, turn on Live View, and point at the brightest star. Magnify Live View to 10x and slowly turn the focus ring until the star becomes the smallest, sharpest point possible. Tape the focus ring to prevent movement. The lens infinity mark gets you close, but Live View focusing is always more precise.
Why are my stars blurry or trailing?
Stars trail when your shutter speed exceeds the 500 rule (full-frame) or 300 rule (crop sensor), which accounts for Earth’s rotation. Calculate maximum shutter speed by dividing 500 by your focal length for full-frame, or 300 for crop sensors. Shorten your exposure to fix trailing. Blurry stars can also result from poor focus, tripod vibration, or accidentally leaving image stabilization on.
Do I need a star tracker for Milky Way photography?
No, a star tracker is not required for beginner Milky Way photography. You can achieve excellent results with untracked wide-field astrophotography using the 500 rule and image stacking. A tracker becomes worthwhile when you want to use longer focal lengths, achieve lower noise through longer exposures, or photograph deep-sky objects beyond the Milky Way.
What is the 500 rule in astrophotography?
The 500 rule calculates the maximum shutter speed before stars trail due to Earth’s rotation. Divide 500 by your lens focal length in millimeters. For example, a 24mm lens allows about 20 seconds (500 / 24 = 20.8) on a full-frame camera. On a crop sensor, use 300 instead of 500, so a 24mm lens allows about 12 seconds. Always round down and subtract a second for safety.
Capturing Your First Milky Way Photo
Learning how to photograph the Milky Way with a DSLR for the first time is a journey that starts with understanding a few fundamentals and ends with standing under a sky full of stars, creating images you did not think were possible. The settings, techniques, and troubleshooting steps in this guide give you everything you need to succeed on your very first night out.
Remember the essentials: shoot during a new moon from a dark location, use manual mode with a wide aperture and high ISO, apply the 500 or 300 rule for shutter speed, focus carefully using Live View, and shoot in RAW. Everything else is refinement. Check space weather conditions before you go, use the pre-shoot checklist, and do not be afraid to experiment.
Your first Milky Way photo might not be perfect. Mine certainly was not. But it will be yours — a genuine capture of our galaxy taken with your own hands and your own camera. From there, stacking, tracking, and advanced editing will take your images to the next level. The most important step is simply getting out there. Clear skies.