
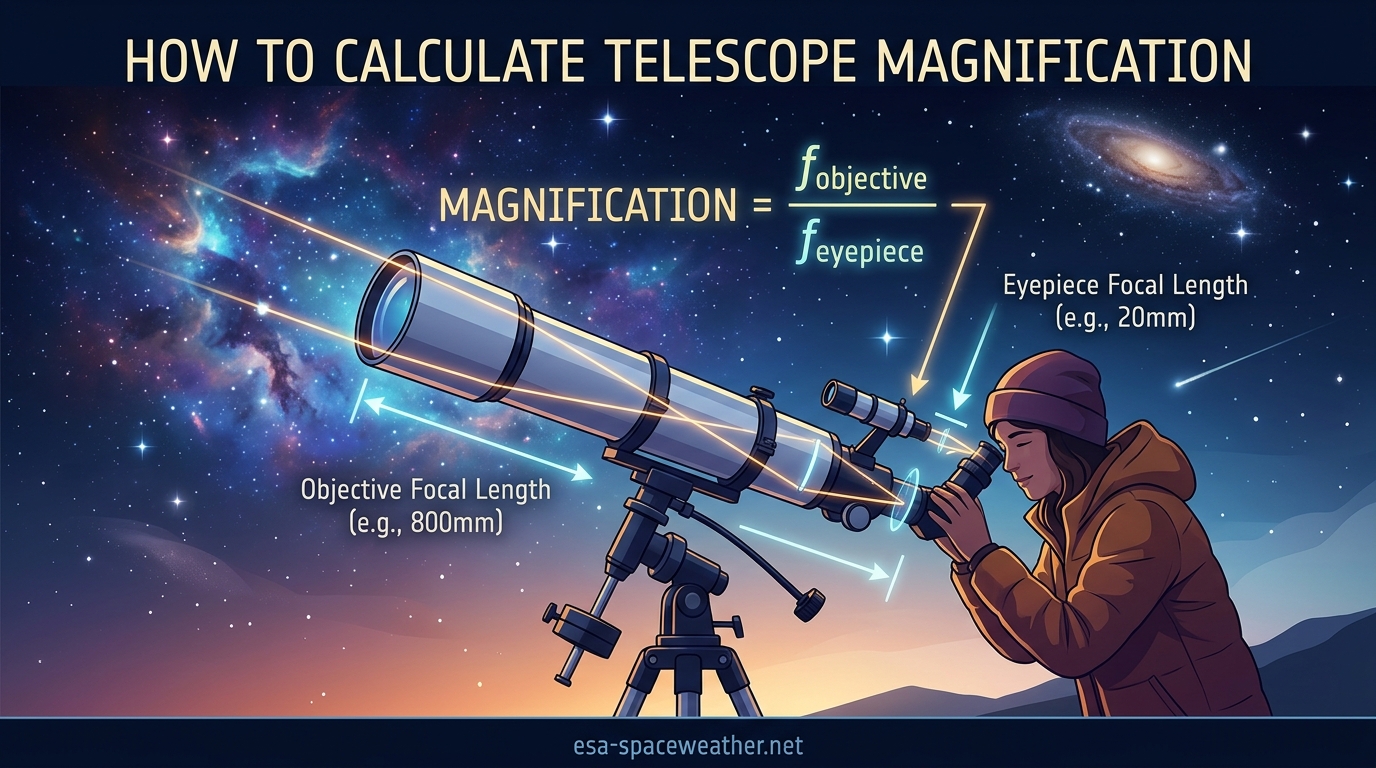
Telescope magnification is calculated by dividing the telescope’s focal length by the eyepiece’s focal length. The formula is simple:
Magnification = Telescope Focal Length / Eyepiece Focal Length
For example, a telescope with a 1200mm focal length used with a 25mm eyepiece produces 48x magnification (1200 / 25 = 48).
Here is the quick step-by-step process:
- Find your telescope’s focal length (printed on the tube or in the manual, measured in mm).
- Find your eyepiece’s focal length (engraved on the eyepiece barrel, measured in mm).
- Divide the telescope focal length by the eyepiece focal length.
- The result is your magnification power, expressed as a number followed by “x” (e.g., 100x).
If you are using a Barlow lens, multiply your final magnification by the Barlow’s power factor (2x, 3x, etc.).
Understanding how to calculate the magnification of your telescope and eyepiece is one of the most important skills for any amateur astronomer. It tells you exactly how much your viewing system enlarges the object you are observing, and it helps you choose the right eyepiece for each target.
Many beginners assume that higher magnification is always better. That is one of the most common misconceptions in amateur astronomy. Pushing magnification too high on a small telescope leads to dim, blurry, and disappointing views. The reality is that magnification is just one variable in the observing equation, and it interacts closely with aperture, exit pupil, and atmospheric seeing conditions.
I have spent years helping newcomers at star parties, and the most common question I hear is “How much magnification does this telescope have?” The answer depends entirely on which eyepiece you are using. A single telescope can deliver anywhere from 15x to 400x depending on the eyepiece attached to it. This guide will walk you through the exact calculation process step by step, with real-world examples you can follow along with your own equipment.
By the end of this article, you will know the telescope magnification formula, understand maximum and minimum useful magnification limits for your scope, and be able to pick the right eyepiece for any observing situation.
Table of Contents
Understanding Focal Length: The Foundation of Magnification
Before diving into the formula, you need to understand what focal length means. Focal length is the distance (measured in millimeters) from the telescope’s main lens or mirror to the point where light converges to form an image. Every telescope has a fixed focal length that is determined by its optical design.
Telescope focal length is not the same as aperture. Aperture is the diameter of the main lens or mirror, which determines how much light your telescope gathers. Focal length is the distance that light travels inside the telescope tube to reach focus. Two telescopes can have the same aperture but very different focal lengths, and that difference changes the magnification you get from the same eyepiece.
You can find your telescope’s focal length in several places. It is usually printed on a label on the telescope tube, listed in the user manual, or found on the manufacturer’s website. Common focal lengths range from about 400mm for short-tube refractors to 2000mm or more for Schmidt-Cassegrain telescopes.
The eyepiece also has a focal length, and this is the variable you can change. Eyepiece focal lengths are engraved right on the barrel, typically ranging from about 2mm to 40mm. Shorter eyepiece focal lengths produce higher magnification, while longer focal lengths produce lower magnification.
The focal ratio is related to focal length but represents something slightly different. It is the focal length divided by the aperture (expressed as f/number). A telescope with a 1200mm focal length and a 200mm aperture has a focal ratio of f/6. While focal ratio affects exposure times in astrophotography, the focal length itself is what determines magnification.
One common point of confusion for beginners is whether aperture affects magnification directly. It does not. A 4-inch refractor and an 8-inch Dobsonian with the same 1200mm focal length produce the same magnification with a given eyepiece. However, the larger aperture gathers more light, so the image at that magnification will be brighter and show more detail. Aperture determines what you can see at a given magnification, not the magnification itself.
How to Calculate the Magnification of Your Telescope and Eyepiece
The telescope magnification formula is straightforward and uses just two numbers. Here is the core equation:
Magnification = Telescope Focal Length / Eyepiece Focal Length
That is it. One division problem gives you your exact magnification power. The result is written as a number followed by “x,” which stands for “times” or “power.” A result of 100 means 100x, or 100 times magnification.
Let us break down each variable:
Telescope Focal Length (FL_scope): This is a fixed number for your telescope. It does not change unless you add a focal reducer or Barlow lens. For a standard 8-inch Dobsonian, this is typically 1200mm. For a Celestron NexStar 8SE Schmidt-Cassegrain, it is 2032mm. For a short-tube 80mm refractor, it might be 400mm.
Eyepiece Focal Length (FL_eyepiece): This is the number you can control by swapping eyepieces. Every eyepiece has its focal length marked on the side. A 25mm Plössl eyepiece, a 10mm Plössl, and a 6mm eyepiece all produce different magnifications on the same telescope.
The key relationship to remember is that shorter eyepiece focal lengths produce higher magnification. A 6mm eyepiece gives you twice the magnification of a 12mm eyepiece on the same telescope. This inverse relationship is why astronomers build collections of eyepieces at different focal lengths.
One important note: the formula assumes you are using the eyepiece directly in the telescope’s focuser. If you add a Barlow lens between the telescope and the eyepiece, the magnification changes. We cover that in detail later in this guide.
Step-by-Step Guide: Calculating Your Telescope’s Magnification
Here is a foolproof step-by-step process for calculating telescope magnification. Follow these steps with your own equipment.
Step 1: Find Your Telescope’s Focal Length
Look for a label on the telescope tube or check the user manual. The focal length is always given in millimeters. If you have a telescope with a listed focal ratio (f/number) and you know the aperture, you can calculate focal length by multiplying them. For example, an 8-inch (203mm) telescope at f/6 has a focal length of 1218mm (203 x 6).
Write this number down. You will use it for every magnification calculation with this telescope.
Step 2: Read the Eyepiece Focal Length
Look at the barrel of your eyepiece. The focal length is engraved or printed on it, usually measured in millimeters. Common values include 32mm, 25mm, 20mm, 15mm, 10mm, 6mm, and 4mm. The number might be small, so check carefully.
If you have a zoom eyepiece (typically 8mm to 24mm), the focal length changes as you rotate the barrel. You can calculate magnification at any zoom position by using the current focal length reading.
Step 3: Divide Telescope Focal Length by Eyepiece Focal Length
This is the actual calculation. Take the telescope focal length and divide it by the eyepiece focal length.
For example, if your telescope has a 1000mm focal length and your eyepiece is 20mm:
1000 / 20 = 50x magnification.
Use a calculator if needed. There is no shame in double-checking the math, and many experienced observers keep a magnification chart handy so they do not have to recalculate every time.
Step 4: Account for Any Barlow Lens
If you are using a Barlow lens, multiply your calculated magnification by the Barlow factor. A 2x Barlow doubles the magnification, while a 3x Barlow triples it.
For example, if you calculated 100x and you add a 2x Barlow, your effective magnification becomes 200x.
The Barlow effectively increases the telescope’s focal length rather than changing the eyepiece, but the mathematical result is the same as multiplying the final magnification.
Step 5: Interpret Your Result
A magnification of 50x means the object appears 50 times larger than it does to the naked eye. The Moon, which subtends about 0.5 degrees in the sky, will fill a good portion of your eyepiece field of view at 50x.
Ask yourself whether this magnification is appropriate for your target. Low magnifications (20x to 50x) are great for wide-field views of star clusters and large nebulae. Medium magnifications (50x to 150x) work well for the Moon, planets, and smaller deep-sky objects. High magnifications (150x to 300x) are reserved for planets and double stars on nights with steady atmosphere.
Worked Examples: Real Telescope and Eyepiece Combinations
Let us work through four real-world examples that cover the most common telescope types beginners own. Grab your own telescope specs and follow along.
Example 1: 8-Inch Dobsonian with a 25mm Eyepiece
The classic 8-inch Dobsonian (such as the Orion XT8 or Sky-Watcher 200P) has a focal length of 1200mm. This is one of the most popular beginner telescopes, and for good reason.
Using the standard 25mm eyepiece that typically comes included:
1200 / 25 = 48x magnification.
At 48x, you get a wide, bright view that is perfect for scanning the Milky Way, observing large star clusters like the Pleiades, and finding your way around the sky. This is an excellent magnification for beginners learning to navigate.
Example 2: Celestron NexStar 8SE with a 10mm Eyepiece
The NexStar 8SE is an 8-inch Schmidt-Cassegrain with a focal length of 2032mm. The longer focal length is inherent to the folded optical design of Schmidt-Cassegrain telescopes.
Using the included 10mm eyepiece:
2032 / 10 = 203x magnification.
At 203x, you can see Saturn’s rings clearly, Jupiter’s cloud bands and Galilean moons, and surface detail on Mars during opposition. This is a powerful planetary observing magnification.
Example 3: Orion ShortTube 80 Refractor with a 20mm Eyepiece
The ShortTube 80 is an 80mm refractor with a short focal length of 400mm. It is a portable, wide-field instrument popular for grab-and-go astronomy.
Using a 20mm eyepiece:
400 / 20 = 20x magnification.
At 20x, this telescope provides extremely wide views that are ideal for large star fields, the Andromeda Galaxy, and the Orion Nebula. You will not see fine detail, but the expansive field of view makes up for it when sweeping the sky.
Example 4: 8-Inch Dobsonian with a 6mm Eyepiece and 2x Barlow
Here is a more advanced setup. Take the same 8-inch Dobsonian (1200mm focal length) but use a 6mm eyepiece combined with a 2x Barlow lens.
First, calculate the base magnification:
1200 / 6 = 200x.
Then multiply by the 2x Barlow factor:
200 x 2 = 400x magnification.
At 400x, you are pushing toward the maximum useful magnification for an 8-inch telescope. On a night with steady atmospheric seeing, you can use this power for splitting tight double stars or examining fine lunar rilles. On most nights, however, the atmosphere will not support 400x, and the image will look soft and wobbly.
Telescope Magnification Chart: Quick Reference Table
Here is a magnification reference chart showing what magnification you get with common telescope and eyepiece combinations. Use this as a quick lookup tool when planning your observing sessions.
This chart covers four of the most popular telescope types among amateur astronomers and pairs them with the most common eyepiece focal lengths.
8-Inch Dobsonian / Newtonian (1200mm focal length):
- 32mm eyepiece = 37.5x (wide-field scanning)
- 25mm eyepiece = 48x (general observing, star clusters)
- 15mm eyepiece = 80x (Moon, nebulae)
- 10mm eyepiece = 120x (planets, lunar detail)
- 6mm eyepiece = 200x (high-power planetary)
- 4mm eyepiece = 300x (maximum practical, steady nights only)
Celestron NexStar 8SE / Schmidt-Cassegrain (2032mm focal length):
- 32mm eyepiece = 63.5x (wide field)
- 25mm eyepiece = 81x (general observing)
- 15mm eyepiece = 135x (Moon, planets)
- 10mm eyepiece = 203x (high-power planetary)
- 6mm eyepiece = 339x (very high power)
- 4mm eyepiece = 508x (beyond practical limits for most conditions)
Orion ShortTube 80 / Refractor (400mm focal length):
- 25mm eyepiece = 16x (extremely wide field)
- 20mm eyepiece = 20x (wide-field scanning)
- 10mm eyepiece = 40x (Moon, bright clusters)
- 6mm eyepiece = 66x (limited by small aperture)
- 4mm eyepiece = 100x (maximum practical for 80mm)
Orion SkyScanner 100mm Reflector (400mm focal length):
- 20mm eyepiece = 20x (wide field)
- 10mm eyepiece = 40x (Moon, planets at entry level)
- 6mm eyepiece = 66x (maximum practical for 100mm)
Notice how the same eyepiece produces very different magnifications depending on the telescope’s focal length. A 10mm eyepiece gives you 40x on a ShortTube 80 but 203x on a NexStar 8SE. This is why you cannot talk about eyepiece magnification without also knowing your telescope’s focal length.
Maximum and Minimum Useful Magnification
Not all magnifications are useful. Every telescope has a practical range of magnification it can handle well, and this range is determined primarily by aperture.
The Maximum Useful Magnification Rule
The most widely accepted rule for maximum useful magnification is 50x to 60x per inch of aperture, or approximately 2x the aperture in millimeters. This means an 8-inch (203mm) telescope has a theoretical maximum of about 400x to 460x.
In practice, the atmosphere usually limits you before you reach this theoretical maximum. On most nights, atmospheric seeing conditions limit useful magnification to about 250x to 300x, regardless of how large your telescope is. Only on rare nights of exceptionally steady air can you push beyond 300x and see meaningful detail.
Some sources cite 2x the aperture in millimeters as the maximum. For an 8-inch scope (203mm), that gives 406x. Others suggest 2.5x the aperture in millimeters, capping at about 350x. The variation comes from the fact that this is a guideline, not a hard physical law. Under average seeing conditions, you will rarely use more than 300x regardless of your telescope size.
Pushing magnification beyond the useful maximum does not reveal more detail. The image simply becomes larger, dimmer, and blurrier. I have seen beginners at star parties try to push a 60mm refractor to 300x using a 4mm eyepiece, and the result is always the same: a huge, dim, featureless blob. The resolving power of the aperture simply cannot support that level of magnification.
The Minimum Useful Magnification
There is also a minimum useful magnification, and it is tied to a concept called exit pupil. The exit pupil is the diameter of the beam of light that exits the eyepiece and enters your eye.
A fully dark-adapted human eye has a pupil diameter of about 7mm. If your telescope’s exit pupil is larger than 7mm, the extra light does not enter your eye and is wasted. This sets the lowest useful magnification for a given telescope.
You can calculate exit pupil using this formula:
Exit Pupil = Telescope Aperture (mm) / Magnification
Alternatively, since magnification equals telescope focal length divided by eyepiece focal length, exit pupil also equals eyepiece focal length divided by focal ratio. For an 8-inch f/6 telescope, a 42mm eyepiece would give a 7mm exit pupil (42 / 6 = 7), which is the maximum useful size.
For most amateur telescopes, the lowest useful magnification ranges from about 15x to 40x. Going below this does not make the image brighter or wider; it just wastes light.
The practical exit pupil range for visual observing is roughly 0.5mm to 7mm. Below 0.5mm, the image becomes too dim and the effects of floaters in your eye become distracting. Above 7mm, light is wasted because it cannot enter your eye’s pupil.
How Barlow Lenses Affect Magnification
A Barlow lens is an accessory that effectively increases your telescope’s focal length, which in turn increases the magnification of any eyepiece you use with it. It is one of the most cost-effective ways to expand your magnification range.
A 2x Barlow lens doubles the magnification of any eyepiece. If your 25mm eyepiece gives you 48x on your 1200mm Dobsonian, adding a 2x Barlow makes that same eyepiece deliver 96x. A 3x Barlow triples the magnification.
Think of a Barlow as a multiplier. The formula becomes:
Magnification with Barlow = (Telescope FL / Eyepiece FL) x Barlow Factor
The beauty of a Barlow lens is that it effectively doubles your eyepiece collection. If you own three eyepieces and a 2x Barlow, you have six usable magnification levels. This is why experienced observers often recommend a Barlow as one of the first accessories a beginner should buy.
One thing to keep in mind: a Barlow lens preserves the eye relief of the original eyepiece. This means that if you have a long-focal-length eyepiece with comfortable eye relief, using a Barlow to achieve high magnification will be much more comfortable than using a short-focal-length eyepiece that has minimal eye relief.
Barlow lenses do introduce a small amount of light loss and potential image degradation, but modern multi-element Barlows from reputable manufacturers are excellent. The trade-off is almost always worth it for the added versatility.
Magnification and Image Brightness: The Trade-Off
One of the most important and least understood aspects of magnification is its relationship to image brightness. Higher magnification does not just make objects larger; it also spreads the same amount of collected light over a larger apparent area, which makes the image dimmer.
For point sources like stars, magnification has essentially no effect on brightness. Stars are so small that even at high magnification, they remain essentially points, and their perceived brightness stays constant. This is why you can push magnification higher when observing double stars and still see them clearly.
For extended objects like nebulae, galaxies, and the Moon, the situation is different. When you double the magnification, you spread the object’s light across four times the apparent area. The image gets dimmer by a factor of four. This is why bright, detailed views of galaxies and nebulae are typically achieved at lower magnifications (30x to 100x) rather than high power.
This brightness trade-off is a major reason why aperture matters more than magnification for deep-sky observing. A larger aperture collects more light, which offsets the dimming effect of magnification. An 8-inch telescope at 100x will show far more detail in the Orion Nebula than a 4-inch telescope at the same magnification, simply because the larger scope gathers four times as much light.
Many beginners are surprised when they look at a galaxy at 200x and see almost nothing. They expected a spectacular view but got a faint smudge. The solution is almost always to reduce magnification. Dropping to 50x or 60x concentrates the available light and makes the galaxy much easier to detect.
Choosing the Right Magnification for Your Observing Target
Different celestial objects call for different magnification ranges. Here is a practical guide based on what experienced observers actually use under typical sky conditions.
The Moon: 50x to 250x
The Moon is bright, large, and full of detail, making it one of the most forgiving targets for magnification. At 50x, you can see the entire lunar disk and identify major maria and craters. At 150x to 200x, individual crater rims, mountain peaks, and rilles become visible. On nights with steady seeing, you can push to 250x or higher for detailed exploration of specific regions.
Planets: 100x to 300x
Planets are small and bright, which means they benefit from higher magnification. Jupiter shows its cloud bands and Great Red Spot at around 150x to 200x. Saturn’s rings and Cassini Division are visible from about 150x onward. Mars reveals surface features best at 200x to 300x during close approaches. The practical limit is almost always the atmosphere, not your equipment.
Deep-Sky Objects (Galaxies, Nebulae, Clusters): 30x to 150x
Deep-sky objects are faint and often large, so lower magnification is usually better. Large nebulae like the Orion Nebula (M42) look best at 50x to 100x. Galaxies are typically observed at 50x to 120x to maximize surface brightness. Globular clusters benefit from slightly higher magnification (100x to 200x) to resolve individual stars. Open star clusters look best at 30x to 60x for wide-field views.
Double Stars: 150x to 400x
Double stars are point sources, so magnification does not reduce their brightness. This makes them ideal targets for high power. Splitting tight double stars like the Double Double (Epsilon Lyrae) may require 200x or more. On nights with exceptional seeing, dedicated double-star observers push to 400x or beyond on suitable targets.
Star Hopping and Finding Objects: 25x to 50x
When you are locating objects to observe, always start with your lowest magnification eyepiece. The wider field of view at low power makes it much easier to find and center your target. Once you have found the object, you can swap to a higher magnification eyepiece for detailed observation.
This approach is sometimes called the “low power, find; high power, refine” method, and it is the standard practice among experienced observers. Trying to find objects at high magnification is frustrating because the narrow field of view makes it easy to lose your bearings.
Common Magnification Mistakes to Avoid
After helping many beginners set up their telescopes, I see the same magnification mistakes repeated over and over. Here are the most common ones and how to avoid them.
Mistake 1: Chasing maximum magnification. Many beginners buy a telescope advertised as delivering “675x” and expect to use that power regularly. In reality, the maximum useful magnification of a small telescope (60mm to 80mm aperture) is about 120x to 160x. Pushing beyond that produces dim, blurry images that show less detail than a lower magnification would.
Mistake 2: Ignoring atmospheric seeing. Even with a large telescope, the atmosphere sets a hard ceiling on useful magnification. On most nights, 250x to 300x is the practical maximum. Trying to use 500x on a night of poor seeing will give you a worse view than 200x would.
Mistake 3: Using high magnification on faint deep-sky objects. Galaxies and nebulae are already faint. Increasing magnification spreads their light further and makes them harder to see. For these objects, lower magnification with a darker sky is the winning combination.
Mistake 4: Not knowing your telescope’s focal length. Without this number, you cannot calculate magnification. Take five minutes to find it and write it down. It is printed on the telescope tube or in the manual.
Mistake 5: Buying eyepieces without a plan. Random eyepiece purchases often result in overlapping magnifications or gaps in your magnification range. A good eyepiece set should provide magnifications spaced roughly 1.5x apart, giving you options for low, medium, and high power observing.
Apparent Field of View vs. True Field of View
Magnification affects how much sky you can see through your eyepiece. This is where apparent field of view and true field of view come into play.
Apparent field of view (AFOV) is a property of the eyepiece itself. It describes how wide the circular view appears when you look through the eyepiece, regardless of the telescope. Standard Plössl eyepieces typically have an AFOV of about 50 to 52 degrees. Wide-field designs like Explore Scientific 82-degree eyepieces or Tele Vue Naglers offer 82 degrees or more.
True field of view (TFOV) is the actual slice of sky you can see through the complete telescope and eyepiece system. It is calculated by dividing the eyepiece’s apparent field of view by the magnification.
True Field of View = Apparent FOV / Magnification
For example, a 50-degree AFOV eyepiece at 100x magnification gives you a true field of 0.5 degrees, which is about the diameter of the full Moon. At 200x with the same eyepiece, the true field shrinks to 0.25 degrees.
This matters because higher magnification always means a narrower slice of sky. If your true field of view is too narrow, large objects will not fit in the eyepiece. This is another reason why low magnification is preferred for large deep-sky objects.
Calculating Magnification Without an Eyepiece (Astrophotography)
If you are doing astrophotography at prime focus (camera attached directly to the telescope with no eyepiece), the concept of magnification is less meaningful. Instead, astrophotographers talk about image scale, which is determined by the telescope’s focal length and the camera’s sensor size.
However, you can still express a sort of magnification by comparing the angular field of view of your camera sensor to the field of view of the naked eye. A telescope with a 2000mm focal length and a standard APS-C sensor produces an image scale where the full Moon fills the frame nicely.
If you use a Barlow lens or a focal reducer in astrophotography, it changes the effective focal length of the system, which changes the image scale. A 2x Barlow doubles the effective focal length and halves the field of view on your camera sensor.
For visual observers, the eyepiece formula we covered earlier is all you need. The prime focus calculation is relevant only if you are transitioning from visual observing to astrophotography.
FAQs
Is 40x magnification good for a telescope?
Yes, 40x is a useful magnification for many observing situations. At 40x, you can see the entire lunar disk, observe bright planets like Jupiter and Saturn with basic detail, and enjoy wide-field views of star clusters and large nebulae. It is especially good for beginners with smaller telescopes (60mm to 80mm aperture) where 40x provides a bright, steady image without exceeding the scope’s useful magnification range.
What can I see with a 30x telescope?
At 30x magnification, you can see the Moon’s craters and maria clearly, observe Jupiter as a small disk with its four Galilean moons, see Saturn’s rings as a distinct shape, and resolve bright star clusters like the Pleiades. You can also spot the Orion Nebula, the Andromeda Galaxy, and double stars. Large deep-sky objects actually look better at 30x than at higher powers because the image stays bright and the field of view is wide enough to fit them.
Is 200x magnification good on a telescope?
Yes, 200x is an excellent magnification for planetary and lunar observing, provided your telescope has enough aperture (at least 4 inches or 100mm) and the atmospheric seeing conditions are steady. At 200x, you can see Saturn’s Cassini Division, Jupiter’s cloud belts and Great Red Spot, polar ice caps on Mars during opposition, and fine detail along the lunar terminator. However, 200x is too high for most deep-sky objects like galaxies and nebulae, which will appear too dim at this power.
Can you have too much magnification on a telescope?
Absolutely. Exceeding your telescope’s maximum useful magnification (approximately 50x to 60x per inch of aperture, or about 2x the aperture in millimeters) produces a larger but dimmer and blurrier image with no additional detail. Atmospheric seeing conditions also impose a practical ceiling of about 250x to 300x on most nights regardless of telescope size. Pushing a small telescope to 500x or more is the most common beginner mistake and always results in a worse view than a moderate magnification would provide.
Conclusion: Mastering Your Telescope’s Magnification
Knowing how to calculate the magnification of your telescope and eyepiece gives you control over your observing experience. The formula is simple: divide your telescope’s focal length by your eyepiece’s focal length, and you have your magnification power.
Remember that magnification is a tool, not a goal. The best magnification depends on what you are observing, the size of your telescope, and the quality of the sky above you. Start low to find your target, then increase magnification only as far as the image quality and atmospheric conditions allow.
Build your eyepiece collection around magnifications spaced roughly 1.5x apart so you have options for every observing situation. Consider a Barlow lens to double your magnification range economically. And always remember that aperture, not magnification, is the most important specification of any telescope.
Now that you can calculate telescope magnification and understand the limits of useful power, you are ready to get the most out of every observing session. Clear skies, and happy observing.