
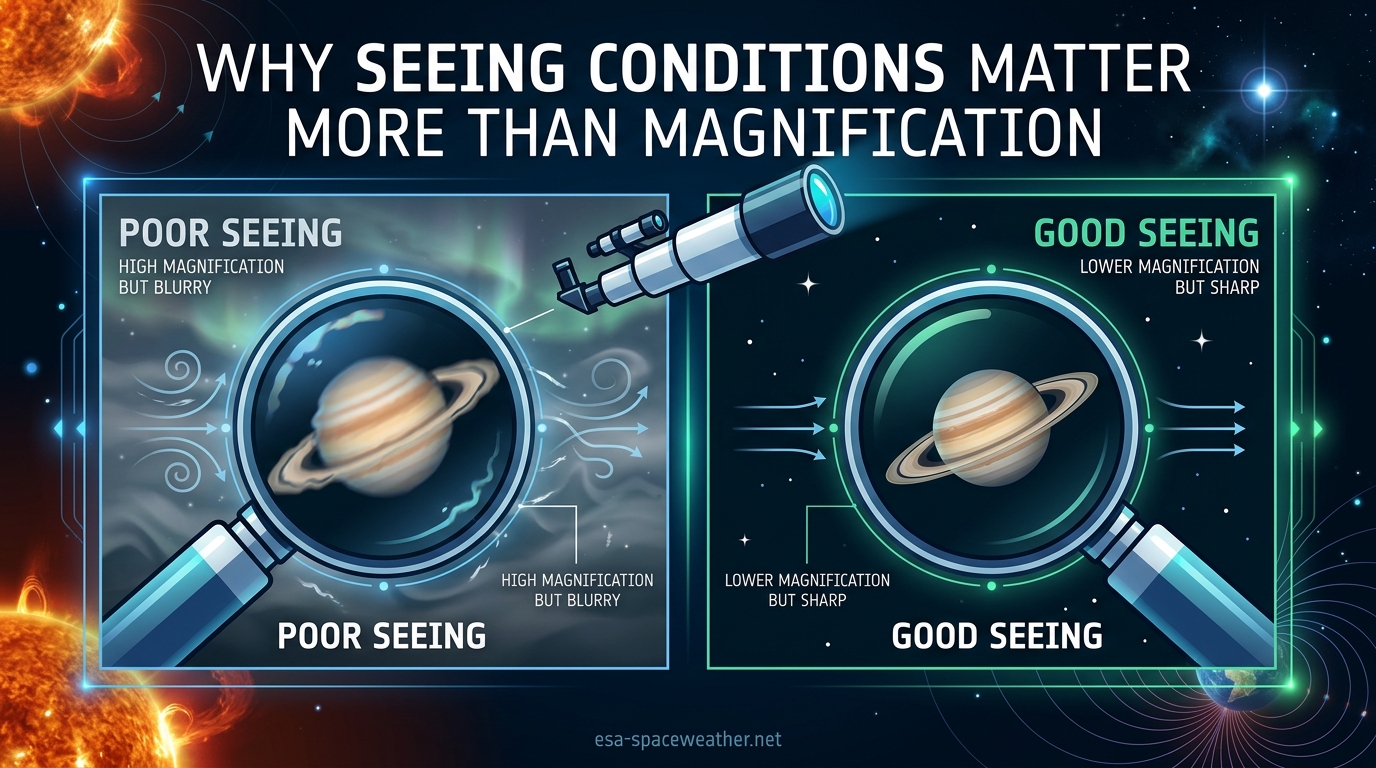
Every new telescope owner experiences the same disappointment. You point at Jupiter, crank the magnification to 400x, and instead of crisp cloud bands you get a boiling, shimmering blob. The instinct is to blame the scope or buy a stronger eyepiece. The real culprit is almost always the atmosphere above your head.
Seeing conditions determine how steady Earth’s air is on any given night, which directly controls how much fine detail you can resolve through any telescope. Magnification cannot create detail that the atmosphere has already blurred away. When seeing is poor, higher magnification simply produces a larger but equally blurry image at a dimmer brightness level.
Understanding why seeing conditions matter more than magnification is the single biggest upgrade you can make to your observing experience. It costs nothing, and it transforms how you use the equipment you already own. In this guide, I will walk through what atmospheric seeing actually is, why pushing magnification beyond what the air allows backfires, and how to predict and work with the conditions you have for the sharpest views possible.
Table of Contents
What Are Seeing Conditions?
Seeing conditions describe the optical steadiness of Earth’s atmosphere at any given moment. When air masses at different temperatures mix, they create density variations that bend and distort incoming starlight before it ever reaches your telescope. This effect is called atmospheric turbulence, and it is the primary reason stars twinkle and planets shimmer when viewed at high power.
Think of the atmosphere as a restless lens sitting between you and space. A calm atmosphere acts like smooth glass, passing light cleanly to your eyepiece. A turbulent atmosphere acts like rippling water, bending the light in unpredictable directions and smearing fine detail faster than any optical defect ever could.
Professional astronomers measure seeing in arcseconds. The best mountaintop observatories routinely achieve sub-arcsecond seeing, where the atmosphere blurs detail by less than one arcsecond. A typical backyard night delivers 2 to 4 arcseconds of seeing, which places a hard ceiling on the detail visible regardless of how large or expensive your telescope is.
It is critical not to confuse seeing with transparency. Transparency refers to how clear the air is, meaning how much light passes through without being absorbed or scattered by haze, humidity, or dust. A night can have crystal-clear transparency with terrible seeing, where stars are bright but boil relentlessly at the eyepiece. Conversely, a slightly hazy night can deliver remarkably steady air with exquisite fine detail on planets and double stars. Beginners often assume a crystal-clear night guarantees great viewing, but the two qualities are entirely independent.
Why Magnification Alone Cannot Fix Blurry Views
The most common mistake in amateur astronomy is believing that more magnification equals more detail. This assumption fails because magnification does not add information to an image. It enlarges whatever the telescope receives, including the atmospheric blur. If the air is smearing detail at a 3-arcsecond level, then 300x simply shows you that smeared image three hundred times larger than your eye would see it unaided.
Imagine taking a slightly out-of-focus photograph and zooming in on your phone. The image gets bigger, but the blur gets bigger right along with it. No amount of zoom creates sharpness that was never captured in the first place. Telescope magnification works the same way. The atmosphere sets the resolution limit, and magnification only determines how large that already-limited image appears.
Every telescope has a maximum useful magnification beyond which the image degrades rather than improves. The widely accepted formula is 2 times the aperture in millimeters, or roughly 50 times the aperture in inches. A 100mm refractor tops out around 200x under excellent conditions. A 200mm Dobsonian reaches about 400x. Push beyond these limits and you enter what observers call empty magnification, where the image grows larger but progressively dimmer and softer with no gain in visible detail.
On nights with mediocre seeing, that practical ceiling drops dramatically. Forum discussions among experienced observers consistently report that an average night caps usable magnification at roughly 200x to 250x, no matter how large the telescope is. On genuinely poor nights, even 100x to 150x can show obvious degradation. I have had nights with an 8-inch scope where 120x delivered better planetary detail than 250x, simply because the atmosphere could not support the higher power.
The Relationship Between Aperture and Seeing
One of the most counterintuitive facts in amateur astronomy is that larger telescopes are more affected by poor seeing than smaller ones. This happens because of how turbulent cells of air interact with different aperture sizes.
Atmospheric turbulence creates cells of air with slightly different refractive properties. These seeing cells are typically 10 to 20 centimeters across. A small telescope with an aperture under 100mm looks through a relatively narrow column of atmosphere and often samples a single cell at a time, catching moments of relative steadiness. A large telescope over 200mm samples many cells simultaneously, averaging their distortions together into a constantly shimmering image.
This is why experienced observers on Cloudy Nights and other astronomy forums often note that a quality 4-inch refractor can outperform an 8-inch reflector on planets during mediocre nights. The smaller scope is simply less sensitive to the atmospheric turbulence that wrecks the larger scope’s resolution advantage. Under poor seeing, the big mirror gathers more light but cannot resolve finer detail than the small refractor.
When seeing improves to excellent, the larger aperture pulls ahead because it can finally resolve finer detail than the smaller scope. The aperture advantage only materializes when the atmosphere allows it. On average nights, the practical resolution limit is set by the sky, not by your optics.
This insight matters for equipment decisions. If you observe primarily from a location with chronically mediocre seeing, investing in a smaller aperture scope with excellent optical quality may deliver more consistently satisfying planetary views than a large scope that rarely gets to stretch its legs.
How Telescope Thermal Equilibrium Affects Viewing
Even when the atmosphere above you is calm, thermal turbulence inside your own telescope can ruin the view. When you bring a cold telescope out from a warm house, the glass, tube walls, and mirror are all warmer than the night air. As heat radiates from these surfaces, it creates rising currents of warm air inside the optical tube.
These tube currents produce exactly the same kind of optical distortion as atmospheric turbulence. Light passing through layers of warm and cool air inside the tube gets refracted unevenly, softening the image before it ever reaches the eyepiece. The effect is most pronounced in closed-tube reflectors and compound scopes like Schmidt-Cassegrains, where warm air gets trapped inside the tube with limited ventilation.
A telescope needs to reach thermal equilibrium with the outside air before it performs at its best. For a small refractor, this can take 15 to 30 minutes. For an 8-inch Dobsonian, plan on 45 minutes to an hour. Large mirrors over 12 inches may need two hours or more to fully stabilize on a cold night.
You can speed up the process significantly. Many observers install small cooling fans behind the primary mirror of their reflectors to actively pull warm air out of the tube. Setting up your telescope outside before dusk so it cools during twilight is a simple, free strategy that costs nothing and pays off in sharper views all night long. I make it a habit to set up at least 45 minutes before I plan to observe.
Local Environment Factors That Degrade Seeing
The atmosphere high above you sets the global seeing limit, but your immediate surroundings create local turbulence that can be just as destructive. Recognizing and minimizing these local effects can improve your views more than any equipment upgrade.
Heat radiating from warm surfaces is the biggest local seeing killer. Concrete, asphalt, brick walls, and house roofs all absorb solar radiation during the day and release it slowly after sunset. This ongoing heat release creates rising columns of warm air that distort the view just like atmospheric turbulence. Observing over a rooftop or driveway typically produces noticeably worse seeing than observing over a grassy lawn.
Grass and natural vegetation stay much closer to ambient air temperature because they transpire moisture and do not store heat the way stone and pavement do. If you have a choice of observing locations in your yard, always favor grass over concrete. Even setting up a few meters away from a warm building wall can make a measurable difference.
Wind direction also plays a role. A gentle, laminar airflow flowing smoothly over flat terrain can actually stabilize local seeing by preventing thermal layers from forming. However, turbulent wind tumbling over nearby trees, fences, or buildings creates mixing and degrades the view. Observing from a sheltered spot that is still open to the sky often provides the steadiest local conditions.
Altitude provides a natural advantage because higher elevations mean you are looking through less atmosphere. Observers at 2,000 meters or higher routinely experience better seeing than those at sea level simply because there is less turbulent air between them and their targets. For those of us at lower elevations, the best strategy is maximizing the quality of what we can control locally.
How to Predict and Identify Good Seeing Conditions
Predicting seeing conditions before you set up saves time and prevents frustration. Several reliable tools and indicators can help you assess what the night will deliver.
The jet stream is the single most important predictor of seeing quality. When fast-moving upper-atmosphere winds are directly overhead, high-altitude turbulence almost guarantees poor seeing. Websites like AstroForecast and the meteoblue seeing forecast provide real-time jet stream maps and seeing predictions specific to your location. When the jet stream is more than 30 meters per second overhead, expect soft, mushy views regardless of how clear the sky looks.
You can also judge seeing with your own eyes before even setting up the telescope. Stars near the zenith that twinkle violently indicate turbulent air overhead. When stars burn with a steady, unwavering light, the seeing is likely good. Violent twinkling near the horizon is normal due to the thicker atmosphere you are looking through, but strong twinkling near the zenith is a warning sign of poor seeing ahead.
Seasonal patterns also provide guidance. In many locations, the most stable air masses arrive during late summer and early autumn, particularly on nights following the passage of a cold front when the air is clean and settled. Midwinter nights can deliver either excellent or terrible seeing depending on whether cold, calm high pressure has settled over the region.
Timing matters within the night itself. Seeing often improves after midnight as the ground and nearby structures finally release their stored heat and reach equilibrium with the air. The hours between about 1 AM and dawn frequently deliver the steadiest views of the entire night. This is when experienced planetary observers do their best work, waiting for those moments when the atmosphere briefly locks into stillness and extraordinary detail flashes into view.
Practical Tips for Getting Sharper Views Tonight
Knowing the theory is useful, but applying it transforms your actual observing sessions. Here is a practical checklist I have built over years of backyard astronomy to maximize image sharpness on any given night.
1. Cool your telescope before observing. Set your scope outside at least 45 minutes before you plan to start. For reflectors, consider a cooling fan. Thermal equilibrium alone can be the difference between a soft, disappointing view and a crisp, detailed one.
2. Start at low magnification and work up. Begin with a long focal length eyepiece that gives you about 50x to 80x. Assess the seeing by watching a bright star or planet. If the image is steady at low power, try increasing. Stop increasing when the image stops improving, even if the theoretical maximum magnification allows more.
3. Let your eyes adapt fully. Give yourself at least 20 to 30 minutes of darkness before attempting high-power planetary observation. Dark-adapted eyes see more subtle contrast features, and you will catch detail during fleeting moments of steadiness that a quick glance would miss entirely.
4. Observe over grass, not pavement. Choose the grassiest, most natural surface available in your yard. Avoid rooftops, warm walls, and concrete patios. If your only option is a warm surface, set up as early as possible so the immediate ground has time to cool.
5. Use the right eyepiece for the conditions. On mediocre nights, a quality eyepiece at 120x to 150x will almost always outperform a premium eyepiece pushed to 300x. Keep a range of focal lengths available and let the atmosphere, not your ambition, dictate the magnification.
6. Try color filters for planetary viewing. When seeing is less than ideal, color filters can enhance contrast on Jupiter and Saturn. A light blue Wratten 82 or 80A filter can bring out cloud band detail by reducing the wavelength scatter that poor seeing produces. Filters do not fix bad seeing, but they can squeeze slightly more detail out of mediocre conditions.
7. Be patient and wait for moments of steadiness. Even on mediocre nights, the atmosphere occasionally calms for a second or two and extraordinary detail snaps into view. Experienced observers call these seeing windows, and they are the reason seasoned planetary observers spend long stretches just watching at the eyepiece. The detail you see in those brief moments is real and memorable. Patience is the most underrated observing skill.
8. Keep an observing log. Track the date, weather conditions, jet stream speed, and the magnification that worked best for each session. Over time, you will build a personal database that tells you which conditions deliver the sharpest views from your specific location.
9. Check forecasts before committing to a session. A 5-minute check of a seeing forecast saves hours of frustration on nights when the atmosphere simply will not cooperate. Knowing in advance that tonight is a deep-sky night rather than a planetary night helps you plan the right targets for the conditions.
10. Accept what the sky gives you. Some nights are simply not planetary nights. On those evenings, lower magnification and wider fields are your friends. Use the conditions for deep sky observing, star clusters, and wide-field sweeps instead of fighting the atmosphere for planetary detail it cannot deliver.
FAQs
How does increased magnification affect the field of view?
Higher magnification narrows the field of view in direct proportion. Doubling magnification halves the field of view. This means higher power shows a smaller patch of sky, making objects harder to find and track, while also reducing image brightness since the same amount of gathered light is spread across a larger apparent area.
What is more important than magnification in a telescope?
Seeing conditions are more important than magnification for sharp views. Atmospheric turbulence sets a hard limit on the detail any telescope can resolve, and magnification cannot create detail the atmosphere has already blurred. Telescope aperture, optical quality, thermal equilibrium, and the steadiness of the air all contribute more to image sharpness than raw magnifying power.
What is the relationship between magnification and field of view?
Magnification and field of view share an inverse relationship. As magnification increases, the field of view decreases proportionally. For example, if a 25mm eyepiece gives you a 2-degree field at 48x, switching to a 10mm eyepiece at 120x reduces the field to roughly 0.8 degrees. Higher magnification shows objects larger but captures less surrounding sky.
What magnification should I use for Jupiter and Saturn?
For planetary viewing, start at 120x to 150x and increase only if the image continues to improve. On nights of average seeing, 150x to 200x is typically the sweet spot for Jupiter and Saturn. On excellent nights you may reach 300x or more, but on poor nights 100x to 120x may be the practical maximum. Always let the atmosphere, not the telescope specifications, set your magnification.
The Bottom Line on Seeing Conditions
Understanding why seeing conditions matter more than magnification is the realization that separates frustrated beginners from satisfied observers. The atmosphere above you sets a hard ceiling on the detail any telescope can deliver, and no amount of magnification can break through that ceiling. When you learn to read the sky, cool your optics, choose the right observing location, and match your magnification to what the air allows, every session improves dramatically.
The best observers are not the ones with the largest telescopes or the highest magnification eyepieces. They are the ones who understand their conditions, prepare accordingly, and patiently wait for those fleeting moments when the atmosphere settles and the universe snaps into focus. That knowledge is free, it works with any telescope, and it transforms ordinary nights into extraordinary ones.
Next time you head outside, check the seeing forecast, set up early, and let the sky tell you what magnification to use. Your telescope is already capable of delivering stunning views. The key to seeing them is learning to work with the atmosphere instead of fighting it.