
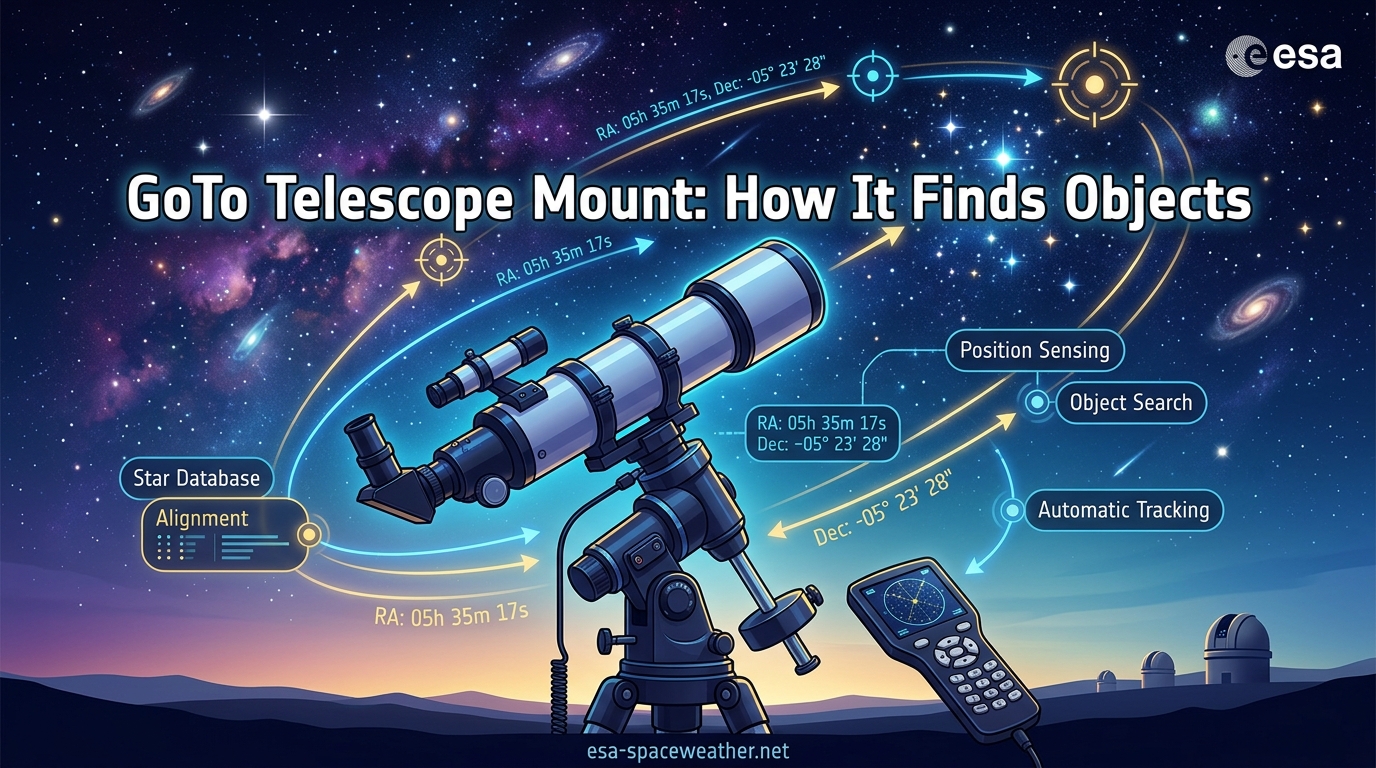
In amateur astronomy, “GoTo” refers to a type of telescope mount and related software that can automatically point a telescope at astronomical objects that the user selects. Both axes of a GoTo mount are driven by a motor and controlled by a computer. This technology transformed backyard astronomy by replacing the time-consuming art of star hopping with the push of a button.
Learning how a GoTo telescope mount finds objects automatically means understanding what happens behind the scenes. The mount does not “see” the sky. It calculates where objects should be based on mathematical models of the sky, your geographic position, the current time, and a handful of reference stars you help it identify during setup. Once those calculations are done, its motors move the telescope to the exact coordinates of whatever you select from its built-in database.
I have spent years working with GoTo mounts ranging from beginner-friendly alt-azimuth models to heavy-duty German equatorial mounts used for deep-sky astrophotography. In this guide, I will walk you through the complete process, from the internal components that make GoTo possible, through the alignment routine, to the moment the mount slews across the sky and locks onto a faint galaxy millions of light-years away.
Whether you are trying to understand your first computerized telescope or you are an experienced observer wondering why your GoTo pointing accuracy degrades over the night, this article covers every layer of the process. I will also address the “sky model” concept that most guides skip entirely, even though it is the single most important factor in how GoTo accuracy works.
Table of Contents
Quick Answer: How a GoTo Mount Finds Objects
A GoTo mount finds objects through a four-step process:
- Alignment – You center two or three known stars so the mount learns its orientation relative to the sky above your location.
- Selection – You choose an object from the mount’s built-in database of thousands of celestial targets.
- Calculation – The mount’s computer looks up that object’s celestial coordinates and calculates how far to rotate each motor axis from the current position.
- Slew and Track – The motors rapidly move the telescope to the target position, then slow to a continuous tracking rate to keep the object centered as Earth rotates.
The entire process relies on an internal mathematical model of the sky, not on any camera or imaging system. The mount never sees the stars. It computes where they should be.
What Is a GoTo Telescope Mount?
A GoTo telescope mount is a motorized, computer-controlled mount that can automatically point your telescope at any celestial object you select from its database. The term comes from the command “go to” a set of coordinates. Instead of manually pushing and aiming the telescope tube, you enter or select a target, press a button, and the mount drives itself to that position.
Before GoTo technology became affordable in the late 1990s and early 2000s, finding deep-sky objects required a skill called star hopping. You would use a star chart, locate a bright star visible to the naked eye, then “hop” from star to star using your finderscope until you reached your target. Finding a faint galaxy like M81 could take 10 to 15 minutes for a skilled observer. A beginner might never find it at all.
GoTo changed this completely. A well-aligned GoTo mount can place a target object within the field of view of a medium-power eyepiece in under 30 seconds. For visual observers, this means more time actually looking at objects and less time searching. For astrophotographers, it means repeatable, precise pointing that is essential for long-exposure imaging.
It is important to distinguish GoTo from older tracking technology. A traditional clock-drive mount uses a single motor to rotate one axis at the sidereal rate, compensating for Earth’s rotation so an object stays in view. That is tracking, not GoTo. A GoTo mount goes further. It has motors on both axes, an onboard computer, a database of object positions, and the ability to calculate and execute movements to any point in the sky. Tracking is just one thing the mount does after it arrives at the target.
Modern GoTo mounts come in a wide range of sizes and prices. A beginner alt-azimuth GoTo mount might cost under $300 and carry a small refractor. A research-grade equatorial GoTo mount can cost $10,000 or more and carry heavy optical tubes plus cameras, filter wheels, and autoguiders. Despite the price difference, the fundamental mechanism for finding objects is the same across all of them.
Core Components of a GoTo System
Every GoTo mount relies on the same set of core components working together. Understanding these parts makes the rest of the process much clearer, because each component plays a specific role in how the mount knows where to point and how it gets there.
1. Motors on Both Axes
A GoTo mount has electric motors driving both its axes. On an alt-azimuth mount, one motor controls altitude (up and down) and the other controls azimuth (left and right). On an equatorial mount, one motor controls right ascension (east-west tracking) and the other controls declination (north-south). These motors are typically either stepper motors or servo motors, each with distinct advantages.
Stepper motors move in precise, discrete steps, which makes them excellent for accurate positioning. They do not require feedback to know their position because each step represents a known angular change. Servo motors, on the other hand, run continuously and use encoder feedback to determine position. Servo motors generally offer smoother tracking at high speeds and are common on higher-end mounts. Most consumer GoTo mounts use stepper motors or a hybrid design.
2. Encoders for Position Feedback
Encoders are sensors that report the exact angular position of each axis. They tell the mount’s computer precisely where the telescope is pointing at any given moment. Without encoders, the mount would have to assume its position based on how many motor steps it has taken, which introduces cumulative error. With encoders, the mount always knows its true orientation.
Some mounts use encoders on both axes for high-precision feedback. Others use them only during slewing or not at all, relying instead on motor step counts. Higher-end mounts increasingly feature high-resolution absolute encoders that can detect position to fractions of an arcsecond, virtually eliminating the cumulative error that builds up over a long observing session.
3. The Hand Controller (Handbox)
The hand controller is the interface between you and the mount’s computer. It is a small keypad device with an LCD screen, navigation buttons, and numeric input. Through the hand controller, you enter your location, date, and time. You select alignment stars, center them in the eyepiece, and confirm each step. After alignment, you browse the object database, select a target, and issue the GoTo command.
Many modern mounts can also be controlled via smartphone apps or computer software over Wi-Fi or USB. Celestron’s SkyPortal app, Sky-Watcher’s SynScan app, and PC software like Stellarium, Cartes du Ciel, or NINA can all replace or supplement the hand controller. But the underlying commands and calculations remain the same regardless of which interface you use.
4. The Internal Star Database
Inside the hand controller or mount computer is a database containing the celestial coordinates of tens of thousands of objects. A typical GoTo database includes all 110 Messier objects, thousands of NGC (New General Catalogue) objects, IC objects, double stars, variable stars, the eight major planets, the Moon, and sometimes asteroids and comets. Each entry stores the object’s right ascension and declination coordinates.
When you select “M42 – Orion Nebula” from the database, the mount does not need to figure out where it is. It simply looks up the stored coordinates. The database is what makes GoTo possible. Without it, the mount would have motors and computation capability but no targets to point at. The quality and size of this database vary by manufacturer, but even entry-level mounts typically include 4,000 or more objects.
5. GPS Receiver (On Many Models)
Many GoTo mounts include a built-in GPS receiver or support an external GPS module. The GPS provides your exact latitude, longitude, and the current universal time. This eliminates the need to manually enter this information and removes a common source of alignment error. Forum users on Cloudy Nights and Reddit frequently report that GoTo accuracy improves significantly when GPS is used instead of manual entry.
However, GPS is not required for GoTo to work. You can manually enter your coordinates and time on any GoTo mount. GPS simply makes the process faster and more accurate. The mount’s ability to find objects depends on knowing where it is and what time it is, whether that information comes from GPS or from you typing it in.
6. The Microprocessor (Onboard Computer)
The microprocessor is the brain of the GoTo system. It runs the alignment calculations, stores the sky model, looks up object coordinates, computes the motor movements needed to reach a target, and manages tracking rates. Every GoTo command passes through this processor.
The processor also handles real-time tasks like backlash compensation, periodic error correction (PPEC), and communication with external devices. Despite running on relatively modest hardware, these processors handle the trigonometric calculations needed for coordinate transformation with ease. The math is well-established and does not require significant computing power by modern standards.
The Alignment Process: Teaching the Mount Where It Is
Alignment is the single most critical step in using a GoTo telescope mount. Without it, the mount has no way to relate its internal coordinate system to the actual sky above you. Alignment is the process of teaching the mount where it is pointing so it can calculate how to reach any other target.
Cold Start vs Warm Start
Before diving into the alignment steps, it helps to understand the difference between a cold start and a warm start. A cold start means the mount begins with no prior alignment data. It does not know where it is pointed relative to the sky and must build a new sky model from scratch. Every observing session typically begins with a cold start.
A warm start means the mount retains alignment data from a previous session. This is only useful if the mount has not been moved or disturbed since the last alignment. Some astrophotographers use warm starts to preserve a carefully built pointing model across multiple nights. However, experienced users on Cloudy Nights generally recommend cold starts for consistency, because even small changes in mount position can invalidate the old model.
Step 1: Set Location, Date, and Time
The alignment process begins with basic information. The mount needs to know your latitude and longitude, the current date, and the current time. If you have GPS, this is automatic. Otherwise, you enter it manually through the hand controller.
This information matters because the positions of stars and planets in the sky depend on your location and the exact time. A star visible from your backyard at 9 PM may be below the horizon at the same moment from a location 500 miles away. The mount uses your coordinates and time to calculate which objects are currently above your horizon and where they should appear.
If your time is off by even five minutes, or your latitude is off by one degree, your GoTo accuracy will suffer noticeably. This is one of the most common reasons beginners report that their GoTo mount “keeps missing targets.” Check your time zone setting, make sure daylight saving time is handled correctly, and verify your coordinates down to at least the nearest degree.
Step 2: Set the Mount to Its Home Position
Most GoTo mounts have a defined “home position” or “zero position.” For an alt-azimuth mount, this typically means the telescope tube is level and pointing due north. For a German equatorial mount, it usually means the telescope is pointed at the north celestial pole with the counterweight bar pointing straight down.
The home position gives the mount a known starting reference. Some mounts require you to manually set this position before beginning alignment. Others have detent marks or index switches that detect the home position automatically. Getting this step right is essential because the mount’s initial calculations are based on the assumption that it starts from home.
Forum discussions on Cloudy Nights reveal that incorrect home position is a leading cause of GoTo failure. If your mount starts from the wrong position, every subsequent calculation will be based on a false assumption, and your first slew may go wildly off target, sometimes ending up pointed at the ground.
Step 3: Center the First Alignment Star
The mount selects a bright alignment star that is currently well-positioned in your sky. It slews to where it calculates that star should be based on your location, time, and home position. The initial slew will likely be close but not exact, because the mount has not yet refined its model.
You look through the finderscope and identify the star. Then you use the hand controller buttons to center the star precisely in the finderscope, and finally in a medium-power eyepiece. When the star is perfectly centered, you confirm the alignment point. This tells the mount, “This known star is at this exact position in my sky.”
One critical prerequisite: your finderscope must be aligned with your main telescope. If the finderscope points slightly off from where the telescope points, the mount will “learn” an incorrect position for the alignment star. Centering the star in an unaligned finderscope means the star will not actually be centered in the telescope’s view. This is the beginner mistake that causes more GoTo frustration than any other.
Step 4: Center the Second Alignment Star
The mount now selects a second bright star, ideally on the opposite side of the sky from the first. The greater the angular separation between the two stars, the more accurate the resulting alignment. The mount slews to the approximate position of star two, and you repeat the centering process.
This is where the magic happens. With two known reference points, the mount can calculate a transformation matrix that maps its internal coordinate system to the actual celestial sphere above your location. It accounts for leveling errors in the mount base, slight misalignments in the mount head, and even the time and location errors that remained after your initial setup.
Why does the mount need two stars instead of one? A single star tells the mount where one point in its coordinate system corresponds to one point in the sky. But it cannot determine rotational offset or whether the mount base is perfectly level. Two stars provide enough information to solve for the full three-dimensional orientation of the mount relative to the sky.
Step 5: Optional Third Star (Three-Star Alignment)
Many GoTo systems offer an optional three-star alignment. The third star, typically chosen on the opposite side of the meridian from the first two, allows the mount to detect and correct for additional errors like cone error (the optical axis not being perfectly perpendicular to the mount’s declination axis) and flexure in the telescope tube or dovetail bar.
Three-star alignment generally improves pointing accuracy across the entire sky, especially when slewing between the eastern and western halves of the sky. Celestron’s SkyAlign system uses three stars but does not require you to know which stars they are, making it the most beginner-friendly option.
Brand Comparison: SkyAlign vs AutoStar vs SynScan
Different manufacturers have developed their own alignment philosophies. Celestron’s SkyAlign is the most beginner-friendly. You simply point the telescope at any three bright objects in the sky and center them. The mount figures out which stars they are by matching the pattern against its database. You do not need to know a single star name. Reddit and Cloudy Nights users consistently rate SkyAlign as the easiest system for newcomers.
Meade’s AutoStar (now AudioStar) uses a more traditional approach. It tells you which star to point at by name and slews to the approximate position. You center it and confirm. This requires you to be able to identify the named star, which can be a hurdle for absolute beginners. However, experienced users often prefer this method because it gives them more control over which stars are used and their separation angle.
Sky-Watcher’s SynScan system offers both approaches. You can choose a one-star, two-star, or three-star alignment, and the system will either name the stars for you or let you select them. SynScan is popular on mid-range equatorial mounts like the HEQ5 and EQ6-R and supports polar alignment routines through the hand controller. The flexibility makes it a favorite among intermediate observers who want to balance speed with precision.
How the Mount Actually Finds Objects After Alignment
This is the section that most guides gloss over, but it is the heart of how a GoTo telescope mount finds objects automatically. What actually happens when you select a target and press GoTo? Let me walk through the complete sequence step by step.
Step 1: Database Lookup
When you select an object from the hand controller or app, the mount’s computer retrieves that object’s celestial coordinates from its internal database. Every object has a fixed position expressed in right ascension and declination. The Orion Nebula (M42) is at RA 5h 35m 17s, Dec -5 degrees 23 minutes. The Ring Nebula (M57) is at RA 18h 53m 35s, Dec +33 degrees 2 minutes. These coordinates do not change; they are stored in the database and simply looked up.
Step 2: Coordinate Transformation
The retrieved RA and Dec coordinates must then be transformed into the mount’s native coordinate system. If you are using an alt-azimuth mount, the computer converts RA and Dec into altitude and azimuth for your specific location and time. This transformation involves spherical trigonometry calculations using your latitude, the current local sidereal time, and the object’s declination.
If you are using an equatorial mount, the conversion is simpler because the mount’s axes are already aligned with the celestial coordinate system (after polar alignment). The computer still needs to account for any residual polar alignment error and atmospheric refraction, which bends light near the horizon and makes objects appear slightly higher than they actually are.
Step 3: Calculating Motor Movements
Once the target coordinates are expressed in the mount’s own coordinate system, the computer calculates how far each axis needs to move. It knows the current position of each axis (from the encoders or motor step count) and the target position. The difference between these two values, plus corrections for any known systematic errors stored in the sky model, determines how many motor steps or encoder counts each axis must travel.
The computer also determines the optimal slewing path. It avoids slewing the telescope tube into the mount or tripod, respects meridian limits (the point where a German equatorial mount would need to flip to keep tracking), and may choose a longer but safer path to prevent collisions.
Step 4: The Slew
The slew is the rapid movement of the telescope from its current position to the target. During the slew, both motors drive their axes at high speed, typically between 2 and 8 degrees per second depending on the mount. The computer monitors encoder feedback continuously to ensure the axes arrive at the correct position simultaneously.
As the axes approach the target position, the motors decelerate smoothly. If the mount stopped abruptly, the momentum of the telescope tube would cause it to overshoot. The deceleration ramp is carefully calculated based on the slewing speed, the weight of the telescope, and the gear ratio of the mount. Backlash in the gears is also compensated during this phase. When the motors finally stop, the telescope should be pointed at or very near the target.
Step 5: Switch to Tracking Rate
The moment the slew ends, the mount switches from slewing speed to tracking speed. The tracking motor begins turning at the sidereal rate, which is one revolution per 23 hours, 56 minutes, and 4 seconds. This matches the apparent rotation of the sky caused by Earth’s rotation. Without this continuous tracking, any object would drift out of the field of view within seconds.
If everything was done correctly during alignment, the target object should now be visible in a medium-power eyepiece. Typical GoTo accuracy after a good two-star alignment places the object within the field of view of a 25mm or 20mm eyepiece. After a three-star alignment or a plate-solved pointing model, the object can be within a few arcminutes of the eyepiece center.
Celestial Coordinates and the Sky Model
To fully understand how a GoTo telescope mount finds objects automatically, you need to understand the coordinate system it uses and the internal model that corrects its pointing. This is where most introductory articles stop, but this knowledge is what separates a functional GoTo user from someone who understands why their mount behaves the way it does.
Right Ascension and Declination
Celestial coordinates work like a grid projected onto the sky, similar to latitude and longitude on Earth. Right ascension (RA) is the celestial equivalent of longitude. It is measured in hours, minutes, and seconds eastward from a starting point called the vernal equinox. One full circle is 24 hours of RA.
Declination (Dec) is the celestial equivalent of latitude. It measures how far north or south of the celestial equator an object lies, in degrees, arcminutes, and arcseconds. The north celestial pole, near Polaris, is at Dec +90 degrees. The celestial equator is at Dec 0 degrees. The south celestial pole is at Dec -90 degrees.
Every object in the GoTo database has a fixed RA and Dec coordinate. When you tell the mount to go to Saturn, it does not need to figure out where Saturn is by looking. It calculates Saturn’s current RA and Dec based on orbital models stored in its computer, then slews to those coordinates. The same applies to deep-sky objects, whose coordinates are essentially fixed.
Altitude and Azimuth
Alt-azimuth mounts use a different coordinate system. Altitude measures how high an object is above the horizon (0 degrees at the horizon, 90 degrees directly overhead). Azimuth measures the compass direction to the object (0 degrees is north, 90 degrees is east, 180 degrees is south, 270 degrees is west). These coordinates change continuously as objects rise and set.
The mount’s computer handles the conversion between RA/Dec coordinates (stored in the database) and altitude/azimuth coordinates (needed to drive the motors). This conversion depends on your latitude and the current sidereal time, which is why accurate location and time are so important for GoTo precision.
J2000 vs JNow: Why Coordinate Epochs Matter
This is a topic that almost no beginner guide covers, yet it causes real pointing errors. The coordinates stored in GoTo databases typically use the J2000 epoch. This means they represent the positions of objects as they were on January 1, 2000. But the Earth’s rotational axis slowly wobbles, a phenomenon called precession, which causes the entire coordinate grid to drift over time.
By 2026, the J2000 coordinates are off by more than a third of a degree from the actual current positions. This difference is called the JNow or “epoch of date” offset. For most visual observing, the built-in GoTo model handles this correction automatically. But if you are using external software like Stellarium or Cartes du Ciel and there is a mismatch between the epoch your software uses and the epoch your mount expects, you can get small but persistent pointing errors.
Cloudy Nights forum experts frequently encounter this issue when users report that their GoTo mount works fine using the hand controller but misses targets when controlled from a PC. The solution is to ensure both the mount and the software agree on which epoch they are using. Most modern mount firmware handles J2000 internally, so you should set your planetarium software to output J2000 coordinates.
The Sky Model: How Mounts Learn and Correct
Now we arrive at the concept that is the true key to GoTo accuracy, yet the one most commonly skipped in guides: the internal sky model. When you complete an alignment, the mount does not simply note the positions of your alignment stars and move on. It builds a mathematical model of the relationship between its mechanical position and the actual sky.
This sky model accounts for systematic errors that affect every pointing calculation. These include cone error (the telescope optical axis not being perfectly aligned with the mount’s rotational axes), non-perpendicularity between the two axes, mount base leveling errors, and even flexure in the telescope tube or dovetail bar that causes the optical axis to shift at different pointing angles.
With a two-star alignment, the model can correct for the most basic errors: the offset between where the mount thinks north is and where it actually is, and the tilt of the mount base. With three or more stars, the model can detect and compensate for more complex errors like cone error and flexure. The more stars you add through “sync” commands during your session, the more refined the model becomes.
This is why experienced observers sometimes add sync points during a session. If you slew to a target and it is slightly off-center, you center it and issue a sync command. The mount adds that data point to its model, improving accuracy for subsequent slews in that region of the sky. Over the course of a long session, a well-synced mount can achieve pointing accuracy of 3 to 5 arcminutes across the entire visible sky.
The sky model also explains why GoTo accuracy degrades over time. If the mount shifts slightly on its tripod, if temperature changes cause metal components to expand or contract, or if the counterweight shifts, the physical relationship between the mount and the sky changes. The model built at the start of the evening no longer perfectly matches reality. This is why re-alignment is sometimes needed midway through a session.
Alt-Azimuth vs Equatorial GoTo Mounts
GoTo technology works on both major types of telescope mounts, but the mechanics differ in important ways. Understanding these differences helps you choose the right mount for your needs and understand why your mount behaves the way it does during slewing and tracking.
Alt-Azimuth GoTo Mounts
An alt-azimuth mount moves in two simple directions: up and down (altitude) and left and right (azimuth). This is the most intuitive movement pattern, which makes alt-azimuth mounts popular for visual observing and beginner astronomy. The GoTo computer converts the target’s RA/Dec coordinates into altitude and azimuth, then drives both motors to the correct position.
Celestron’s NexStar SLT and SE series, Sky-Watcher’s AZ-GTi, and Meade’s ETX series are popular alt-azimuth GoTo mounts. They are generally more affordable, lighter, and faster to set up than equatorial mounts. The trade-off is that tracking requires movement on both axes simultaneously, which means long-exposure astrophotography suffers from field rotation (the image slowly rotates in the frame).
Equatorial GoTo Mounts
An equatorial mount has its polar axis aligned with Earth’s rotational axis, pointed at the north or south celestial pole. This means the mount can track an object by rotating only one axis (the RA axis) at a constant speed. This eliminates field rotation and makes equatorial mounts the standard choice for astrophotography.
The GoTo computer on an equatorial mount still calculates target positions in RA and Dec, but since the mount’s axes are already parallel to the celestial coordinate system, the conversion is straightforward. Popular GoTo equatorial mounts include the Sky-Watcher HEQ5 and EQ6-R, the Celestron CGEM and CGX, and iOptron’s CEM series. These mounts require polar alignment as a setup step before GoTo alignment, which adds time but results in superior tracking performance.
Key Differences Summary
Alt-azimuth GoTo mounts are simpler to set up, more portable, and excellent for visual observing. They track by moving both axes, which introduces field rotation that limits astrophotography to short exposures. Equatorial GoTo mounts require polar alignment during setup but can track on a single axis at a constant rate, making them ideal for long-exposure imaging. Both types use the same fundamental GoTo process: database lookup, coordinate transformation, calculation, slew, and track.
Tracking After the Slew: Keeping Objects in View
Once the mount slews to a target and centers it in the eyepiece, the job is not over. Earth is rotating, which means every object in the sky is slowly drifting westward. Without continuous tracking, any object would drift out of the telescope’s field of view within seconds or minutes, depending on magnification.
GoTo mounts solve this by continuously driving the tracking motor at a specific rate. The most common rate is the sidereal rate, which matches the apparent rotation of the stars. One sidereal day is 23 hours, 56 minutes, and 4 seconds, slightly shorter than the 24-hour solar day. The sidereal rate ensures that stars remain centered as Earth rotates beneath them.
Most GoTo mounts also offer lunar and solar tracking rates. The Moon moves slightly slower against the star background than the stars themselves, so the lunar rate is marginally slower than sidereal. The Sun moves even slower. When you GoTo the Moon, the mount can automatically switch to lunar rate to keep it centered.
On alt-azimuth mounts, tracking requires continuous adjustments to both altitude and azimuth, and the rates change depending on where the object is in the sky. An object near the zenith requires rapid azimuth changes but almost no altitude change. An object near the horizon requires the opposite. The mount’s computer handles these calculations in real time.
On equatorial mounts, tracking is simpler. Once polar aligned, only the RA axis needs to turn, and it turns at a constant sidereal rate. This simplicity is a major reason why equatorial mounts are preferred for astrophotography. Higher-end mounts add periodic error correction (PPEC), which compensates for the small repeating errors caused by imperfections in the worm gear, resulting in smoother tracking over long exposures.
When GoTo Goes Wrong: Common Problems and Fixes
Even well-designed GoTo mounts occasionally miss targets or behave unexpectedly. Based on the pain points most commonly reported in astronomy forums, here are the most frequent GoTo problems and their causes.
GoTo Mount Consistently Misses Targets
The most common cause is inaccurate time, date, or location data. If your mount’s clock is off by just five minutes, every calculated position will be slightly wrong. Check that your time zone is correct, that daylight saving time is properly configured, and that your latitude and longitude are accurate. If your mount supports GPS, use it. It eliminates this entire class of error.
Finderscope Not Aligned
If your finderscope points even one degree away from where your main telescope points, your alignment stars will be slightly off, and every subsequent GoTo will inherit that error. Always verify finderscope alignment before starting your GoTo alignment. Center a distant terrestrial object (a chimney, a power pole, a distant streetlight) in the main eyepiece, then adjust the finderscope until the same object is centered in its crosshairs.
First Slew Goes Wildly Off Target
If your first GoTo slew after alignment sends the telescope to the wrong part of the sky entirely, the most likely cause is an incorrect home position. The mount assumed it was starting from a specific orientation, but it was actually pointing somewhere else. Double-check the home position procedure for your specific mount. On equatorial mounts, also verify that your polar alignment is reasonably close.
Accuracy Degrades Over the Night
This happens because the sky model built during alignment slowly becomes less accurate. Temperature changes cause metal components to expand or contract. The mount may shift slightly on its tripod. Counterweights can slip. All of these factors change the physical relationship between the mount and the sky. The solution is to add sync points during your session, or to re-run alignment if accuracy becomes unacceptable.
Mount Overshoots or Makes Strange Noises
Overshooting is usually related to backlash settings. Backlash is the small gap between gear teeth that causes a brief period of no movement when the motor changes direction. Most GoTo mounts have backlash compensation settings in the hand controller. If these are set incorrectly, the mount may overshoot when settling after a slew. Experiment with the backlash settings or reset them to factory defaults.
From GoTo to Plate Solving: The Next Step
For visual observers, a well-aligned GoTo mount is all you need. But astrophotographers demand even higher precision, and this is where plate solving comes in. Plate solving is a technique where software analyzes an image from your camera and determines the exact RA and Dec coordinates of the image center by matching star patterns against a reference catalogue.
When plate solving is integrated with GoTo mount control through software like NINA, ASTAP, or EQASCOM, the workflow becomes incredibly precise. The mount slews to the approximate target position, takes a short exposure, and plate solves the image. If the target is off-center, the software issues a corrective sync command to the mount, refining the sky model. The mount then re-slews to the exact position, and the process repeats until the target is perfectly centered.
This technique can achieve sub-arcminute pointing accuracy, far beyond what visual alignment alone can deliver. It bridges the gap between the beginner-level GoTo alignment process and the precision required for long-exposure deep-sky astrophotography. The underlying mechanism is the same, the mount still calculates motor movements based on coordinates, but plate solving provides far more accurate coordinate data than manual star centering ever could.
FAQs
How do GoTo mounts work?
GoTo mounts work by using an onboard computer to calculate the position of celestial objects based on your location, the current time, and a two-star or three-star alignment. Once aligned, the computer looks up the target’s coordinates from its database and drives both motor axes to move the telescope to that position, then tracks the object to compensate for Earth’s rotation.
Why can’t I see anything through my telescope eyepiece?
The most common reason is that your finderscope is not aligned with the main telescope, so the object visible in the finderscope is not actually in the eyepiece. Start with your lowest power eyepiece (usually 25mm or 40mm), center a distant terrestrial object during the day, and align the finderscope to match. Also check that you removed the dust cap and that the star diagonal is properly seated.
How do automatic telescopes work?
Automatic telescopes, also called GoTo telescopes, use motorized mount axes controlled by an onboard computer. The computer contains a database of celestial object coordinates and uses your location and time to calculate where each object should appear in the sky. After a brief alignment with two or three reference stars, the telescope can automatically slew to and track any object you select.
What is a telescope autoguider?
A telescope autoguider is a separate camera and software system that makes small real-time corrections to the mount’s tracking to keep a guide star perfectly centered during long-exposure astrophotography. It is different from GoTo, which handles initial pointing. Autoguiding compensates for tracking errors caused by gear imperfections, wind, and polar alignment drift, allowing exposures of 5 minutes or longer without star trailing.
Conclusion
Understanding how a GoTo telescope mount finds objects automatically comes down to a simple chain of events: the mount knows where objects are stored in a database, it learns where it is pointed through star alignment, and it uses mathematical calculations to drive its motors to any target you choose. The sky model built during alignment is the quiet engine behind every successful GoTo, correcting for mechanical imperfections and environmental factors that would otherwise send your telescope to the wrong part of the sky.
If you are new to GoTo, focus on getting your time, location, and home position exactly right. Verify your finderscope alignment before every session. Practice the two-star alignment routine until it becomes second nature. If you are advancing toward astrophotography, explore plate solving to push your pointing accuracy to levels that visual alignment alone cannot achieve. The technology that makes GoTo possible works the same way whether you are using a $300 beginner mount or a $10,000 imaging platform, and knowing how it works under the hood will make you a more confident and capable observer.