
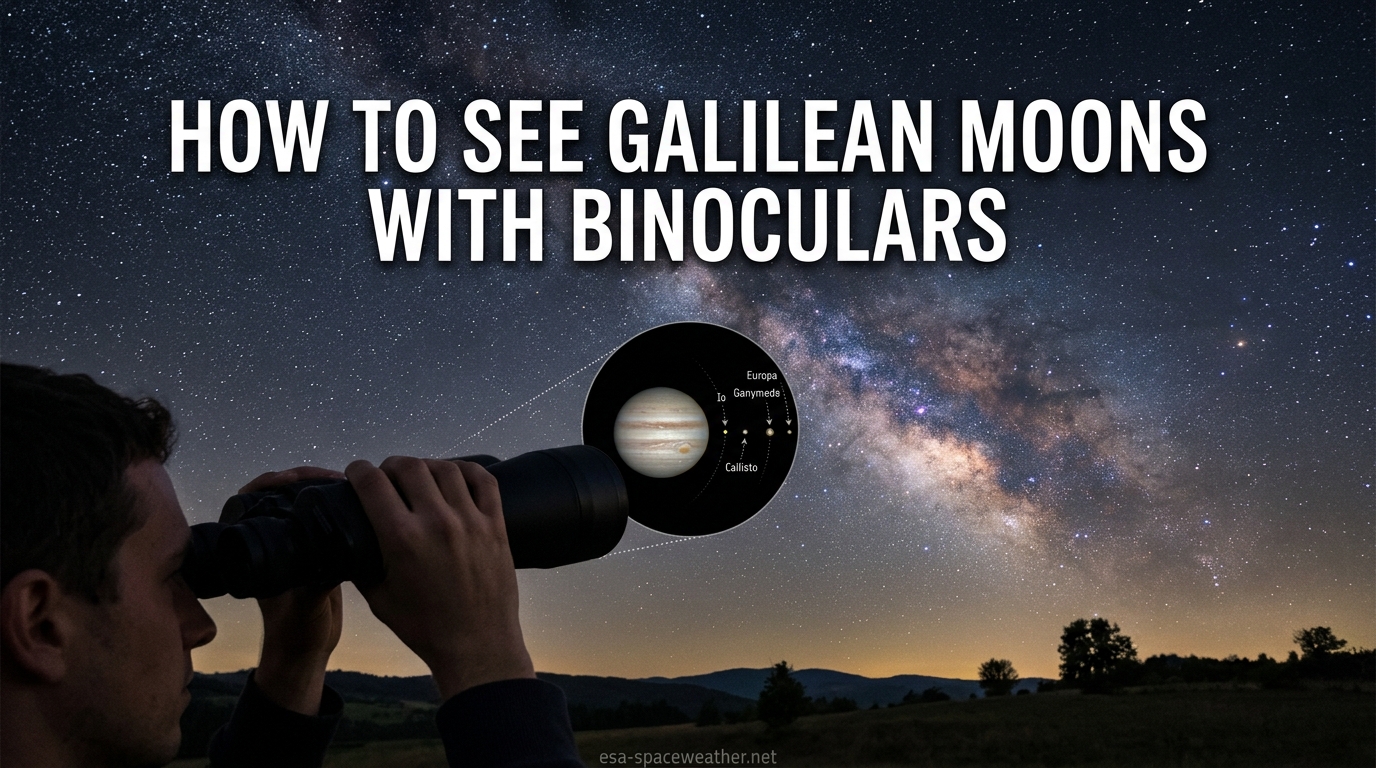
On a clear night in January 1610, Galileo Galilei pointed a small telescope at Jupiter and noticed something that changed our understanding of the solar system forever. Four tiny points of light were lined up beside the planet, and they moved from night to night. He had discovered the Galilean moons: Io, Europa, Ganymede, and Callisto.
Here is the remarkable part. You do not need a telescope to see what Galileo saw. A ordinary pair of binoculars is enough to reveal all four moons, and I want to walk you through exactly how to do it.
Learning how to see the four Galilean moons of Jupiter with binoculars is one of the most rewarding first steps in amateur astronomy. The moons are bright enough, their separation from Jupiter is large enough, and the observation is simple enough that even a complete beginner can succeed on the first clear night. I have helped dozens of first-time observers spot them, and the moment those tiny dots appear never gets old.
In this guide, our team covers everything from choosing the right binoculars to finding Jupiter in the sky, identifying which moon is which, and troubleshooting when you cannot see all four. Whether you have a pair of 7×50 binoculars or a basic 10×50 model gathering dust in a closet, you are about to discover one of the easiest and most thrilling sights in the night sky.
Table of Contents
The Short Answer: Can You Really See Jupiter’s Moons With Binoculars?
Yes, you can absolutely see all four Galilean moons of Jupiter with binoculars. The moons have apparent magnitudes between 4.6 and 5.6, which means they are bright enough to be visible through any binoculars with at least 7x magnification and 50mm objective lenses. The minimum recommended specification is 7×50, but 10×50 binoculars work just as well and are the most common pair people already own.
The key factors are not the binoculars alone. Stability matters just as much. Jupiter’s moons appear as tiny pinpricks of light arranged in a line on either side of the planet, and any shaking of your hands will smear them into invisibility. That is why I emphasize stabilization throughout this guide.
What Are the Four Galilean Moons?
The Galilean moons are the four largest moons of Jupiter, and they are also the four largest moons in the entire solar system. Each one is a world of its own, with unique characteristics that make observing them even more fascinating when you know what you are looking at.
Io: The Volcanic World
Io is the innermost Galilean moon, orbiting closest to Jupiter at a distance of about 422,000 kilometers. It is the most volcanically active body in the solar system, with hundreds of active volcanoes spewing sulfur and sulfur dioxide across its colorful surface. Io orbits Jupiter in just 1.77 days, which means its position changes noticeably from one night to the next. Through binoculars, Io appears as a bright dot that can sometimes be difficult to separate from Jupiter’s glare when it is at its closest apparent distance.
Europa: The Ice-Covered Ocean World
Europa is the second moon from Jupiter and one of the most intriguing objects in planetary science. Beneath its smooth ice crust lies a global ocean of liquid water that may contain more water than all of Earth’s oceans combined. Europa orbits Jupiter every 3.55 days and has a high albedo, meaning it reflects a lot of sunlight. This makes Europa one of the brighter Galilean moons through binoculars, often appearing as a distinct, steady point of light.
Ganymede: The Largest Moon in the Solar System
Ganymede holds the title of the largest moon in the solar system, even bigger than the planet Mercury. It orbits Jupiter every 7.15 days at a distance of about 1.07 million kilometers. Ganymede is so large and bright that it is often the easiest Galilean moon to spot, especially when it is at maximum separation from Jupiter. It has its own magnetic field, the only moon known to have one.
Callisto: The Ancient, Cratered World
Callisto is the outermost Galilean moon and the most distant from Jupiter at about 1.88 million kilometers. It has the oldest surface in the solar system, covered in impact craters that record billions of years of bombardment. Callisto orbits Jupiter every 16.69 days, so it moves the slowest of the four and can sometimes appear quite far from the planet. When Callisto is at maximum elongation, it is the easiest moon to identify because of its great distance from Jupiter.
What You Need: Binocular Specs That Actually Work
You do not need expensive equipment to see the Galilean moons. The real question is what binocular specifications will give you the best view, and the answer depends on a few tradeoffs between magnification, light-gathering ability, and stability.
7×50 Binoculars: The Classic Astronomy Choice
7×50 binoculars have long been considered the gold standard for handheld astronomy. The 7x magnification provides a steady enough view for most people to hold without a tripod, and the 50mm objective lenses gather plenty of light. The exit pupil is approximately 7.1mm, which matches the dilation of a dark-adapted human eye. This makes 7×50 binoculars exceptionally bright and comfortable for night sky observation. Many experienced observers, including forum users who have been watching Jupiter for decades, recommend 7×50 as the starting point.
10×50 Binoculars: The Most Common Pair
10×50 binoculars are probably what you already have in a closet somewhere. The extra magnification compared to 7×50 can help separate the moons from Jupiter’s glare, but the tradeoff is that 10x binoculars are noticeably harder to hold steady. Several forum users on Reddit and Cloudy Nights report struggling to see all four moons with 10×50 binoculars, and the issue is almost always stability rather than the binoculars themselves. If you mount 10×50 binoculars on a simple tripod or rest them on a stable surface, the view is excellent.
15×70 Binoculars: The Step-Up Option
15×70 binoculars gather significantly more light and provide greater magnification, which makes the Galilean moons pop more clearly against the sky. However, 15×70 binoculars are heavy and virtually impossible to hold steady by hand. A tripod is mandatory. The exit pupil is about 4.7mm, slightly smaller than 7x50s but still very capable for astronomy. If you already own 15×70 binoculars and a tripod adapter, you will get some of the best binocular views of Jupiter available.
What About Smaller Binoculars?
Binoculars smaller than 7×50, such as 8×42 or 10×25, can sometimes show the brighter Galilean moons (Ganymede and Callisto) under good conditions. However, the smaller objective lenses gather less light, and the moons will be harder to distinguish from background stars. I would not recommend relying on compact binoculars for this observation, but if that is all you have, try it from a dark sky location during Jupiter’s opposition.
How to Find Jupiter in the Night Sky
Before you can see Jupiter’s moons, you need to find Jupiter itself. This is a step that many guides skip or gloss over, but it is the number one stumbling block for beginners. Let me break it down into a simple process.
Know When Jupiter Is Visible
Jupiter is not visible year-round from a single location. The planet is best observed around opposition, which is the point when Earth passes between Jupiter and the Sun. At opposition, Jupiter rises at sunset, is visible all night, and appears at its largest and brightest. Opposition dates change each year because Jupiter takes about 12 months to orbit the Sun relative to Earth. Check a current astronomy app or website to find out when Jupiter is visible from your location in 2026.
Look Along the Ecliptic
The ecliptic is the imaginary line across the sky that the Sun, Moon, and planets follow. Jupiter always appears somewhere near this line. If you can trace the path of the Sun across the sky during the day, you know roughly where to look for Jupiter at night. The ecliptic arcs from east to west, and its height above the horizon depends on your latitude and the season.
Identify Jupiter by Its Brightness
Jupiter is typically the brightest object in the night sky after the Moon and Venus. It appears as a brilliant, steady white light that does not twinkle the way stars do. Venus is brighter but is only visible near the horizon shortly after sunset or before sunrise. If you see a very bright, steady light high in the sky that is not the Moon, there is a good chance it is Jupiter.
Use a Star App to Confirm
Free apps like Stellarium, SkyView, or Star Walk make finding Jupiter trivial. Point your phone at the sky and the app will show you exactly where Jupiter is in real time. I recommend using one of these apps the first few times you try to locate Jupiter. Once you have found it once or twice, you will start to recognize it on your own.
Best Viewing Windows
The best time to observe Jupiter’s moons is when the planet is high in the sky, typically between 10 PM and 2 AM during opposition season. When Jupiter is high, you are looking through less atmosphere, which means less turbulence and a steadier image. Avoid observing when Jupiter is near the horizon, where atmospheric distortion is at its worst.
Check the Moon Positions Before You Go Out
Here is a tip that catches many beginners off guard. Sometimes one or more Galilean moons are not visible because they are passing in front of or behind Jupiter. Before you head outside, check an astronomy app or website that shows the current positions of Jupiter’s moons. If one or two moons are hidden, you will know it is not a problem with your equipment or your eyes.
How to See the Four Galilean Moons of Jupiter With Binoculars: Step by Step
Now for the main event. Here is the step-by-step process I use every time I observe the Galilean moons, refined over years of binocular stargazing.
Step 1: Set Up in a Dark Location
Find the darkest spot available to you. If you live in a city, try to get to a park or open area away from direct streetlights. Even a backyard with the house lights off and a fence blocking the nearest streetlight will work. Let your eyes dark-adapt for at least 15 to 20 minutes before observing. Do not look at your phone during this time, or use a red light filter if you must.
Step 2: Locate Jupiter With Your Naked Eye
Find Jupiter as a bright point of light using the methods described above. Keep your eyes on it and note its position relative to any landmarks or bright stars nearby. This will help you find it again once you raise your binoculars.
Step 3: Stabilize Your Binoculars
This is the most critical step in the entire process. Handheld binoculars will shake, and that shake will hide the moons. If you have a tripod and a binocular adapter, mount them now. If not, rest your binoculars against a fence post, the roof of a car, or a wall. One of the best stabilization hacks I have seen comes from astronomy forums: place a 5 lb bag of rice on the roof of your car and rest the binoculars on top of it. The rice conforms to the shape of the binoculars and absorbs vibration beautifully.
Step 4: Center Jupiter in the Field of View
Bring the binoculars to your eyes and slowly aim them at Jupiter. It will take a moment to find the planet in the binocular view, especially if you have never done this before. Take your time. Once you have Jupiter centered, you will immediately notice that it is not a point of light but a small, bright disk. You may also notice faint bands of clouds crossing the disk.
Step 5: Look for Tiny Dots Near Jupiter
Now scan the area immediately surrounding Jupiter. Look for tiny pinpricks of light arranged in a line on either side of the planet. These are the Galilean moons. They may be very close to Jupiter or spread out in a wider line depending on where each moon is in its orbit. Some nights, all four are visible. Other nights, one or two may be hidden behind or in front of the planet.
Step 6: Focus Carefully
The moons are small and bright, and a slightly out-of-focus image can make them invisible. Adjust the center focus wheel slowly while watching Jupiter’s disk. When Jupiter’s edges are as sharp as possible, the moons should also be in focus. If your binoculars have a diopter adjustment on the right eyepiece, set that correctly for your eyes as well.
Step 7: Observe and Record
Once you have found the moons, spend a few minutes just looking. Note how many you can see and their approximate positions relative to Jupiter. Sketch what you see in a notebook or take a mental picture. Come back the next night and compare. You will see that the moons have moved, sometimes dramatically. This is real-time orbital mechanics happening before your eyes.
Step 8: Try Different Eyes and Positions
If you are having trouble seeing all four moons, try observing with one eye closed and then the other. Some people see faint points of light better with their dominant eye. Also, try slightly moving Jupiter to the edge of the field of view rather than dead center. Sometimes the moons are easier to see when they are not competing with Jupiter’s full glare.
What You Will Actually See Through Binoculars
Let me set realistic expectations so you are not disappointed. Through binoculars, the Galilean moons do not look like disks or spheres. They appear as tiny, starlike points of light, similar to background stars but distinguishable by their alignment with Jupiter.
The four moons will be arranged roughly in a straight line that passes through the equator of Jupiter. This line is the orbital plane of the moons as seen from Earth. Typically, you will see one or two moons on one side of Jupiter and the remaining moons on the other side. The exact arrangement changes every night because each moon orbits at a different speed.
Jupiter itself will appear as a small, bright disk, noticeably larger than a star. In steady conditions with 10×50 or larger binoculars, you may glimpse two dark bands crossing the planet’s surface. These are Jupiter’s equatorial cloud belts. The famous Great Red Spot is generally not visible through binoculars.
The moons will not show any color through binoculars. They all appear white or slightly off-white. The differences between them are in brightness and position, not appearance. Ganymede and Callisto tend to be the brightest, while Io can sometimes be harder to see when it is close to Jupiter.
Which Dot Is Which? Identifying the Four Moons
This is the question I get asked more than any other. Once you can see the four dots lined up beside Jupiter, the natural next question is: which one is Io, which is Europa, which is Ganymede, and which is Callisto? No major article currently provides a clear answer to this, so let me give you a practical method.
The Short Answer: Use an App
The most reliable way to identify each moon is to check an astronomy app or website before you go outside. Stellarium, Sky and Telescope’s moon-position tool, and other apps show the exact positions of the four Galilean moons at any given date and time. Simply compare what you see through your binoculars with the app’s diagram.
The Manual Method: Distance From Jupiter
If you want to identify the moons without an app, the general rule is that the innermost dot is usually Io, then Europa, then Ganymede, then Callisto as you move outward. But this only works when all four moons are on the same side of Jupiter, which is relatively rare. More often, the moons are split across both sides.
Callisto is the easiest to identify because it is typically the farthest from Jupiter. When Callisto is at maximum elongation, it can appear several Jupiter-widths away from the planet. Ganymede is usually the next farthest. Io and Europa are closer to Jupiter and harder to tell apart.
The Brightness Clue
Ganymede is the brightest of the four moons (apparent magnitude about 4.6), followed by Europa (about 4.7), then Io (about 5.0), and Callisto (about 5.6). In practice, the brightness differences are subtle, and atmospheric conditions can wash them out. But if one moon appears noticeably brighter than the others, it is likely Ganymede.
Watch Them Move Night by Night
The most rewarding way to learn moon identification is to observe Jupiter over several consecutive nights. Io moves the fastest, completing an orbit in less than two days, so its position changes dramatically from one night to the next. Callisto barely moves over the same period. By tracking the positions over three or four nights, you can deduce which moon is which based on their movement patterns.
A Quick Cheat Sheet
Callisto: usually the farthest from Jupiter, moves the slowest. Ganymede: often the brightest, medium distance. Europa: steady brightness, medium-close to Jupiter. Io: closest to Jupiter, moves the fastest from night to night. Remember that any moon can be on either side of Jupiter, and occasionally one will be hidden behind or passing in front of the planet.
Why Can’t I See All Four Moons? Troubleshooting Guide
If you can only see two or three moons instead of all four, do not panic. This is the single most common experience reported by beginners on astronomy forums, and there are several perfectly normal explanations.
A Moon May Be Behind or In Front of Jupiter
The Galilean moons orbit Jupiter constantly, and at any given time, one or more of them may be passing behind the planet (occultation) or in front of it (transit). When a moon is directly behind Jupiter, it is completely hidden. When it is transiting across Jupiter’s face, it can be very difficult to see against the bright planetary disk. This is the most common reason for seeing fewer than four moons, and it has nothing to do with your equipment or skills.
Your Binoculars Are Not Steady Enough
If the image is shaking even slightly, the fainter moons (Io and Callisto) will disappear. This is the number one complaint from users with 10×50 binoculars who cannot see all four moons. The solution is stabilization. Mount your binoculars on a tripod or use the rice-bag trick described earlier. The difference between a shaky view and a steady view is night and day for this observation.
Light Pollution Is Washing out the Fainter Moons
If you live in a Bortle 6 or 7 area (suburban with significant skyglow), the brighter moons like Ganymede and Callisto will usually still be visible, but Io and Europa may be lost in the glare. The solution is to get to a darker location, even a nearby park or rural area. Each step down on the Bortle scale makes a noticeable difference. From Bortle 4 or darker skies, all four moons are easily visible in 10×50 binoculars.
You Have Not Dark-Adapted
Your eyes need at least 15 to 20 minutes of darkness to reach full sensitivity. If you just walked outside from a brightly lit room, you are seeing the sky at perhaps half your potential sensitivity. Give your eyes time to adjust. Avoid looking at your phone or any white light during this period.
The Viewing Conditions Are Poor
Atmospheric turbulence, thin clouds, and high humidity can all degrade the view. Even when the sky looks clear to your naked eye, thin cirrus clouds can scatter light and reduce contrast. If Jupiter looks like it is boiling or shimmering through your binoculars, the atmospheric seeing is poor. Try again on another night.
Pro Tips for Better Jupiter Observation
Here are the tips and techniques I have collected from years of observing and from astronomy community discussions that will dramatically improve your success rate.
Use the Rice Bag Trick
This tip comes straight from Cloudy Nights forum users and it works. Place a 5 lb bag of rice on your car roof, a table, or any flat surface at comfortable observing height. Rest your binoculars on top of the rice bag. The bag conforms to the binoculars’ shape and absorbs hand tremors, giving you a nearly tripod-steady view for the cost of a bag of rice.
Observe During Opposition
Jupiter at opposition is significantly brighter and larger than at other times. The planet is closest to Earth, the moons are at maximum brightness, and the planet is visible all night long. Find out when the next opposition occurs and plan your observation session for that window.
Sit Down While Observing
Sitting in a comfortable chair reduces fatigue and makes it easier to hold binoculars steady. A reclining lawn chair is ideal because it supports your arms and neck. This is especially important if you are observing for more than a few minutes.
Cover Your Head With a Dark Cloth
Stray light entering from the sides of your binoculars reduces contrast. A dark cloth or towel draped over your head and the eyepieces blocks ambient light and dramatically improves the view. Old-school astronomers have used this trick for centuries.
Observe Over Multiple Nights
The real magic of the Galilean moons is watching them move. Observe Jupiter on three or four consecutive clear nights and sketch the moon positions each time. You will see the moons shift positions, sometimes dramatically, as they orbit the giant planet. This is the same observation that convinced Galileo that not everything in the universe orbits the Earth.
FAQs
Can you see the Galilean moons with binoculars?
Yes. The four Galilean moons of Jupiter are bright enough to be visible through common binoculars with at least 7x magnification and 50mm objective lenses. A pair of 7×50 or 10×50 binoculars is sufficient to see all four moons on a clear night.
What magnification do you need to see Galilean moons?
A magnification of 7x to 10x with 50mm objective lenses is sufficient to see the Galilean moons. Higher magnification like 15×70 provides a brighter view but requires a tripod for stability. The key factor is holding the binoculars steady, not raw magnification.
How to see Galilean moons?
Find Jupiter in the night sky as a bright steady light near the ecliptic. Point stabilized binoculars at Jupiter. Look for tiny points of light in a straight line on either side of the planet. Those are the four Galilean moons: Io, Europa, Ganymede, and Callisto.
What binoculars can see Jupiter?
Any binoculars with at least 7x magnification and 50mm objective lenses can show Jupiter and its moons. Common options include 7×50, 10×50, and 15×70 binoculars. The 7×50 is the classic choice for handheld astronomy, while 15×70 provides the best view but requires a tripod.
Why can I only see two or three of Jupiter’s moons?
One or more moons may be passing behind or in front of Jupiter at the time you are observing. This is called occultation or transit. Check an astronomy app showing moon positions to confirm. Other causes include unsteady binoculars, light pollution, or poor dark adaptation.
When is the best time to see Jupiter’s moons?
The best time is around Jupiter’s opposition, when the planet is closest to Earth and visible all night. During opposition season, observe between 10 PM and 2 AM when Jupiter is highest in the sky for the steadiest atmospheric conditions.
Seeing the four Galilean moons of Jupiter with binoculars for the first time is a genuinely thrilling experience. Those tiny points of light are entire worlds, each one larger than or comparable to Earth’s Moon, and they are dancing around the largest planet in our solar system in real time. Now you know exactly how to see them, what equipment works, how to find Jupiter, how to identify each moon, and what to do when things do not go as planned.
The most important advice I can give you is simple: go outside on the next clear night when Jupiter is visible and try it. The moons are there, waiting. They have been orbiting Jupiter for billions of years and will continue long after we are gone. All you need is a pair of binoculars, a steady hand or a makeshift support, and the patience to let your eyes adjust to the dark.
Once you have mastered the Galilean moons, you will find that binoculars open up an entire universe of accessible night sky targets. Learning how to see the four Galilean moons of Jupiter with binoculars is just the beginning of a lifetime of discovery. Clear skies, and happy observing.