
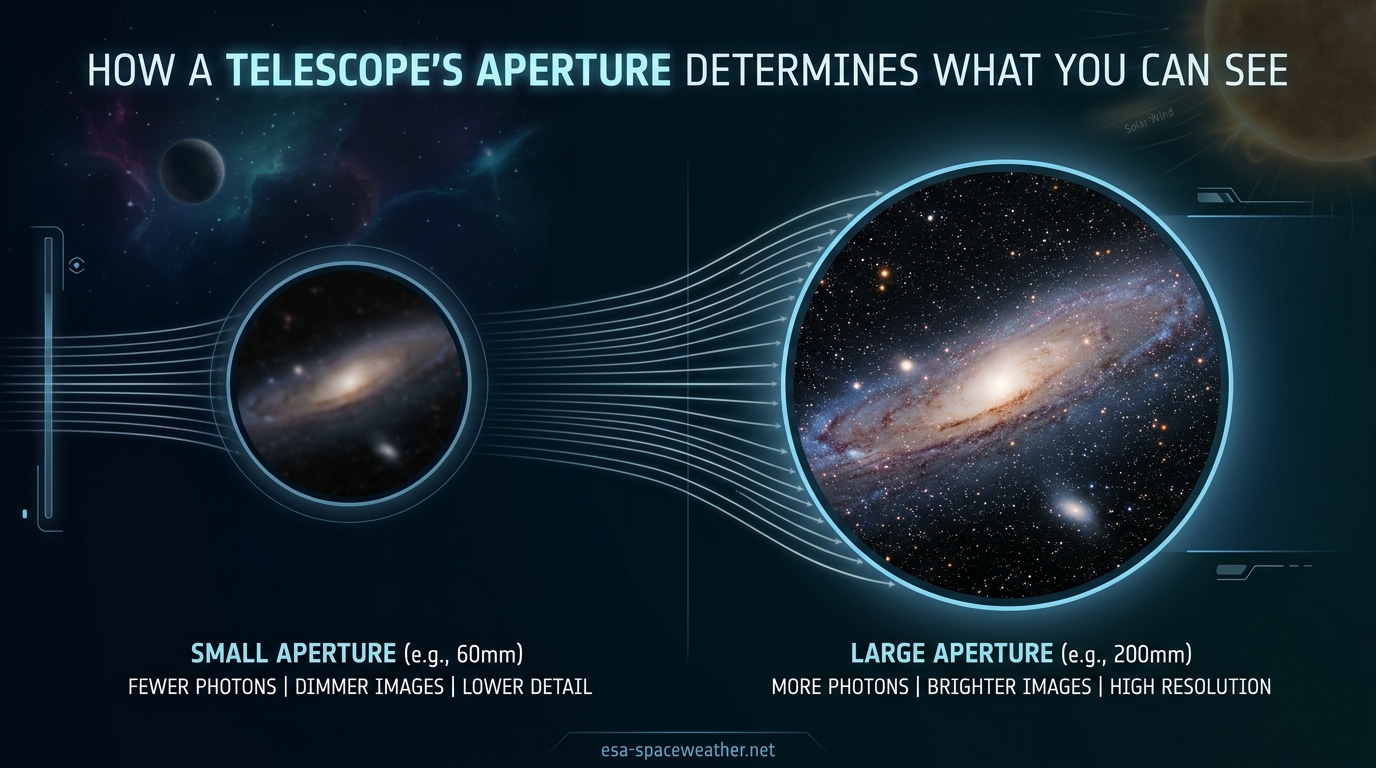
If you have ever looked through a telescope and felt underwhelmed by a tiny, dim image, the culprit is almost certainly aperture. Understanding how a telescope’s aperture determines what you can see is the single most important concept to grasp before buying or using any telescope. It affects everything from how bright the Moon looks to whether you can spot faint galaxies millions of light-years away.
I have spent years behind eyepieces of all sizes, from budget 60mm refractors to massive 14-inch Dobsonians. The difference between what a small scope and a large scope reveal is not subtle. It is dramatic, sometimes jaw-dropping, and always tied directly to one specification on the spec sheet: aperture.
The problem is that most beginners fixate on magnification. They see “675x” printed on a box and assume bigger magnification numbers mean better views. That could not be further from the truth. Magnification is just a number you dial in with an eyepiece. Aperture is the physical foundation that determines whether any magnification produces a worthwhile image at all.
In this guide, we will break down exactly what aperture is, how it controls both brightness and detail, and what you can realistically expect to see at different aperture sizes. We will cover the physics in plain language with worked examples, tackle common beginner mistakes, address how atmospheric seeing and light pollution change the equation, and help you understand why aperture matters more than magnification, focal length, or any other telescope specification.
Whether you are choosing your first telescope or wondering why your current scope shows fuzzy gray patches instead of the brilliant colorful nebulae you see in photographs, the answer comes down to aperture. Let us get into the details.
Table of Contents
What Is Telescope Aperture?
Telescope aperture is the diameter of the main light-gathering element, whether that element is a lens or a mirror. It is measured in millimeters (mm) or inches, and it tells you exactly how wide the opening is that collects light from the night sky. A larger diameter means a larger collecting surface, which means more photons reaching your eye or camera sensor.
In a refractor telescope, the aperture is the diameter of the objective lens at the front of the optical tube assembly. Light passes through this lens, which bends (refracts) the light rays to a focus point where the image forms. Refractors with large apertures require long optical tubes and very high-quality glass to avoid chromatic aberration, which shows up as false color fringes around bright objects.
In a reflector telescope, the aperture is the diameter of the primary mirror at the bottom of the tube. Light travels down the tube, bounces off the primary mirror back up to a smaller secondary mirror, and then out through the side or back to the eyepiece. Reflectors offer the most aperture per dollar because mirrors are less expensive to manufacture in large sizes than high-quality lenses.
Catadioptric designs like Schmidt-Cassegrains and Maksutov-Cassegrains use both a corrector lens and mirrors. The aperture measurement still refers to the diameter of the primary mirror, even though the front corrector plate looks like a lens. These compact designs fold the light path, allowing large apertures in a shorter tube.
A common source of confusion is the difference between aperture and focal ratio. The focal ratio (written as f/4, f/8, f/10, etc.) describes the relationship between focal length and aperture. You calculate it by dividing the focal length by the aperture. A telescope with a 200mm aperture and a 1000mm focal length has a focal ratio of f/5. But focal ratio does not determine what you can see in the way aperture does. Aperture is the raw physical size of your light-collecting surface.
You might also see “2.8 aperture” mentioned, especially in camera or photography contexts. In photography, f/2.8 refers to a focal ratio, not a physical aperture diameter. It describes the speed of a lens. In the telescope world, we almost always talk about aperture as a linear measurement in millimeters or inches because that number directly tells you how much light the scope can gather.
One more term you will encounter is “obstruction.” In reflector and catadioptric telescopes, the secondary mirror blocks some light at the center of the aperture. A typical secondary mirror obstruction reduces the effective light-gathering area by about 8 to 12 percent compared to an unobstructed refractor of the same aperture. This is a minor effect but worth knowing about when comparing designs.
Why Aperture Determines What You Can See
Aperture controls two independent things that directly shape your entire viewing experience: light-gathering power and resolution. These two factors work together to set the ceiling on what is visible through the telescope and how detailed those objects appear when you find them.
Light-gathering power determines how faint an object you can detect. Think of aperture as a bucket in a rainstorm. A wider bucket catches more raindrops in the same amount of time. The human eye has an aperture of roughly 7mm when fully dark-adapted. A modest 70mm telescope has a lens ten times wider than your pupil, but because light-gathering depends on area rather than just diameter, that 70mm scope collects about 100 times more light than your naked eye. That is why even a small telescope reveals thousands of stars that are completely invisible without optical aid.
Resolution determines how fine a detail you can distinguish. A larger aperture can separate closely spaced double stars, show smaller craters on the Moon, and reveal cloud bands on Jupiter that a smaller scope cannot resolve. This property is governed by the physics of diffraction, and it scales linearly with aperture diameter. Double the aperture and you double the resolving power.
Together, these two effects mean aperture is the primary factor in what you can see through any telescope. A bigger aperture shows you fainter objects (higher limiting magnitude) and finer details (better resolving power). No amount of magnification, fancy eyepieces, premium optical coatings, or computerized mounts can compensate for a small aperture when the target object is inherently faint or requires fine resolution.
This is why experienced astronomers always say aperture is king. If you have to choose between spending your budget on a larger aperture or on accessories, go with the larger aperture every time. You can always upgrade eyepieces and add accessories later. The one thing you cannot change about a telescope after purchase is the size of its main lens or mirror.
How Light-Gathering Power Scales With Aperture Area
Here is where most beginners get tripped up, and it is also where the math becomes genuinely exciting once you understand it. Light-gathering power does not scale linearly with aperture diameter. It scales with the area of the lens or mirror, which means it follows the formula for the area of a circle.
The area of a circle equals pi multiplied by the radius squared. Since the radius is half the diameter, doubling the aperture does not give you twice the light. It gives you four times the light. Tripling the aperture gives you nine times the light. The relationship is quadratic, not linear.
Let us walk through a concrete example. A 100mm telescope has a radius of 50mm. Its collecting area is pi times 50 squared, which equals approximately 7,854 square millimeters. A 200mm telescope has a radius of 100mm. Its collecting area is pi times 100 squared, which equals approximately 31,416 square millimeters. The 200mm scope has exactly four times the light-gathering area of the 100mm scope, despite being only twice as wide.
This is why stepping up from a 4-inch telescope to an 8-inch telescope feels like a revelation. You are not getting twice as much light. You are getting four times as much light. Faint galaxies that were barely detectable smudges in the 4-inch become clearly defined patches with visible structure in the 8-inch. Nebulae that looked like gray stains start showing actual detail and extension.
The scaling gets even more dramatic at larger sizes. A 300mm (12-inch) telescope gathers nine times as much light as a 100mm scope. A 400mm (16-inch) gathers sixteen times as much. Each time you double the aperture, you quadruple the light grasp. This is why aperture fever is a real phenomenon among amateur astronomers, and why people who look through a large scope once often start planning their next upgrade.
You can calculate the brightness ratio between any two telescopes by squaring the ratio of their diameters. Compare a 150mm scope to a 75mm scope and the diameter ratio is 2 to 1. Square that ratio and you get 4, meaning the larger scope delivers four times the surface brightness for extended objects like nebulae and galaxies. Compare a 200mm to a 100mm and the ratio is also 4. Compare a 300mm to a 100mm and the ratio is 9.
Another useful concept is limiting magnitude, which is the faintest star magnitude your telescope can detect under ideal conditions. A rough formula for visual limiting magnitude is 2 plus 7 times the log base 10 of the aperture in millimeters. For a 100mm scope, that works out to about magnitude 12. For a 200mm scope, it reaches approximately magnitude 14. Each magnitude step represents a brightness difference of about 2.5 times, so a one-magnitude gain is a significant increase in what you can see.
This quadratic relationship is the single most important concept in understanding why aperture matters so much. A seemingly modest increase in aperture produces a substantial increase in performance, especially for deep-sky objects where every photon matters and faint targets hover right at the edge of visibility.
Aperture vs Magnification: Which Really Matters?
If there is one misconception I encounter more than any other among newcomers to astronomy, it is the belief that magnification is the most important telescope specification. Department store telescopes often advertise enormous magnification numbers on the box, and those numbers are almost entirely meaningless. They tell you nothing about what you will actually see.
Here is the fundamental truth: magnification is not a fixed property of a telescope at all. It is determined entirely by the eyepiece you use. You calculate magnification by dividing the telescope’s focal length by the eyepiece’s focal length. Any telescope can produce any magnification by simply swapping eyepieces. A 200mm Dobsonian can produce 30x with a long eyepiece or 400x with a short one.
What magnification cannot do is create detail that the aperture cannot resolve or light that the aperture cannot gather. If your telescope’s aperture is too small to show a particular detail, no eyepiece will reveal it. You are just magnifying blur. Similarly, if the aperture cannot gather enough light to make an object visible, increasing the magnification makes the problem worse by spreading the already-dim light across a larger area of your retina.
A useful rule of thumb is that the maximum useful magnification for a telescope is approximately 50 times the aperture in inches, or about 2 times the aperture in millimeters. A 100mm telescope tops out around 200x before the image becomes unacceptably dim and blurry. Pushing a 60mm scope to 200x produces a dark, washed-out, vibrating view that actually shows less detail than 100x would.
This is why two telescopes at the same magnification can look wildly different. A 200mm Dobsonian at 150x shows crisp cloud bands on Jupiter with subtle color variations, moon shadow transits, and fine structure in the Great Red Spot. A 60mm refractor at the same 150x shows a tiny, dim, featureless disk that barely looks like a planet. Same magnification, completely different experience, because the larger aperture is feeding the eyepiece far more light and resolving far more detail.
There is also a minimum useful magnification to consider. Below about 3x to 4x per inch of aperture, the exit pupil (the beam of light exiting the eyepiece) becomes wider than your dark-adapted pupil. The excess light simply falls on your iris instead of entering your eye, wasting aperture. For a 200mm scope, the practical minimum magnification is around 25x to 30x.
The practical takeaway could not be clearer: when choosing a telescope, ignore the magnification claims entirely. Look at the aperture first, the mount stability second, and everything else after that. You can always buy different eyepieces later to change magnification across a wide range. You cannot make a small aperture gather more light after the fact.
Resolution and Resolving Power
While light-gathering power gets most of the attention in popular telescope guides, resolution is equally important in understanding how aperture determines what you can see. Resolution is the telescope’s ability to distinguish fine details, and it is limited by the wave nature of light itself. No amount of optical perfection can beat this limit.
Light passing through a telescope aperture diffracts, creating a tiny blur circle called the Airy disk at the focus point. The larger the aperture, the smaller the Airy disk, and the finer the detail the telescope can theoretically resolve. This relationship is quantified by two well-established formulas that astronomers use to compare instruments.
The Rayleigh limit states that the angular resolution in arcseconds equals 138 divided by the aperture in millimeters. For a 100mm telescope, that gives a theoretical resolution of about 1.38 arcseconds. For a 200mm telescope, it drops to about 0.69 arcseconds. The larger scope can resolve details twice as fine, which is why it shows smaller lunar craterlets and tighter double stars.
The Dawes limit is a slightly tighter empirical measure, calculated as 116 divided by the aperture in millimeters. A 150mm scope has a Dawes limit of about 0.77 arcseconds, which is tight enough to split many famous double stars that appear as single stars in smaller instruments. These formulas explain why larger apertures show progressively more detail on planets, resolve globular clusters into individual stars, and reveal surface features on Mars during close approaches.
Resolving power improves in direct proportion to aperture diameter, not area. This is a different scaling law from light-gathering power (which scales with area). So while doubling the aperture quadruples light grasp, it only doubles resolution. Both improvements are significant, but they operate on different aspects of image quality.
In practice, atmospheric turbulence (called seeing by astronomers) often limits resolution before the telescope’s theoretical limit is reached. Under average seeing conditions at most observing sites, even a large telescope may only resolve 1 to 2 arcseconds of detail on planets, regardless of its theoretical capability. But on nights of exceptional seeing, a 250mm or larger scope can show planetary detail that smaller instruments simply cannot match, no matter how good their optics are.
This is also why higher quality optics matter in addition to aperture. A well-figured mirror or lens that delivers light precisely to the Airy disk will outperform a larger aperture with poorly figured optics that scatter light. Optical quality and aperture work together to produce sharp, high-contrast images.
What Different Aperture Sizes Show You
This is the section I wish every newcomer could read before buying their first telescope. The practical difference between aperture sizes is enormous, and knowing what to expect at each level helps you set realistic expectations and choose wisely. The views you have seen in astrophotography are not what you will see through an eyepiece, but different apertures get you progressively closer.
60mm to 70mm (2.4 to 2.8 inches)
These are the smallest useful apertures for astronomy. Anything below 60mm is better suited to terrestrial viewing than stargazing. A 60mm refractor shows the Moon in genuinely excellent detail, with major craters like Tycho and Copernicus clearly defined, mountain ranges visible along the terminator, and large maria (dark plains) easy to identify.
Jupiter’s four Galilean moons are easy targets, appearing as a row of tiny stars beside the planet’s disk. You can see Saturn’s rings as a distinct feature surrounding the planet, though Saturn itself remains quite small at these apertures. Mars shows as a tiny reddish disk with no surface detail. Venus displays its phase clearly, looking like a miniature Moon.
Beyond the solar system, you can resolve the brightest open star clusters like the Pleiades (M45), the Beehive (M44), and the Double Cluster in Perseus. You can spot a few colorful double stars like Albireo. Deep-sky objects are challenging at this size. The Orion Nebula (M42) is visible as a faint greenish smudge under dark skies. Most galaxies remain completely invisible.
80mm to 90mm (3.1 to 3.5 inches)
This range is where serious astronomy begins. An 80mm to 90mm telescope gathers about 50 to 80 percent more light than a 70mm scope, which is a very noticeable improvement in practice. Lunar detail sharpens significantly, with smaller craters and rilles becoming visible along the terminator.
Jupiter starts showing its two main equatorial cloud bands as dark stripes across the disk. Saturn’s Cassini Division in the rings becomes visible on nights of steady seeing. The Orion Nebula shows more structure and a brighter core. You can begin spotting brighter globular clusters like M13 in Hercules and M3 in Canes Venatici as grainy, glowing balls of light that hint at their true nature as dense star clusters.
A few of the brightest galaxies become detectable under dark skies. The Andromeda Galaxy (M31) appears as a faint elongated smudge of gray light. M81 and M82 in Ursa Major are visible as small fuzzy patches on transparent nights. These views are modest compared to larger scopes, but they represent a genuine entry into deep-sky observing.
100mm to 130mm (4 to 5 inches)
A 4-inch to 5-inch telescope represents a significant step up in capability. These scopes show Jupiter’s Great Red Spot (when it is facing Earth), multiple cloud belts beyond the two main equatorial bands, and subtle color variations in the atmosphere. Saturn reveals detail within the ring system and subtle banding on the planet’s disk itself.
Deep-sky performance improves dramatically at this range. The Orion Nebula shows wispy extensions beyond the bright central core and takes on a noticeable greenish-gray hue. Globular clusters begin resolving into individual stars at their outer edges, giving them a distinctly grainy appearance. Many Messier galaxies become visible as faint oval or round patches, though spiral structure remains frustratingly out of reach.
This aperture range is excellent for double star observation, where the ability to split tight pairs rewards steady seeing and good optics. It is also where lunar photography through a telescope becomes practical with a smartphone adapter or a dedicated planetary camera. The Ring Nebula (M57) is visible as a small but distinct gray donut shape.
150mm to 200mm (6 to 8 inches)
This is the sweet spot for amateur astronomy, and the 8-inch Dobsonian is the most recommended beginner telescope for very good reason. At 200mm, you are gathering approximately 816 times more light than your dark-adapted eye (7mm pupil). The jump from 5 inches to 8 inches is where deep-sky observing truly comes alive and transforms from frustrating to addictive.
Planetary views at this aperture are spectacular. Jupiter shows half a dozen belts and zones, the Great Red Spot with detail visible within it, and frequent moon shadow transits where the tiny black dots of Galilean moons cross the planet’s face. Saturn displays multiple ring divisions including the Cassini and Encke gaps, polar darkening, and subtle banding. Mars shows dark surface markings like Syrtis Major and bright polar ice caps during close approaches.
Deep-sky objects transform completely at this aperture. The Orion Nebula fills the eyepiece with tangled wisps of glowing gas and shows the Trapezium star cluster clearly at its heart. Globular clusters like M13, M3, and M22 resolve into hundreds of pinpoint stars crowded together in spherical formations. Galaxies like M51 (the Whirlpool) and M82 (the Cigar) show structural detail including hints of spiral arms and dust lanes. The Ring Nebula displays its classic donut shape with a visible central star.
Under dark skies with an appropriate narrowband filter, you can see the Veil Nebula, a delicate supernova remnant spanning several degrees of sky. The Eagle Nebula (M16) shows the famous Pillars of Creation region as a bright patch with dark structure. The Whirlpool Galaxy’s companion NGC 5195 is clearly visible. These are the views that turn casual observers into lifelong enthusiasts.
250mm to 350mm (10 to 14 inches) and Beyond
At these apertures, you enter serious deep-sky territory where the universe opens up in a way that smaller scopes simply cannot match. A 250mm scope gathers over 1,200 times more light than your unaided eye. A 350mm scope gathers over 2,500 times more. The views under genuinely dark skies are breathtaking and sometimes emotionally overwhelming.
Galaxies show spiral arm structure in the brightest examples. M51 displays clear spiral arms with dark dust lanes. M104 (the Sombrero) shows its distinctive dust lane bisecting the bright core. Globular clusters are resolved to their very cores, appearing as three-dimensional balls of countless stars. Faint planetary nebulae display color (typically blue-green) and internal structural detail.
The Horsehead Nebula becomes visually detectable without photography when paired with a hydrogen-beta filter. The California Nebula, the Rosette Nebula, and other large faint emission nebulae reveal themselves. Pluto is within reach as a faint point of light for dedicated observers with good star charts. Abell galaxy clusters, some of the most distant objects observable by amateurs, come into view.
The trade-off is real, though. A 14-inch Dobsonian is a large, heavy instrument that requires significant physical commitment to transport and set up. Many observers find they use a very large scope less frequently simply because it is harder to get outside with it. The best telescope is always the one you actually use on a regular basis, not the one sitting in a closet because it is too heavy to move.
How Seeing Conditions Limit Aperture
One topic that almost no astronomy guide covers adequately is how atmospheric seeing conditions interact with aperture. This is a major source of frustration for beginners who invest in a large scope and then wonder why their planetary views are sometimes soft, blurry, and disappointing.
“Seeing” refers to the stability of Earth’s atmosphere at the time and place you observe. When air masses at different temperatures mix, they create turbulent layers that blur and distort the light passing through them on its way to your telescope. You can think of it as looking at the bottom of a swimming pool on a windy day. The image shimmers, wavers, and dances, destroying fine detail.
Under typical seeing conditions at most lowland locations, the atmosphere limits effective resolution to about 1 to 3 arcseconds. This means that on an average night, a 100mm scope (theoretical resolution about 1.4 arcseconds) may perform nearly as well as a 300mm scope (theoretical resolution about 0.5 arcseconds) on planetary targets. The larger scope’s theoretical advantage is simply wasted because the atmosphere will not allow that level of detail to pass through.
This does not mean a large aperture is wasted money. Even when seeing limits resolution on planets, the larger scope still gathers more light. This means brighter images, fainter limiting magnitude for stars and deep-sky objects, and better overall contrast. Deep-sky observing is largely unaffected by poor seeing because nebulae and galaxies are extended, low-contrast objects that do not depend on diffraction-limited resolution.
On nights of genuinely exceptional seeing, which occur perhaps a handful of times per year at most observing locations, a large aperture telescope dramatically outperforms smaller scopes on planetary detail. These are the nights experienced astronomers wait for and treasure. On these rare nights, a 10-inch or 12-inch scope can show levels of Jovian detail including intricate belt structure, festoons, and the Great Red Spot’s internal swirling that take your breath away.
Experienced planetary observers develop strategies for dealing with mediocre seeing. They observe early in the morning (around 3 to 4 AM) when atmospheric turbulence is often at its lowest. They let their telescopes cool to ambient temperature before observing, because thermal currents inside the tube degrade seeing locally. They avoid observing over heat-radiating surfaces like rooftops and asphalt parking lots.
The practical lesson is this: do not expect a large aperture to deliver textbook-sharp planetary views every single night. Atmospheric conditions set a ceiling that aperture cannot punch through. But when that ceiling lifts on a night of exceptional seeing, the large aperture reveals details that smaller instruments will never show.
Light Pollution and Aperture Performance
Light pollution is the nemesis of amateur astronomers worldwide, and it directly affects how much benefit you get from a larger aperture. If you observe from a city, suburb, or anywhere near artificial lights, sky glow from streetlights, buildings, and parking lots creates a bright background that washes out faint celestial objects.
Under heavy light pollution, a larger aperture gathers more sky glow right along with more starlight. The contrast between a faint galaxy and the bright background sky does not improve much with aperture alone. The galaxy gets brighter, but so does the sky behind it, and the eye perceives contrast, not absolute brightness. This is a fundamental limitation that catches many urban observers off guard.
Experienced observers in light-polluted areas rely on narrowband and line filters to combat this problem. These filters block specific wavelengths of light pollution (particularly the sodium and mercury emission lines from streetlights) while letting through the specific wavelengths emitted by emission nebulae and planetary nebulae. A good narrowband filter on a 200mm scope under suburban skies can make the Veil Nebula or the Eagle Nebula visible when they were completely undetectable without it.
That said, larger apertures still provide meaningful advantages under light-polluted skies for several reasons. First, brighter objects like the Moon, planets, and bright star clusters are much less affected by sky glow, and a larger scope shows more detail on these targets regardless of light pollution. Second, larger aperture provides higher surface brightness at any given magnification, which helps with contrast perception on certain objects. Third, larger aperture reaches fainter limiting magnitudes, which means more stars visible in clusters and brighter cores in galaxies.
For deep-sky observing under light pollution, the single most effective strategy is not buying a larger scope. It is traveling to a darker location. Even a 20-minute drive away from city lights can transform what you see more dramatically than any aperture upgrade. Consult a light pollution map like lightpollutionmap.info to find accessible dark sky sites near you.
If you primarily observe from a heavily light-polluted area and cannot easily travel, you may not need the largest aperture available. A well-made 100mm to 150mm scope used with appropriate filters, focused on brighter targets like planets, the Moon, double stars, and bright clusters, may serve you better and see more regular use than a massive scope that is too heavy to carry to darker locations.
Limiting Magnitude: How Faint Can You See?
Limiting magnitude is a concept that puts a number on what aperture lets you see. It represents the faintest star your telescope can detect under ideal dark-sky conditions. Understanding limiting magnitude helps you compare apertures and set expectations for what specific objects will be visible.
The naked-eye limit under a truly dark sky is about magnitude 6.5 for a person with good vision and full dark adaptation. Each whole magnitude step represents a brightness difference of about 2.512 times (the fifth root of 100). A magnitude 5 star is roughly 2.5 times brighter than a magnitude 6 star. A magnitude 1 star is exactly 100 times brighter than a magnitude 6 star.
A telescope extends your limiting magnitude based on its aperture. A rough formula for visual limiting magnitude is 2 plus 7 times the logarithm (base 10) of the aperture in millimeters. For common apertures, this gives the following approximate visual limits under dark skies: a 60mm scope reaches about magnitude 11.4, a 100mm scope reaches about 12.0, a 150mm scope reaches about 12.5, and a 200mm scope reaches about 12.9.
For astrophotography, limiting magnitude goes much deeper because cameras can accumulate light over long exposures. A 200mm scope with a modern CMOS camera can reach magnitude 15 or fainter with a single 60-second exposure, and stacking many exposures pushes that limit to magnitude 18 or beyond. This is why astrophotography reveals objects and details that are completely invisible through the same telescope visually.
Keep in mind that limiting magnitude assumes dark skies and good transparency. Light pollution can reduce your effective limiting magnitude by 2 to 4 magnitudes or more. Haze, humidity, and dust in the atmosphere also reduce the limit. The best limiting magnitude results always come from high-altitude desert or mountain sites with extremely dry, stable air.
Practical Considerations: Portability, Cost, and the Sweet Spot
Aperture fever is a well-known phenomenon in amateur astronomy. Once you have looked through a 12-inch scope under dark skies, it is psychologically difficult to go back to a 4-inch. But bigger is not automatically better when you factor in the practical realities of owning, transporting, and using a telescope on a regular basis.
Weight is the first consideration. An 8-inch Dobsonian typically weighs around 20 to 25 pounds and sets up in about two minutes. One person can easily carry it from a car to an observing site. A 12-inch Dobsonian weighs 45 to 55 pounds and requires more effort and planning to move and store. A 16-inch can exceed 70 pounds and may require a permanent observatory or a dedicated observing site with easy vehicle access and a ramp or dolly.
Storage space matters too. Large Dobsonians occupy significant floor space in a garage or closet. If you live in an apartment or have limited storage, a large scope may end up being more burden than joy. Compact designs like Schmidt-Cassegrains offer large apertures in smaller physical packages, but at significantly higher cost per inch of aperture.
Cost scales steeply with aperture, and the scaling is dramatically different for refractors versus reflectors. A quality 4-inch apochromatic refractor can cost two to three times as much as a 10-inch Dobsonian reflector. This is because high-quality lenses free of chromatic aberration are expensive to manufacture, especially in larger sizes. Reflectors and Dobsonians deliver the most aperture per dollar by a wide margin, which is why they dominate recommendations for visual astronomy.
The community consensus, echoed repeatedly and consistently on forums like Cloudy Nights and Reddit’s r/telescopes, is that an 8-inch (200mm) Dobsonian represents the sweet spot for most observers. It provides enough aperture to show impressive deep-sky detail while remaining portable enough for one person to carry and set up in minutes. It is also affordable enough that most aspiring astronomers can purchase one without a major financial strain.
For observers who prioritize portability above all else, a 100mm to 130mm refractor on a sturdy alt-azimuth mount is an excellent alternative. These scopes are compact enough to fit in a car trunk, require no collimation (mirror alignment), and deliver crisp, contrast-rich views of the Moon and planets. They give up deep-sky performance compared to larger reflectors but make up for it in grab-and-go convenience that encourages frequent use.
The telescope you use every clear night is always better than the telescope you never take outside. Choose the largest aperture you can reasonably afford, carry, store, and transport. For most people, that lands right around 6 to 8 inches.
Exit Pupil and Eyepiece Selection
Exit pupil is a concept that connects aperture, magnification, and your eye in a way that directly affects what you see. The exit pupil is the diameter of the beam of light that exits the eyepiece and enters your eye. You calculate it by dividing the aperture by the magnification, or equivalently, dividing the eyepiece focal length by the telescope’s focal ratio.
For example, a 200mm telescope at 50x magnification produces an exit pupil of 4mm (200 divided by 50). At 100x, the exit pupil is 2mm. At 25x, the exit pupil is 8mm. The exit pupil determines image brightness at a given magnification. A larger exit pupil delivers a brighter image but lower magnification.
The human eye’s pupil dilates to about 7mm in total darkness for a young person, but this maximum shrinks with age, typically reaching about 5mm by age 60. If your telescope’s exit pupil exceeds your eye’s pupil diameter, the excess light is blocked by your iris and wasted. This is why using very long focal length eyepieces with a fast telescope can produce an exit pupil wider than your eye can accept.
For deep-sky observing, most experienced astronomers target an exit pupil of 4 to 7mm for the brightest possible views of large, faint objects. For planetary observing, a smaller exit pupil of 0.5 to 2mm is preferred, because the smaller beam provides higher magnification and the planets are bright enough that the dimmer image is not a problem.
Understanding exit pupil helps you select the right eyepieces for your telescope. Rather than buying a random assortment, calculate which focal lengths give you exit pupils of about 5mm (for deep-sky), 2mm (for general use), and 1mm (for planets on nights of good seeing). Three well-chosen eyepieces will serve you better than a case full of mismatched ones.
Aperture for Astrophotography vs Visual Astronomy
The role of aperture in astrophotography differs from visual observing in important and sometimes counterintuitive ways. When you look through an eyepiece, your eye is integrating light in real time, with an effective exposure of roughly a fraction of a second. A camera, by contrast, can accumulate light over minutes or even hours per individual exposure, which fundamentally changes the equation.
For astrophotography of deep-sky objects, focal ratio matters more than aperture diameter. A fast scope (f/4 or f/5) produces brighter images at the camera sensor per unit of exposure time compared to a slow scope (f/10). This means you can use shorter individual exposures, which reduces tracking demands and makes the whole process more forgiving. This is why astrophotographers often prefer fast refractors in the 70mm to 130mm range for wide-field deep-sky imaging.
Modern techniques like live stacking, which aligns and combines many short exposures in real time, can make a modest aperture perform remarkably well for imaging. Smart telescopes with apertures under 115mm can produce stunning images by stacking dozens or hundreds of short exposures automatically. This would be completely impossible for visual observing, where your eye cannot stack frames at all.
However, aperture still matters for astrophotography in two key ways. First, a larger aperture provides higher resolution, which translates to more fine detail in your images, assuming your mount can track accurately enough to take advantage of it. Second, a larger aperture lets you reach fainter limiting magnitudes more quickly, which matters for imaging challenging targets like distant galaxies and faint supernova remnants.
The bottom line for imaging is this: focal ratio determines how fast you gather light on the sensor, aperture determines the level of detail and the ultimate limiting magnitude, and mount tracking accuracy is often the real bottleneck that limits image quality. Many beginners underestimate how important a solid, well-aligned tracking mount is for astrophotography.
For visual astronomy, aperture is the undisputed king. For astrophotography, the mount, focal ratio, camera sensitivity, and image processing workflow share the throne with aperture. Choose your equipment priorities based on which type of observing you plan to pursue most actively.
FAQs
What does the aperture of a telescope determine?
A telescope’s aperture determines two things: how much light the telescope collects (light-gathering power) and how much fine detail it can resolve (resolving power). Together, these factors control how faint an object you can see and how sharp it appears, making aperture the single most important telescope specification.
Is a 90mm aperture good for a telescope?
Yes, a 90mm aperture is a solid choice for a beginner telescope. It provides enough light-gathering power to show Jupiter’s cloud belts, Saturn’s rings in detail, hundreds of lunar craters, and brighter deep-sky objects like the Orion Nebula and globular clusters. A 90mm scope is also portable and affordable, making it an excellent starting point for visual astronomy.
What does 2.8 aperture mean?
In photography, 2.8 refers to an f/2.8 focal ratio, not a physical aperture size. It describes the relationship between a lens’s focal length and its aperture diameter. In telescope terminology, aperture refers to the actual diameter of the main lens or mirror in millimeters or inches, while the focal ratio is expressed separately as f/4, f/8, f/10, and so on.
Is an 80mm aperture good for a telescope?
Yes, an 80mm aperture is a good entry-level size for a telescope, especially as a portable refractor. An 80mm scope shows detailed lunar views, Jupiter’s four Galilean moons, Saturn’s rings, and brighter star clusters. It is less capable on faint deep-sky objects than larger scopes but offers excellent value, portability, and crisp views of the Moon and planets.
Can I see galaxies with a small aperture telescope?
You can see a few of the brightest galaxies with a small telescope under dark skies. An 80mm to 90mm scope can show the Andromeda Galaxy (M31) as a faint elongated smudge and may reveal a few others like M81 and M82. However, detailed galaxy observation requires at least 150mm to 200mm of aperture to see structural features like spiral arms or bright cores.
Does a bigger aperture always mean better views?
A bigger aperture generally means better views, but not always. Atmospheric seeing conditions can limit a large scope’s resolution on planets. Light pollution can reduce the benefit of a larger aperture for deep-sky objects. Portability issues may mean you use a large scope less often. For most observers, an 8-inch (200mm) Dobsonian represents the best balance of performance and practicality.
What aperture telescope is best for beginners?
The most recommended beginner telescope is an 8-inch (200mm) Dobsonian, which provides excellent aperture for deep-sky and planetary viewing at an affordable price. If portability is a priority, a 90mm to 130mm refractor or a 114mm to 150mm reflector on a sturdy mount is also an excellent choice. Avoid any telescope advertised primarily by magnification rather than aperture.
Conclusion
Understanding how a telescope’s aperture determines what you can see transforms the way you approach amateur astronomy. Aperture controls the two factors that matter most: how much light your scope collects and how much detail it can resolve. Every other specification, from focal length to magnification to optical coatings, works within the boundaries that aperture sets.
The key takeaways from this guide are straightforward. Aperture scales with area, so doubling the diameter gives four times the light grasp. Magnification is adjustable with eyepieces but cannot create detail the aperture cannot resolve. Atmospheric seeing and light pollution set real-world limits on performance that no aperture can fully overcome. And the 8-inch Dobsonian remains the gold standard for beginners because it balances genuinely impressive aperture with real-world portability and affordability.
If you take one lesson from this guide, let it be this: choose your telescope based on aperture first, and use it under the darkest skies you can access as often as you possibly can. The night sky rewards preparation and persistence. Aperture is the tool that opens the door to fainter, more detailed, and more unforgettable views of the universe.