
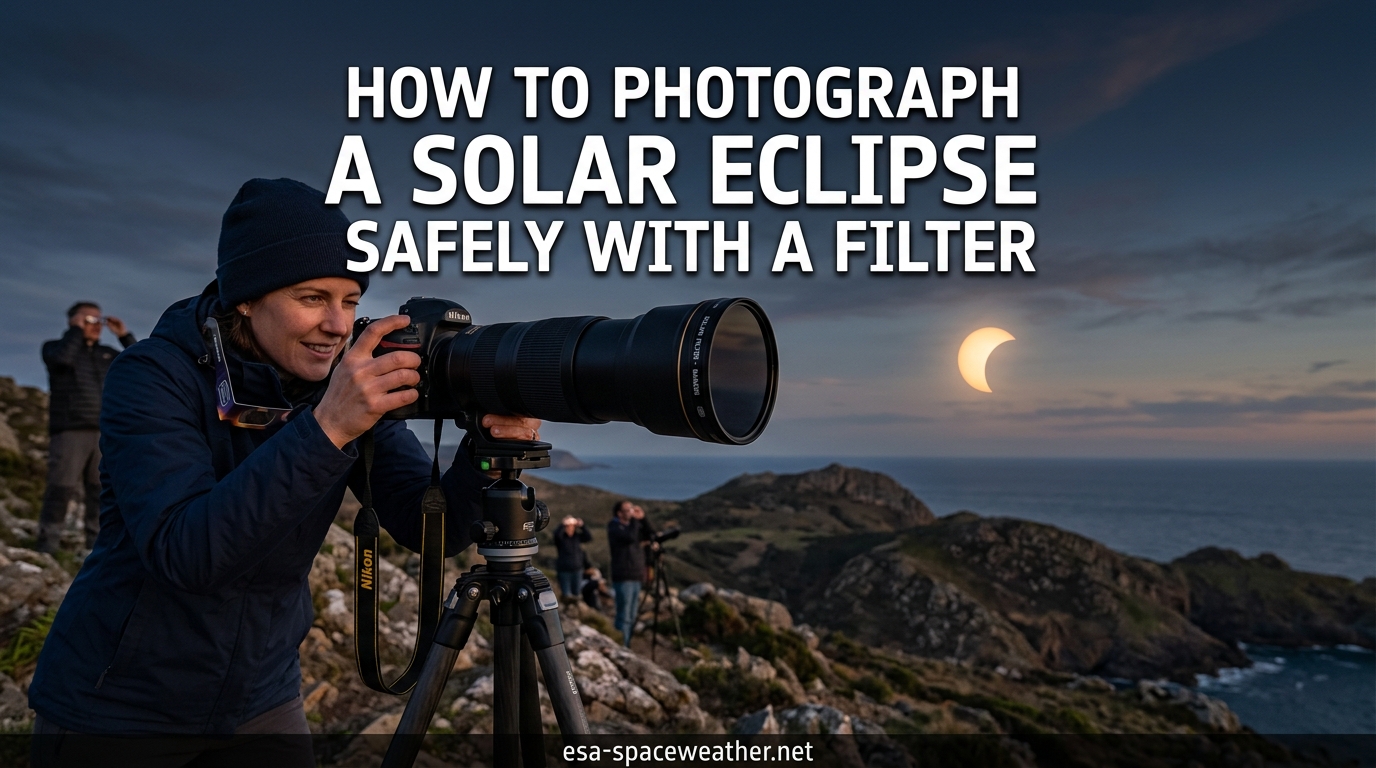
CRITICAL SAFETY WARNING: Never look at the sun directly or through a camera viewfinder without a certified solar filter. Pointing an unprotected camera at the sun can permanently damage your eyes and destroy your camera sensor in seconds. A solar filter rated to ISO 12312-2 is the minimum safety standard for both viewing and photography.
A total solar eclipse is one of the most awe-inspiring events you can witness and photograph. But capturing it safely requires preparation, the right equipment, and a clear understanding of when and how to use a solar filter. If you want to photograph a solar eclipse safely with a filter, this 2026 guide walks you through every step from planning to post-processing.
Our team has researched forums, studied NASA recommendations, and compiled advice from expert astrophotographers like Fred Espenak (also known as Mr. Eclipse) to create this comprehensive resource. Whether you are using a professional DSLR, a mirrorless camera, or a smartphone, the principles remain the same: protect your eyes, protect your gear, and know exactly when to adjust your setup.
This guide covers safety fundamentals, filter selection, camera settings, step-by-step shooting technique, smartphone tips, and post-processing. By the end, you will have everything you need to capture stunning eclipse images without risking your vision or your equipment.
Solar eclipses do not happen every day, and when one crosses your path, you want to be ready. Photographers who have captured totality describe it as a once-in-a-lifetime thrill. The difference between a blurry snapshot and a jaw-dropping image comes down to preparation. Let us start with the most critical topic first: safety.
Table of Contents
Safety First: Why a Solar Filter Is Non-Negotiable
The sun is intensely powerful, and even a partial phase of a solar eclipse emits enough concentrated light to cause permanent retina damage. When you look through a camera lens or telescope, the magnifying effect intensifies that light even further. This is why a solar filter is not optional equipment.
According to NASA and the American Astronomical Society, the only safe way to look directly at the uneclipsed or partially eclipsed sun is through special-purpose solar filters. These filters are thousands of times darker than standard sunglasses and meet the international safety standard known as ISO 12312-2.
Without a proper filter, you risk two types of damage simultaneously. First, concentrated sunlight can burn your retina in seconds, causing permanent blind spots. You would not even feel it happening because the retina has no pain receptors. Second, that same concentrated light will literally melt the internal components of your camera. One photographer on a Reddit astrophotography forum shared a cautionary tale of destroying a Canon DSLR by pointing a 400mm lens at the sun without a filter, resulting in internal damage within seconds.
Our team takes this risk seriously. We have seen too many forum posts from photographers who learned this lesson the hard way. The good news is that proper solar filtration eliminates both risks completely, allowing you to focus on creativity instead of worry.
Why Regular ND Filters Are Not Enough
This is one of the most common questions on photography forums, and the confusion is understandable. A standard 10-stop neutral density (ND) filter reduces light by a factor of about 1,000. That sounds like a lot, but it is nowhere near sufficient for photographing the sun.
Solar photography requires at least 16 to 17 stops of light reduction. That means the filter blocks somewhere between 65,000 and 130,000 times more light than an unfiltered lens. A 10-stop ND filter simply cannot provide that level of protection. The photography community on Stack Exchange puts it bluntly: you need a dedicated 16-stop solar filter for any optic pointed at the sun.
Solar filters also block harmful infrared and ultraviolet radiation, something standard ND filters are not designed to do. Even if you stacked multiple ND filters to reach 16 stops, you would still be exposing your camera sensor and potentially your eyes to damaging IR and UV wavelengths. Always use a filter specifically designed and certified for solar viewing.
The ISO 12312-2 Standard Explained
ISO 12312-2 is the international standard for filters intended for direct observation of the sun. When a solar filter carries this certification, it means the filter has been tested to transmit no more than 0.0032 percent of visible light, no more than 0.00032 percent of infrared light (780 to 1400 nm), and no more than 0.00023 percent of ultraviolet light (280 to 400 nm).
Look for this certification on any solar filter or eclipse glasses you purchase. Reputable manufacturers will prominently display the ISO 12312-2 rating on their packaging. If a filter does not carry this certification, do not use it, no matter how dark it appears.
One important note: the ISO 12312-2 standard was updated in 2026 to include stricter testing protocols. Make sure any filter you purchase in 2026 or later meets the current version of the standard. Older filters that have been stored improperly may have degraded, so inspect your filter for scratches, pinholes, or tears before each use.
Types of Solar Eclipses and How They Affect Your Photography
Understanding what type of eclipse you are photographing changes your approach significantly. There are four main types of solar eclipses, and each presents unique challenges and opportunities for photographers.
Total Solar Eclipse
A total solar eclipse occurs when the moon completely covers the sun. This is the crown jewel of eclipse photography because it is the only time you can see and photograph the sun’s corona. The corona is the outer atmosphere of the sun, visible as a ghostly white halo surrounding the black disk of the moon. During totality, which typically lasts between 1 and 7 minutes, it is safe to remove your solar filter and photograph without it.
Total solar eclipses are rare from any given location. The next total solar eclipse visible from North America will not occur until 2026 or later, so if one is coming your way, make every shot count.
Partial Solar Eclipse
During a partial solar eclipse, the moon covers only a portion of the sun’s disk. This is the most common type of eclipse and requires a solar filter throughout the entire event. You will not experience the dramatic darkness of totality, but you can still capture striking images of the sun appearing as a crescent shape. Most photographers shoot partial eclipses using the same settings and filter setup they would use for any solar photography session.
Annular Eclipse
An annular eclipse happens when the moon is too far from Earth to completely cover the sun, leaving a bright ring of sunlight visible around the moon’s disk. This ring of fire effect is visually stunning but extremely dangerous to photograph without a filter. You must keep your solar filter on for the entire duration of an annular eclipse, even at maximum coverage. The visible ring is still blindingly bright and will damage both your eyes and sensor instantly.
Hybrid Eclipse
A hybrid eclipse is the rarest type, where the eclipse appears as total in some locations and annular in others. If you are fortunate enough to be in the path of totality for a hybrid eclipse, you can treat it like a total eclipse. Otherwise, keep your filter on at all times.
Choosing the Right Solar Filter for Your Camera
Not all solar filters are created equal. The right choice depends on your lens diameter, your budget, and the type of images you want to capture. Let us break down the main categories so you can make an informed decision.
Full-Aperture Solar Filters
Full-aperture filters cover the entire front element of your lens or telescope. They are the most popular choice among astrophotographers because they allow the full resolution of your optics to be used. Light passes through the entire filter and reaches every part of your lens, producing sharp, detailed images. Both Nikon and Canon recommend full-aperture filters for eclipse photography.
Full-aperture filters are available in two main materials: glass and film. Glass filters are more durable and tend to produce images with a slight orange or yellow tint. Film filters, particularly Baader AstroSolar film, are less expensive and produce images with a more natural white-blue color rendition.
Off-Axis Solar Filters
Off-axis filters are smaller filters positioned in front of only a portion of the lens aperture. They are typically used with telescopes or very large lenses where a full-aperture filter would be prohibitively expensive. The trade-off is that off-axis filters reduce the effective aperture of your lens, which can affect image sharpness and require longer exposures.
For most photographers using standard telephoto lenses (200mm to 600mm), a full-aperture filter is the better choice. Off-axis filters are primarily for telescope users who need to manage cost on large-diameter optics.
Baader AstroSolar Film
Baader AstroSolar film is widely regarded as the gold standard for DIY and budget-conscious solar photographers. This specially engineered polymer film provides 16-plus stops of light reduction and meets ISO 12312-2 safety requirements. It produces images with a neutral white color balance, which many photographers prefer over the warm tones produced by glass filters.
You can purchase Baader AstroSolar film in sheets and build your own filter holder for a fraction of the cost of a pre-made glass filter. Many photographers on Reddit and astrophotography forums recommend this approach. Just make sure your DIY filter fits snugly over the front of your lens with no light leaks around the edges.
One forum user from the r/astrophotography community noted that they built four different filters from a single A4 sheet of Baader film for under $40 total. That is enough to cover multiple lenses for the price of one commercial glass filter. The key is ensuring a secure, light-tight fit.
Glass Solar Filters
Glass solar filters use a coated optical glass element to block solar radiation. They are more expensive than film filters but offer better durability and easier cleaning. The coatings on quality glass filters can produce sharp images with excellent contrast, though the color rendition tends toward warm orange or yellow tones.
If you plan to photograph the sun regularly (not just during eclipses), a glass filter is a worthwhile investment. For a one-time eclipse event, Baader film offers comparable image quality at a lower price point.
Solar Filter Sizing Guide
Solar filters mount on the front of your lens, so you need to match the filter to your lens diameter. Measure the outside diameter of the front element or check the lens specification for the filter thread size. Most manufacturers list compatible lens sizes, but if you cannot find an exact match, you can use a slightly oversized filter secured with foam tape or a snug-fitting sleeve.
If you own multiple lenses with different diameters, consider buying a universal solar filter or a sheet of Baader film that you can cut to size. Some photographers create multiple custom filter holders from cardboard or 3D-printed adapters to cover different lenses.
Essential Equipment for Eclipse Photography
Beyond your solar filter, several pieces of equipment will dramatically improve your eclipse photography results. Here is what our team recommends based on forum discussions and expert advice from seasoned eclipse chasers.
Camera Body
Any interchangeable lens camera, whether DSLR or mirrorless, will work for eclipse photography. Mirrorless cameras have an advantage here because their electronic viewfinders and live view screens mean you never need to look through an optical viewfinder at the sun. This eliminates any risk of accidental direct viewing.
If you are using a DSLR, always use live view on the rear LCD screen rather than the optical viewfinder. Looking through a DSLR viewfinder at the sun, even with a filter, concentrates light directly toward your eye. The rear LCD provides a safe viewing alternative.
Canon specifically recommends using live view and the LCD monitor for all solar photography. This advice applies regardless of brand. The few seconds you save by using the optical viewfinder are not worth the risk.
Telephoto Lens
Your focal length determines how large the sun appears in your frame. The sun occupies roughly 0.5 degrees of angular size in the sky, which means you need a significant focal length to capture it as anything more than a small dot.
At 200mm, the sun appears as a small but recognizable disk. At 400mm, it fills a more satisfying portion of the frame. At 600mm to 1200mm, you capture fine surface details like sunspots and the texture of the corona. The experts at Space.com provide focal length comparison images showing the dramatic difference between 200mm and 1200mm framing.
For most photographers, a 400mm to 600mm lens represents the sweet spot between reach and practicality. You can also add a 1.4x or 2x teleconverter to extend your focal length if your lens supports one. Keep in mind that teleconverters reduce the maximum aperture of your lens, which matters more during the dim totality phase than during the bright partial phases.
Sturdy Tripod
A tripod is absolutely essential for eclipse photography. At the long focal lengths needed to capture the sun, even the slightest camera shake will blur your images. The photography community on Reddit is unanimous on this point: buy a good tripod and remote shutter release.
Look for a tripod that can support the weight of your camera and telephoto lens without wobbling. A ball head with smooth adjustments will help you track the sun as it moves across the sky during the hours-long partial phases.
Remote Shutter Release
A remote shutter release or cable release lets you trigger your camera without touching it, eliminating vibration. This is critical when shooting at long focal lengths where even the pressure of your finger on the shutter button can cause visible blur. If your camera supports Wi-Fi or Bluetooth control via a smartphone app, that works just as well.
Some photographers also use their camera’s built-in intervalometer to shoot at set intervals. This is particularly useful for capturing a sequence of partial phase images for later compositing into a timeline.
Optional Accessories
A star tracker or equatorial mount can compensate for the rotation of the Earth, allowing you to use longer exposures without star or sun trailing. This is most useful during totality when you want to capture faint corona detail. Vibration reduction (also called image stabilization) can help, but it should be turned off when shooting on a tripod to avoid introducing its own micro-movements.
A teleconverter (1.4x or 2x) can extend your focal length for tighter framing. A dew heater or hand warmers can prevent condensation on your lens if you are shooting in humid conditions. And a white towel draped over your camera and head creates a makeshift viewing hood that makes the LCD screen easier to see in bright daylight.
How to Photograph a Solar Eclipse Safely With a Filter: Camera Settings Guide
Getting your camera settings right is what separates a blurry orange blob from a crisp, detailed eclipse image. The settings you need change depending on the phase of the eclipse, so let us walk through the recommendations phase by phase.
Aperture
For the partial phases, shoot at your lens’s sharpest aperture, typically between f/8 and f/16. Stopping down improves edge sharpness and depth of field. However, be aware that extremely small apertures like f/22 or f/32 can cause diffraction softening. Most photographers find f/8 to f/11 produces the sharpest solar disk images.
During totality, open your aperture as wide as possible (f/2.8 to f/5.6 depending on your lens). You need to gather as much light as possible to capture the faint corona.
ISO
Keep your ISO low during the partial phases. ISO 100 to 200 produces the cleanest, most noise-free images. The sun is extremely bright even through a solar filter, so you have plenty of light to work with. During totality, increase your ISO to 400 or even 800 to capture the much dimmer corona. Higher ISO settings introduce noise, but a noisy corona photo is better than no corona photo at all.
Shutter Speed
Shutter speed is your primary creative control during eclipse photography. During the partial phases with a solar filter, use fast shutter speeds ranging from 1/4000 to 1/500 of a second. The exact setting depends on your filter density, aperture, and ISO combination.
One advantage of fast shutter speeds is that they freeze the motion of the sun across your frame. The sun moves approximately its own diameter every two minutes, so long exposures will blur the disk.
During totality, your shutter speeds will range dramatically. To capture the bright inner corona, use speeds around 1/500 to 1/60 of a second. To capture the faint outer corona extending far from the sun, you may need exposures of 1 to 4 seconds. This is why experienced eclipse photographers shoot a bracketed series of exposures during totality.
Spot Metering
Set your camera to spot metering mode and meter directly on the sun’s disk. Evaluative or matrix metering will be fooled by the dark surrounding sky and overexpose your image. Spot metering ensures the sun itself is properly exposed. If your camera has a live histogram feature, use it to verify your exposure is not clipping highlights.
Shoot in RAW Format
Always shoot in RAW format for eclipse photography. RAW files retain far more dynamic range than JPEGs, which is critical when photographing an event with extreme contrast between the bright sun and dark sky. During post-processing, RAW files give you the flexibility to recover blown highlights and lift shadows in ways that are simply impossible with JPEG.
Bracket Your Exposures
Bracketing means shooting multiple images at different exposure settings in quick succession. This is especially valuable during totality, when the dynamic range of the scene far exceeds what any camera can capture in a single frame. Set your camera to auto-bracket 3 to 5 exposures, each 1 to 2 stops apart, and combine them later during post-processing.
Bracketing is also useful during the partial phases if you want to capture both the bright solar disk and fainter details like sunspots. Shoot one exposure for the disk and one slightly overexposed frame for the surface texture.
Step-by-Step: Photographing the Eclipse from Start to Finish
Now let us put everything together into a clear, step-by-step process that you can follow on eclipse day. These steps incorporate advice from expert photographers and real forum discussions.
Step 1: Plan Your Location
Research the path of the eclipse and choose a location within the path of totality if possible. The difference between experiencing 99 percent coverage and 100 percent totality is literally the difference between day and night. NASA’s eclipse maps provide detailed information about timing and coverage percentages for locations worldwide.
Scout your location in advance if possible. Look for clear sightlines to the horizon, interesting foreground elements for wide-angle compositions, and reliable parking or access. Check historical weather patterns and have a backup location in mind in case of clouds.
Step 2: Practice Before the Event
This is the most underrated step, and experienced eclipse photographers cannot emphasize it enough. Practice your entire workflow days or weeks before the eclipse. Set up your equipment, attach your solar filter, and photograph the non-eclipsed sun. This lets you test your exposure settings, verify your focus technique, and identify any equipment issues while you still have time to fix them.
One of the biggest mistakes photographers make is treating eclipse day as a practice session. Totality lasts only minutes, and you will not have time to troubleshoot. As one forum contributor put it, worrying about missing totality while fiddling with settings is a real and common fear.
Write down your settings for each phase on a small card and keep it with you. During the stress of totality, having a quick reference can prevent costly mistakes.
Step 3: Set Up Early
Arrive at your shooting location at least an hour before first contact (when the moon first begins to cross the sun). Set up your tripod, mount your camera, attach your solar filter, and confirm everything is secure. Use live view or your LCD screen to find and frame the sun. Double-check that your filter is seated correctly with no gaps.
Step 4: Focus Carefully
Achieving sharp focus on the sun can be challenging because the solar disk is relatively featureless when filtered. Switch to manual focus and use your camera’s live view magnification feature to zoom in on the edge of the sun’s disk. Adjust focus until the edge is as crisp as possible. If your lens has a focus scale, note the position so you can quickly reset it if focus drifts.
Do not rely on autofocus during the eclipse. Most autofocus systems will struggle to lock onto the filtered solar disk, and you do not want to waste precious seconds hunting for focus during totality.
If there are sunspots visible on the solar surface, use them as a focus target. They provide a high-contrast reference point that makes manual focusing easier.
Step 5: Shoot the Partial Phases
Once first contact occurs, start shooting. Take test shots and review them on your LCD to confirm exposure. Adjust your shutter speed as needed to capture the sun’s disk with detail but without blowing out highlights. Continue shooting throughout the partial phases, capturing the progressively larger crescent of the sun.
Take photos every few minutes to document the progression. These images can later be composited into a timeline showing the moon’s path across the sun.
Step 6: Prepare for Totality
About two minutes before totality, remove any unnecessary items from your shooting area. Have your filter removal plan ready. Know exactly how you will detach or slide off your solar filter quickly and safely. Practice this motion during your pre-eclipse rehearsal so it becomes second nature.
As the final sliver of sun disappears, you will see the diamond ring effect, a brilliant burst of light at the edge of the moon’s disk. Capture this if you can, but do not get so focused on settings that you forget to experience the moment.
Step 7: Totality Photography
The moment totality begins, remove your solar filter. You are now photographing the corona, and every second counts. Shoot a bracketed series of exposures to capture the full dynamic range of the corona. Vary your shutter speed from fast (1/500) to slow (2 to 4 seconds) to record both the bright inner corona and the delicate streamers of the outer corona.
Look for Baily’s beads at the very beginning and end of totality. These are bright points of sunlight shining through valleys on the edge of the moon, and they last only seconds. The diamond ring effect, which occurs just before and just after totality, is another must-capture moment.
Most importantly, put your camera down for at least a few seconds and look up. Totality is a visceral, emotional experience that no photograph can fully capture.
Step 8: Re-Attach Your Filter Immediately
The instant totality ends and the first sliver of sun reappears, re-attach your solar filter. The return of the sun’s direct light is instantaneous and blindingly bright. Many photographers damage their eyes or equipment in the excitement of the moment by forgetting this critical step. Have your filter ready and within arm’s reach at all times.
During the exiting partial phases, continue shooting if you want to capture the full progression. You can use the same settings as the entering partial phases.
How to Photograph a Solar Eclipse with a Smartphone
Not everyone has a DSLR or telephoto lens, and the good news is that smartphone eclipse photography is entirely possible with the right preparation. The key is understanding both the capabilities and the limitations of your phone’s camera.
You Still Need a Solar Filter
This cannot be stressed enough: your smartphone camera needs a solar filter during all partial phases, just like any other camera. The sensor in your phone is smaller but just as vulnerable to damage from concentrated sunlight. Pointing your phone directly at the sun without a filter can permanently damage the sensor.
Small solar filters designed specifically for smartphones are available from several manufacturers. You can also cut a piece of Baader AstroSolar film and mount it over your phone’s camera lens using a simple cardboard or 3D-printed holder. Make sure the filter covers the lens completely with no light leaks.
Smartphone Camera Settings
Tap on the sun in your viewfinder to set focus and exposure, then drag the exposure slider down to reduce brightness. This prevents your phone from overexposing the bright solar disk. Lock focus and exposure by pressing and holding on the sun until you see the AE/AF Lock indicator (on iPhone) or the equivalent on Android.
Some photographers recommend using third-party camera apps that offer manual control over ISO, shutter speed, and focus. Apps like ProCamera, Lightroom Mobile, and Open Camera give you more precise control than the default camera app.
Consider a Telephoto Attachment
Smartphone lenses have wide focal lengths, which means the sun will appear very small in your photos. A clip-on telephoto lens attachment can magnify the sun to a more satisfying size. Look for attachments that offer 10x to 60x magnification. Just remember that any telephoto attachment also needs a solar filter on the front.
Shoot Wide Environmental Shots
If you do not have a telephoto attachment, consider using your phone to capture the environmental experience of the eclipse. Wide-angle shots of the landscape during the eerie twilight of deep partial phases can be more compelling than a tiny dot of a filtered sun. Capture the changing light, the reactions of people around you, and the overall atmosphere.
Totality: The Only Time to Remove Your Filter
Totality deserves its own section because it is fundamentally different from every other phase of the eclipse. During the brief window when the moon completely covers the sun, the sun’s corona becomes visible, and it is safe to view and photograph without a filter.
The corona is the sun’s outer atmosphere, and it is incredibly faint compared to the solar disk. It is only visible during totality because the blinding light of the sun’s surface is completely blocked. Photographing the corona requires completely different camera settings than the partial phases.
During totality, remove your solar filter, open your aperture wide, increase your ISO, and slow your shutter speed. The corona’s brightness drops off dramatically with distance from the sun, so no single exposure can capture the full range. This is where exposure bracketing becomes essential. Shoot a rapid series of images at different shutter speeds, from fast to slow, to capture the inner corona, the outer streamers, and everything in between.
You may also be able to capture the chromosphere, a thin pink ring of glowing hydrogen gas visible at the very edge of the moon’s disk. Solar prominences, which are loops of plasma extending from the sun’s surface, may also be visible during totality. These features are extremely delicate and require precise exposure to capture well.
The length of totality varies from eclipse to eclipse. Some last only 30 seconds, while others can stretch to over 7 minutes. Know your totality duration in advance and plan your shooting sequence accordingly. Prioritize your most important shots for the middle of totality when conditions are darkest and most stable.
Common Mistakes to Avoid During Eclipse Photography
Even experienced photographers make mistakes during solar eclipses. The combination of excitement, rapidly changing conditions, and strict safety requirements creates a perfect environment for errors. Here are the most common pitfalls and how to avoid them.
Using Insufficient Filtration
The single most dangerous mistake is using a filter that is not rated for solar photography. A 10-stop ND filter, stacked ND filters, or improvised dark materials are not safe substitutes for a certified solar filter. If you are unsure whether your filter is sufficient, do not use it. The risk to your eyes and equipment is simply too great.
Forgetting to Re-Attach the Filter After Totality
This happens more often than you might think. Photographers get caught up in the excitement of totality, and when the diamond ring signals the end of the total phase, they forget to immediately re-attach their solar filter. The returning sunlight is instant and intense. Train yourself to make filter replacement your first action the moment totality ends.
Relying on Autofocus
Autofocus systems struggle to lock onto the featureless filtered solar disk. If your camera hunts for focus during the partial phases, you will end up with soft images. Switch to manual focus before the eclipse begins and use live view magnification to achieve precise focus on the sun’s edge.
Not Using a Tripod
Hand-holding a telephoto lens during eclipse photography is a recipe for blurred images. The fast shutter speeds needed during partial phases are achievable handheld, but you will get consistently sharper results with a tripod. During totality, when shutter speeds slow dramatically, a tripod becomes absolutely essential.
Missing the Moment While Checking Settings
Forum photographers repeatedly mention the fear of missing totality while fiddling with camera settings. Totality is brief, and every second you spend looking at your camera menu is a second you will never get back. Practice your settings changes beforehand so they become muscle memory. During totality, shoot first and adjust second.
Overlooking Battery and Storage
Eclipses can last hours from first to last contact. Carry spare batteries and memory cards. Long exposures during totality, live view usage, and continuous shooting all drain batteries faster than normal shooting. A dead battery at the worst moment is a preventable tragedy.
Post-Processing Your Eclipse Images
Capturing the eclipse is only half the process. Post-processing is where your images truly come to life, and this is an area where most competing guides provide little detail. Our team has compiled this workflow based on techniques shared by experienced astrophotographers.
RAW Processing Basics
Start by importing your RAW files into your preferred editing software (Adobe Lightroom, Capture One, DxO PhotoLab, or similar). Adjust white balance, exposure, and contrast on your base image. Solar disk images typically benefit from a slight boost in contrast and clarity to emphasize surface details and the crisp edge of the moon’s silhouette.
Exposure Blending for Corona Detail
If you shot a bracketed series during totality, you can blend multiple exposures to create a single image that captures the full dynamic range of the corona. This technique, sometimes called high dynamic range (HDR) blending, combines a fast exposure (for the bright inner corona) with slower exposures (for the faint outer streamers).
Software like Photoshop, PixInsight, or specialized astrophotography tools can automate much of this blending process. The goal is to produce a natural-looking image that shows corona detail from the inner edge all the way out to the delicate streamers that extend several solar radii from the disk.
Image Stacking
For the sharpest possible solar disk images, consider stacking multiple frames. Take several identical shots during the partial phases and use software like AutoStakkert or RegiStax to align and combine them. Stacking reduces noise and improves fine detail by averaging out random sensor noise across multiple frames.
Creating Composite Timeline Images
If you photographed the partial phases at regular intervals, you can create a composite image showing the entire progression of the eclipse. Using Photoshop or similar software, blend multiple shots of the sun at different phases into a single frame. This creates a striking visual record of the moon’s path across the solar disk.
Color and Final Adjustments
The color of your filtered sun depends on the type of filter you used. Glass filters typically produce a warm orange-yellow tone, while Baader AstroSolar film produces a more neutral white-blue rendering. Adjust the color temperature and tint in post-processing to match your creative vision. Some photographers prefer a naturalistic white sun, while others enhance the warm tones for a more dramatic look.
What filter do I need to photograph a solar eclipse?
You need a dedicated solar filter rated to the ISO 12312-2 international safety standard, providing at least 16 stops of light reduction. Options include full-aperture glass filters, Baader AstroSolar film, and off-axis filters. Regular ND filters, even at 10 stops, are not sufficient for safe solar photography.
How to safely photograph a solar eclipse?
To safely photograph a solar eclipse, attach a certified ISO 12312-2 solar filter to the front of your lens before pointing your camera at the sun. Always use live view or your LCD screen rather than an optical viewfinder. Keep the filter on during all partial phases and remove it only during the brief period of totality.
Can I use a regular ND filter for solar eclipse photography?
No. A regular 10-stop ND filter does not provide enough light reduction or the necessary infrared and ultraviolet blocking for solar photography. Solar filters provide 16 or more stops of reduction and block harmful IR and UV wavelengths. Using standard ND filters risks permanent damage to both your eyes and camera sensor.
What camera settings are best for solar eclipse photography?
During partial phases with a solar filter, use ISO 100 to 200, aperture f/8 to f/16, and shutter speeds from 1/4000 to 1/500 of a second. During totality, remove the filter, open to f/2.8 to f/5.6, increase ISO to 400 to 800, and shoot bracketed exposures from 1/500 to 4 seconds. Always shoot in RAW format.
How do I photograph a solar eclipse with my iPhone?
Attach a small solar filter (ISO 12312-2 certified) over your iPhone camera lens, tap to set focus and exposure on the sun, lock AE/AF, and drag exposure down to avoid overexposing. Consider a clip-on telephoto lens attachment for a larger sun image. Remove the filter only during totality if you are in the path of one.
When is it safe to remove the solar filter during an eclipse?
It is safe to remove your solar filter only during the brief period of totality, when the moon completely covers the sun and the solar disk is no longer visible. This lasts between 30 seconds and 7 minutes depending on the eclipse. Re-attach your filter immediately when the first sliver of sun reappears at the end of totality.
Conclusion
Learning how to photograph a solar eclipse safely with a filter comes down to three core principles: use a certified ISO 12312-2 solar filter at all times during partial phases, know your camera settings for each phase of the event, and practice your workflow before eclipse day arrives. The combination of proper filtration, solid technique, and careful planning will help you capture images you will treasure for a lifetime.
Remember that your safety always comes first. No photograph is worth risking your eyesight or destroying your equipment. Invest in a quality solar filter, rehearse your settings changes, and do not forget to look up and experience the eclipse with your own protected eyes. The next solar eclipse is an opportunity you do not want to miss, and with the preparation from this 2026 guide, you will be ready to capture it beautifully.